Battery Installation
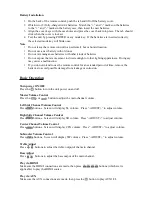
1. On the back of the remote control, push the tab and lift off the battery cover.
2. Obtain two (2) fully-charged AAA batteries. Match the “+” and “-” marks on the batteries
to the “+” and “-” marks in the battery case, then insert the new batteries.
3. Align the cover keys with the case holes and press the cover back into place. The tab should
click when the cover is locked.
4. Test the unit by pressing POWER or any mode key. If the batteries are inserted correctly,
the selected mode key will blink once.
Note
•
Do not leave the remote control in an extremely hot or humid location.
•
Do not use a new battery with old ones.
•
Do not mix manganese batteries with other kinds of batteries.
•
Do not expose the remote sensor to direct sunlight or other lighting apparatuses. Doing say
may cause a malfunction.
•
If you do not intend to use the remote control for an extended period of time, remove the
batteries to avoid possible damage from leakage or corrosion.
Basic Operation
Turn power ON/OFF
Press the button to turn the unit power on and off.
Master Volume Control
Press the or button to adjust the main channel volume.
Left Side Channel Volume Control
Press buttons. Screen will display SL volume. Press “-” to adjust volume.
Right Side Channel Volume Control
Press buttons. Screen will display SR volume. Press “-” to adjust volume.
Center Channel Volume Control
Press buttons. Screen will display CEN volume. Press “-” to adjust volume.
Subwoofer Volume Control
Press buttons. Screen will display SW volume. Press “-” to adjust volume.
Treble Adjust
Press buttons to adjust the treble output of the main channel.
Bass Adjust
Press buttons to adjust the bass output of the main channel.
Play via HDMI
Make sure the HDMI connections are made, then press buttons (whichever is
applicable) to play the HDMI source.
Play via AUX
Make sure the AUX connections are made, then press the button to play AUX1/2/3.
Summary of Contents for KAHTS51BTXA
Page 1: ......


