background image

Select the Radio mode.

REPEAT

MIX

Remote Control

Remote Control


8

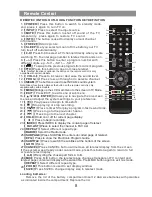
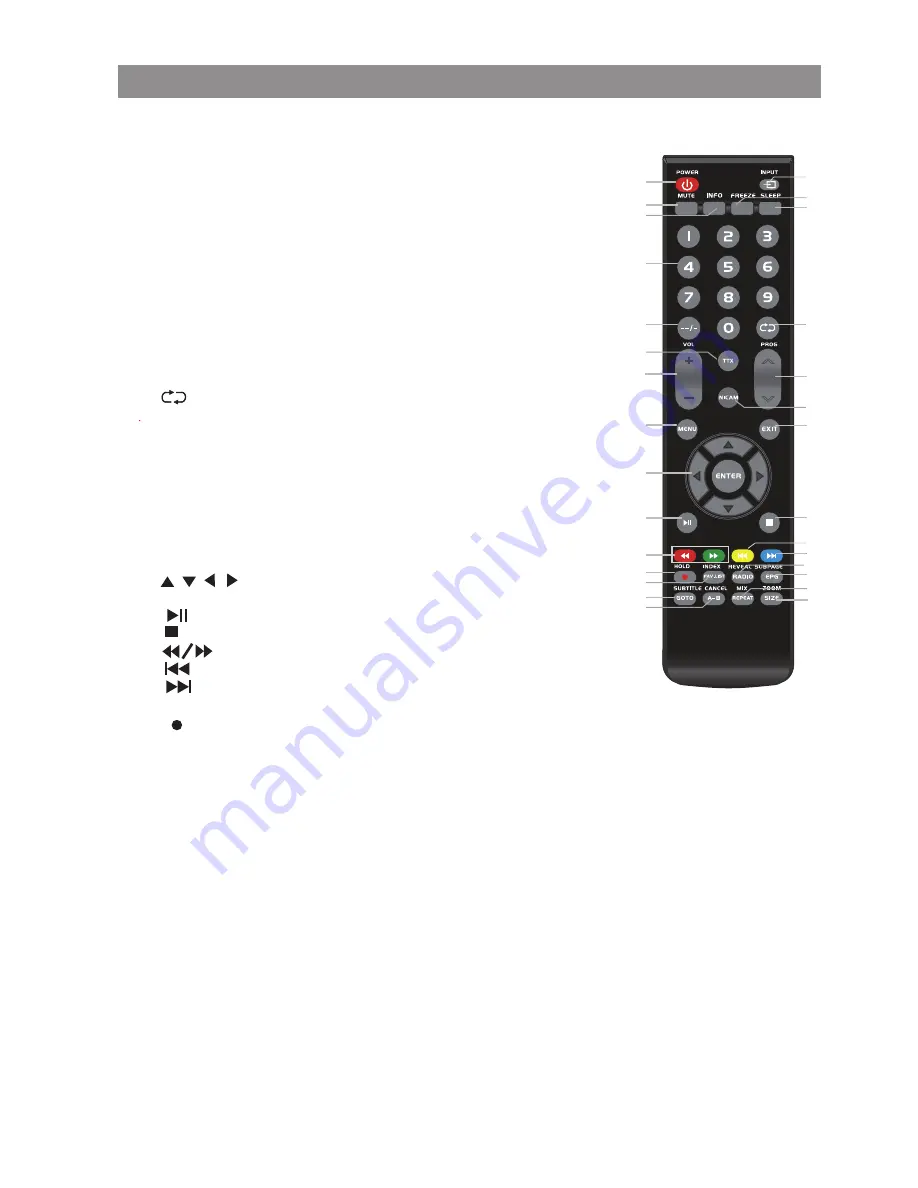
REMOTE CONTROL OUTLOOK & FUNCTION KEY DEFINITION


1.

POWER

Press


this


button


to


switch


to


standby mode

,

and


press


it


again


to


turn TV on.

2.

INPUT

Press to select the input source.

3.

4.
5.

FREEZE

S

13.

NICAM

The button is used to set NICAM sound system.

Note: Nicam function is optional, the button on the remote control is only 

available with certain models.

tatic picture

.

6.

SLEEP

Let you select amount of time before your TV 

turn itself off automatically.

7.

0-9

Press 0-9 to select a TV channel directly when you are

 watching TV. To enter page number in teletext mode and so on.

8.

--/-

Press this button to enter a program number with 

different digits.e.g.-for1,--for11,---for111.

9.

【    】

To swap to the previous program from current program.

INFO

The button is used to display current channel 

information.

11

.

VOL+/-

Press to increase / decrease the sound level.

12.

PROG+/-

Press to scan through or to select a channel.

MUTE

10

TTX

Press


this


button


to shut


off


sound


of


the


TV

temporarily

press


again


to


restore


TV


sound

.

14.

MENU

Brings up the LCD main menu to the screen in TV Mode.

15.

EXIT

22.

HOLD

23.

INDEX

FAV.LIST

Press EXIT to exit menu or sub menu.

16.

【          /

ENTER

Allows you to navigate the on-screen

 menus and adjust the system settings to your preference.

17 .


Play/pause or begin to timeshift.

18 .


Stop playing or stop recording.

19 .


Press to timeshift or play a program in fast rewind mode.

20.


Press to go to the previous chapter. 

21.


P

Hold on or off for current page display.

Press to begin recording.

Press INDEX to display the content page of teletext.

Press to select the channel in FAV List.

ress to go to the next chapter.

GOTO

S

Press to switch the subtitles at the bottom of the screen.

Recycling the chosen part form A to B.

kip

28.

29.

A-B

24.

REPEAT

RADIO

 25.

SUBPAGE

 26.

SUBTITLE

 27.

CANCEL

EPG

S

Press SUBPAGE to enter sub coded page of teletext.

Press to show the Electronic Program Guide.

elect different repeat type.

ZOOM

This button is used to set display window.

Loading


batteries:


Remove


the


lid


of


the


battery


compartment;Insert 2  AAA


 batteries with polarities

 as indicated inside the compartment; Replace the lid.

size

/    /     /

1

2

3

4

6

5

7

8

10

9

11

12

13

14

15

16

17

18

19

21

22

23

25

24

28

26

27

29

20

Press


MIX button,the teletext page changes transparent,TV content and 

teletext


page


content


will


display


at


the


same


time.


Press


MIX


button


again


to


exit


mix


mode.

Press CANCEL button will remove all teletext display from the screen.

if t he system was already under cancel mode ,press this button again to return to full

screen teletext display. 

Select different repeat type.


SIZE

Press SIZE to change display size in teletext mode.

Press this button to open or close teletext.

Note: Teletext function is optional, the button on the remote control is only 

available with certain models.


Summary of Contents for KALED19XXXZA

Page 1: ...KALED19XXXZA USER MANUAL...

Page 2: ...ort circuit parts that could result in a fire or electric shock Never spill liquid of any kind on the set Use special caution in households where children are present The apparatus is not suitable for...

Page 3: ...l Installation The ventilation should not be impeded by covering the ventilation opening with items such as newspapers tablecloths curtains etc At least 10 cm space should be left around the apparatus...

Page 4: ...for cleaning Do not place the set on an unstable cart stand table or shelf The set may fall causing serious personal injury as well as damage to the product Use only with the cart stand tripod bracket...

Page 5: ...ts 4 General description 5 Specifications and Accessories 6 Overview 7 Remote control 8 Basic Operation 9 Menu Operation 10 External connection 12 Trouble shooting 13 Picture defects and countermeasur...

Page 6: ...t protection requirement Auto tuning and fine tuning One PC VGA input socket One YPbPr input socket One HDMI input socket HDMI 1 4 One composite video input socket TWO audio input sockets Support USB...

Page 7: ...ction changes with different display screens weight marked in this user s manual or in packaging box are subject to change without notice Specifications 1366X 768 WX2 Description Dimensions LXWXH TV w...

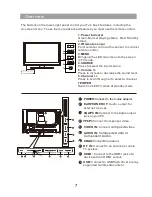
Page 8: ...the input source The buttons on the lower right panel control your Tv s basic features including the on screen menu To use the more advanced features you must use the remote control E POWER Connect to...

Page 9: ...gin to timeshift 18 Stop playing or stop recording 19 Press to timeshift or play a program in fast rewind mode 20 Press to go to the previous chapter 21 P Hold on or off for current page display Press...

Page 10: ...n to access the submenu 5 Press the button to select the desired value The adjustment in the OSD may differ depending on the selected menu 6 Press the MENU button to return to the previous menu 7 Pres...

Page 11: ...an only be operated under DTV state SOUND Menu CHANNEL Menu Select the a type of channel to suit your viewing requirements You can change the station of Auto Scan Manual tuning Channel Edit and Signal...

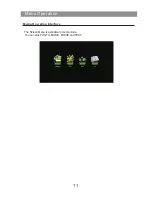
Page 12: ...You can play PHOTO MUSIC MOVIE and TEXT The Screen Menu is available to media mode 11 Menu Operation Media Operating Interface...

Page 13: ...on the rear cover 3 Fasten 2 brackets with 4 M4 screws on the wall 4 Carefully check for the strength before releasing the LED TV 1 Assemble the stand Before attaching detaching the stand make sure to...

Page 14: ...terminals Remote is out of range move close to TV Confirm there is no obstructions between remote and TV Make sure power cord is plugged in Image is not centered on the screen Adjust the horizontal a...

Page 15: ...NTERFERENCE Wave pattern are moving on the screen which are usually caused by nearby radio transmitter or short wave receiving equipment HIGH TEMPERATURE ELECTROTHERMAL INTER FERENCE Diagonal or herri...

Page 16: ...4D00251...
Reviews: