background image

TROUBLESHOOTING

Care & maintenance

Unplug the television from the power supply 
before cleaning. Do not use any liquid cleaners 
or harsh chemicals. Always use a soft, damp 
cloth.

Cleaning the screen

Wet a soft cloth in a mixture of lukewarm water 
and a little fabric softener or dish washing 
detergent. Wring the cloth until it’s almost dry, 
and then use it to wipe the screen.

Make sure the excess water is off the screen, 
and then let it air-dry before you turn on your 
TV.

Cleaning the casing

To remove dirt or dust, wipe the TV casing with 
a soft, dry, lint-free cloth. Please be sure not to 
use a wet cloth.

Common fixes

Many minor issues can be resolved by 
hard resetting, or power cycling the 
unit or upgrading the firmware.

To perform a hard reset, or power cycle, 
please use the following steps.

Unplug it from the main power socket
and leave it for 10-15 minutes.

Press and hold the power button on
the TV for 5 seconds.

Connect the TV back to the power and
turn it on.

Poor picture and sound quality

Try a different channel

Adjust the antenna

Check all connections

No picture or sound in TV status

Try another channel

Press the TV/AV button

Make sure TV is plugged in

Check the antenna connection

No sound or sound is too low at 
maximum volume

Check the volume settings on any
external speakers connected to your
television

Adjust the TV volume accordingly

Check another channel or input

Check that MUTE hasn’t been turned
on

Picture rolls vertically

Check all connections

No colour, wrong colour or tints

Make sure the program itself is broad-
cast in colour

Select the picture menu, then adjust
the colour and tint submenus

Blurred or snowy picture, distorted 
sound

Check direction, location and connec-
tions to your antenna

Issues may be caused by the use of an
indoor antenna (poor signal)

Remote control malfunctions

Replace remote control batteries

Check battery terminals

Remote is out of range, move closer to
TV

Remove any obstructions between
remote and IR sensor of TV

Make sure the power cord to your TV is
plugged in and turned on

Image is not centred on the screen

Adjust the horizontal and vertical
position

“No Signal” on HDMI source

Test the device with a different HDMI
cable

Plug the device into another HDMI
port

Try a different device connected to the
same cable and port

For our 

Perform a factory reset on your TV

full TV troubleshooting guide, 

head online to help.kogan.com 

©

 Copyright 

02

2

1

, Kogan.com – 

KALED24EH7520SVA

1

4

Summary of Contents for (KALED24EH7520SVA

Page 1: ...KALED24EH7520SVA USER GUIDE 24 SMART HD LED TV SERIES 7 EH7520...

Page 2: ...anufacturer 12 Use only with the cart stand tripod bracket or table specified by the manufacturer or sold with the apparatus When a cart is used caution when moving the cart apparatus combination to a...

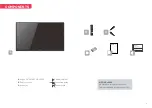
Page 3: ...HD LED TV QUICK START GUIDE B C D F A Kogan 24 T R A M S HD LED TV B Remote control C Stand x2 D AAA battery x2 E Quick start guide F Warranty card NOT INCLUDED Phillips head screwdriver antenna cabl...

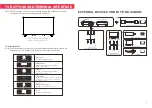
Page 4: ...al input from HDMI video connector USB input Connect a USB device here to play its media files or to record programs via the PVR function OPTICAL output Connect the SPDIF receiver ANT 75 Connect the a...

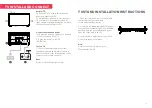
Page 5: ...supply enter the standby mode red light press the power button of the TV or the power button on the remote control to turn on the TV Note Picture for reference purposes only 1 Open the carton and rem...

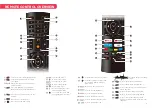
Page 6: ...the Home Page Press these buttons according to different prompts Press to fast reverse in USB mode Press to fast forward in USB mode Press to play the video and press again to pause the video Press t...

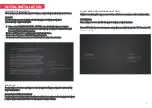
Page 7: ...selecting your desired language connecting to the internet signing in to your account and tuning in TV channels 1 1 Language select 1 Press the buttons to highlight your desired OSD language then pres...

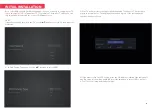
Page 8: ...highlight 4 Press the buttons then the OK button to confirm the selection ACCEPT USAGE INFORMATION COLLECTION Suppliers accepting the agreement section collect some non personal user information DECL...

Page 9: ...tomatically scan for your wireless network then show you a list of networks that its found Highlight your network and press the OK button 2 Use the buttons to nevigate the keypad in the screen to entr...

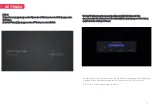
Page 10: ...then press the OK button 3 Your TV will now start scanning for all the available TV channels This operation may take a few minutes The display will show the progress of the tuning and the number of ch...

Page 11: ...tuning press the OK button to interrupt the tuning half way A pop up screen will be displayed press the button to select YES to confirm 5 Your TV is now setup and ready to watch SETTINGS 11 3 Your TV...

Page 12: ...Program Network About etc Press to jump to the corresponding sub option on the right HBBTV 1 HBBTV Hybrid broadcast broadband TV is a service that is offered by certain broadcasters and available onl...

Page 13: ...lution Response Time Size Viewing Angle Features EPG HDCP TV Resolution Browser 1366x768 3000 1 16 9 60Hz 1366 x 768 8 5 ms 24 178 178 Yes Yes 1 4 HD No USB Media Playback USB Media Playback Formats I...

Page 14: ...s the TV AV button Make sure TV is plugged in Check the antenna connection No sound or sound is too low at maximum volume Check the volume settings on any external speakers connected to your televisio...

Reviews: