background image

1

1


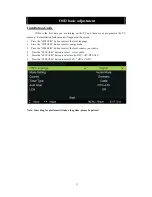
OSD basic adjustment 

Installation Guide 

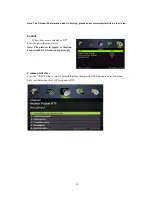
If  this  is  the  first  time  you  are  turning  on  the  TV  and  there  are  no  programs  in  the  TV 

memory, the installation Guide menu will appear on the screen. 

1. Press the “

/

/

/

” button to select the local language.

2. Press the “

/

/

/

” button to select energy mode.

3. Press the “

/

/

/

” button to select the local country you want to

4.

Press the “

/

/

/

” button to select    Air or cable.

5.

Press the “

/

/

/

” button to select mode :DTV+ATV,DTV,ATV.

6.

Press the “

/

/

/

” button to select LCN

ON”or “OFF”.

Note: Searching for platform will take a long time, please be patient! 

Summary of Contents for KALED24QF7000VA

Page 1: ......

Page 2: ...1 Contents Introduction Warning Caution Main Unit Description Remote Control OSD basic adjustment DTV Features USB Features PVR Operation Specifications Trouble Shooting...

Page 3: ...nd the wall to permit ventilation Avoid excessively warm locations to prevent possible damage to the cabinet or premature component failure This TV can be connected to Do not install the TV in a locat...

Page 4: ...nce instructions in the literature accompanying the equipment Class I structures of equipment should be connected to the grid power output with a protective earth connection on the socket Power plug a...

Page 5: ...not drop or push objects into the television cabinet slots or openings Never spill any kind of liquid on the television receiver Caution Avoid exposing the main unit to direct sunlight and other sour...

Page 6: ...n individual and damage to the television may result if it should fall Caution When the product is not used for an extended period of time it is advisable to disconnect the AC power cord from the AC o...

Page 7: ...minal 4 VGA input terminal 5 YPbPr input terminal 6 COAX output terminal 7 RF antenna 8 HDMI MHL input terminal 9 USB input terminal 10 VIDEO input terminal 11 AUDIO input terminal VOL Volume up VOL V...

Page 8: ...Mobile HD works well you should use other power supply for the Mobile HD And do not use the USB jack in the same time It supports Mobile HD by connecting with USB jack must more than 2 GB The partitio...

Page 9: ...sources 5 9 6 0 7 4 8 D Menu D Title Goto D Disp PROG STEP REPEAT A B 1 2 3 MENU MENU SOURCE ENTER ENTER VOL CH Zoom Angle Subtitle Audio EXIT DISPLAY SLEEP SLEEP P MODE S MODE MTS INDEX RED GREEN YE...

Page 10: ...page for their DVD playback functionality 1 SUB PG SUBTITLE To show subtitles when watching DTV broadcast dependent Switch the teletext on and off TEXT 32 REC Begin recording current program to connec...

Page 11: ...his button to change the playback order It varies according to the different discs 51 STEP Entrance of DVD OSD features 52 REPEAT Repeat playing the title or chapter 53 A B Whilst watching a DVD press...

Page 12: ...appear on the screen 1 Press the button to select the local language 2 Press the button to select energy mode 3 Press the button to select the local country you want to 4 Press the button to select Ai...

Page 13: ...ress the button to select mode Press button and then press button to start scanning Press MENU or EXIT button to stop Note Searching for platform will take a long time Please be patient Channel Press...

Page 14: ...l Scan and press the button to start Press MENU button to return the previous menu Press EXIT button to exit the menu 4 Channel Edit Press button to select Channel Edit and press the ENTER button to e...

Page 15: ...ess the button to select the channel with which you want to move Press BLUE button again to confirm 5 Signal information only use in DTV Press button to select Signal information and press the ENTER b...

Page 16: ...button to enter sharpness adjustment menu to adjust sharpness 4 Press button to select Saturation and press the button to enter Saturation adjustment menu to adjust saturation 5 Press button to selec...

Page 17: ...the button to adjust 4 Press button to select Balance and press the button to adjust Press 5 Button to select Surround sound and button to select ON or OFF 6 Press button to select EQ Setting and but...

Page 18: ...annel locks and press the button to select channe to lock 3 Press button to select Parental Rating and press the button to set 4 Press button to select Lock Keypad then press button to select On or Of...

Page 19: ...ote This function is only used for DTV source 4 Press button to select Teletext menu and press the button to enter 5 sub menu Press button to select Blue Screen and press the button to select On or Of...

Page 20: ...button to select Auto Adjust menu and press the button to auto adjustment 2 Press button to select H Position and press the button to adjust 3 Press button to select V Position and press the button to...

Page 21: ...ing FAV button The Favorite List window is illustrated as follows You can press the button to select the favorite list number Program Information When the source is selected as DTV you can press displ...

Page 22: ...DATE and TIME information is displayed on the right of the window The left side shows all channels The right side shows the programs in the channel The selected program is also displayed on the top of...

Page 23: ...btitle When the source is selected as DTV users can go to the menu to set Note The pictures in regard to function are provided for reference purposes only Common interface Press the button to select C...

Page 24: ...Photo 1 Press the button enter the PHOTO option and press enter button to enter 2 Press button to select drive disk you want to watch then press enter button to enter 3 Press BLUE button to enter the...

Page 25: ...3 Press BLUE button to enter the sub menu to set 4 Press the exit button to back to the previous menu Movie 1 Press button to select MOVIE in the main menu then press enter button to enter 2 Press but...

Page 26: ...button to select drive disk you want to watch then press enter button to enter 3 Press BLUE button to enter the sub menu to set 4 Press the EXIT button to back to the previous menu PVR Operation In DT...

Page 27: ...ct PVR Settings and press the ENTER or button to enter a Press button to select File Manager and press the ENTER button to check PVR file system b Press button to select Device List and press the ENTE...

Page 28: ...R button to set Note 1 The U disk will be formatted when in format please do not store important files in the U disk 2 Press button for the first time to start recording for the second time the sign o...

Page 29: ...576i 720 x 576i 15 63 50 480p 720 x480p 31 47 59 94 60 576p 720 x 576p 31 26 50 720p 1280 x 720p 37 50 44 96 50 59 94 60 1080i 1920 x 1080i 28 13 33 75 50 59 94 60 1080p 1920 x 1080p 56 25 67 5 50 59...

Page 30: ...ote then press the IT button repeatedly to select the TV source Check the cable between TV and antenna external AV device Poor picture sound OK Try another channel the station may have broadcast diffi...

Reviews: