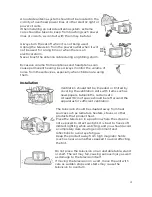
Time Menu
The fourth item of the menu is the TIME MENU. You can adjust the clock,
power on/off times, sleep timer etc. Press to move and press OK to
▲ ▼
adjust.
NOTE
1.
The clock time is automatically set by reading the time data that is transmitted by local
Digital TV stations.
2. The Off and On timers allow you to program the TV to switch On and Off at specific
times that you set. In order for this function to operate, the TV must be powered up (ie
mains power switch on the TV is On), and in Standby mode. The Off and On timers have
6 different setting options: Once, Every Day, Mon – Fri, Mon – Sat, Sat – Sun and Sunday.
You can set the TV channel and volume settings for most options (except for the Once
setting, where the TVs last channel and volume settings are used).
3. The Sleep Timer allows you to select from a range of pre-set times (between 10 minutes
and 240 minutes long) that the TV will operate for before returning to the standby state.
4. The Time Zone setting of the TV is initially set using data from local Digital TV stations.
You can manually adjust the time zone in the TV if required (eg. For locations where DTV
signals are not available).
Options Menu
To enter the Option Menu, press the MENU button and then press or
◀
▶
buttons to select the Option menu. Once in the Option menu, press or
▲
▼
to select the settings you wish to adjust. Press the MENU button again to
return to the main menu.
NOTE
1.
The OSD Language option allows you to select the language used in various TV menus
from a wide selection. At the initial setup of the TV, the default language is English and it
is recommended that this setting is not changed unless you are fluent in any new
language chosen.
2. The Audio Languages and Subtitle Languages options relate to DTV reception only.
Some TV channels transmit their audio and subtitles in more than one language, and if
this is known in advance, you can select this alternative language. At the initial setup
stage, the default language is English, and it is recommended that setting is not changed
unless you are fluent in the new language chosen.
3. HDMI CEC (Consumer Electronics Control) allows your TV to share
control of some functions with various compatible equipment via an
HDMI cable connection. The HDMI cable connecting your equipment
to this TV must support both ARC and CEC functionality.
For example, with HDMI CEC set to “on” in the TVs menu and also on
the HDMI connected device that supports CEC (eg. A Blu-ray player),
selecting the HDMI input on this TV sends a signal to the Blu-ray
player and may switch it On from its standby state (depending on the
player's CEC capabilities).
The HDMI CEC system supports a wide variety of commands, many of which may not be
applicable to this TV or any connected HDMI equipment. Refer to the User Manual of
your other equipment to check what areas of the CEC commands they may be able to
work with. If after selecting the CEC option you find the TV or any other connected
equipment behaving unusually (eg. Switching itself back on after you've switched it back
to standby mode), your connected equipment may not be compatible with this TV, and
the HDMI CEC sub-menu should be set to the Off position.
18
Summary of Contents for KALED24XXXYB
Page 1: ......

