background image

32

Summary of Contents for KALED40GF7300ZA

Page 1: ...WNER S MANUAL KALED40GF7300ZA LED TV Please read this manual carefully before TV operation Retain it for future reference Dolby Dolby Audio and the double D symbol are trademarks of Dolby Laboratories...

Page 2: ...1...

Page 3: ...2...

Page 4: ...3...

Page 5: ...12 30 31 32 10 Media Menu 25 4...

Page 6: ...5 General Description...

Page 7: ...accessories Optional 6 VGA support resolution HDMI support resolution 2x5W 640x480 800x600 1366x768 1920x1080 480P 570I P 720I P 1080I P KALED40GF7300ZA 75W 40 1920x1080 NTSC SECAM Specifications And...

Page 8: ...7 CH MENU Source Select CH CH Select channel VOL VOL VOL Adjust Volume INPUT 1 5V 500mA AV I N ARC 3 COAXIAL Connect Coaxial out VGA AUDIO audio AV IN ANT IN TV system supported multimedia content...

Page 9: ...ep timer EPG Press to display EPG information Electronic Program Guide OK Allow you to navigate on screen menus and adjust the system settings to your prefer MENU Display the OSD menu on screen displa...

Page 10: ...display in Teletext mode REVEAL Receal or Hide the hidden words 19 INDEX Press to return to the index initial page S PAGE Display a sub page of upper options TTX T SHIFT Press the button to panse curr...

Page 11: ...ess or OK button to select the input source you want to Press OK button to enter the input source Press Select OSD Language EXIT button to quit Press button to highlight OSD Language Press button to s...

Page 12: ...First Time Setup Auto Tuning Tuning DTV press Menu and left arrow button to skip DTV tuning D 11...

Page 13: ...nt to a ust in the CHANNEL enu 2 Press Enter button to a ust 3 ter inishing your a ust ent Press Enter button to sa e an return to the re ious enu Auto Tuning Press button to select AutoTuning then re...

Page 14: ...t Press the Blue button to skip the selected channel Press Fav button to add or remote the channel to your favorite list Your TV set will skip the channel automatically when using CH to view the chann...

Page 15: ...ge the Picture Mode directly Press MENU button to display the main menu Press button to select PICTURE in the main menu 1 Press button to select the option that you want to adjust in the PICTURE menu...

Page 16: ...olor cast of the picture Press button to select Color Temperature then press OK button to enter sub menu Press button to select Available Picture mode Cool Medium Warm You can change the value of red...

Page 17: ...ss button to select the o tion that you want to a ust in the SOUND menu 2 Press Enter button to a ust 3 ter inishing your a ust ent Press Enter button to save and return to the previous menu Sound Mod...

Page 18: ...button to select D Switch then ress button to select On or O NOTE Balance his ite can a ust the s ea er s out ut it enables you to listen to best at your osition Auto Volume his ite is use or re ucin...

Page 19: ...urn to the previous menu Sleep Timer Press button to select leep Timer then press Enter button to enter sub menu Press button to select Available options are Off 15min 30min 45min 60min 90min 120min 2...

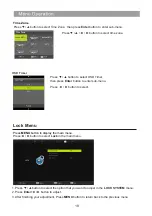
Page 20: ...enu Press button to select Lock in the ain enu Press button to select the o tion that you want to a ust in the LOCK SYSTEM enu Press Enter button to a ust ter inishing your a ust ent Press MENU butto...

Page 21: ...ssword Press button to select Set Password then press Enter button to enter sub menu to set new password Block Program Press button to select Block Program then press Enter button to enter sub menu to...

Page 22: ...s button to select the o tion that you want to adjust in the SETUP menu 2 Press Enter button to adjust 3 After finishing your adjustment Press Enter button to save and return to the previous menu Sele...

Page 23: ...Audio Languages then press Enter button to enter sub menu Press button to select the primary of Audio Languages Press button to select the Audio Languages Subtitle Language Press button to select Sub...

Page 24: ...button to Select on or off Restore Factory Defaule Press button to select Restore Factory Defaule then press Enter button to Select Restore Factory Defaule Software Update USB Press button to select...

Page 25: ...er sub menu Vertical Pos Adjust the vertical position of the picture Press button to select Vertical Pos then press Enter button to enter sub menu Size Adjust the display size Press button to select S...

Page 26: ...L E 9 E I 9 L I 8 6 3 8 9 8 6 F 3 G 8 7 H 9 8 6 Madia Menu 25...

Page 27: ...e previous menu and e it menu to uit Photo Menu Press button to select the file you want to watch in the file selecting menu then press media button to display picture hen highlighting the option you...

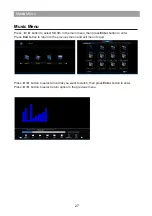
Page 28: ...ter button to enter Press Exit button to return to the previous menu and e it menu to uit Music Menu Press button to select drive disk you want to watch then press Enter button to enter Press button t...

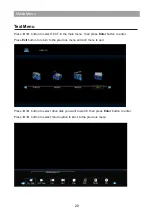
Page 29: ...evious menu and exit button to quit the entire menu Press button to select drive disk you want to watch then press Enter button to enter Press button to select M V E in the main menu then press Enter...

Page 30: ...press Enter button to enter Press Exit button to return to the previous menu and e it menu to uit Press button to select drive disk you want to watch then press Enter button to enter Press button to s...

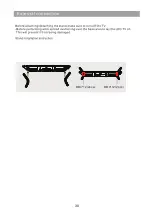
Page 31: ...BB4 12 2pcs BB4 12 2pcs 30...

Page 32: ...31...

Page 33: ...32...

Page 34: ......

Reviews: