background image

Troubleshooting

Problem

Cause

Solution

Air-conditioner does not turn on.

There is no power.

Not plugged in.

Safety switch has triggered.

Wait.

Plug into the mains.

Wait 30 minutes, if the 
problem persists, contact 
Kogan customer support.

Air-conditioner works for a short time 
only.

There are bends in the 
exhaust hose.

Something is preventing the 
air from being discharged.

Position the air exhaust hose 
correctly, keeping it as short 
and free of curves as possible
to avoid bottlenecks.

Check and remove any 
obstacles that may be 
blocking air flow.

Air conditioner is working but it is not 
cooling the room.

Windows, doors and/or 
curtains open.

There are heat sources in the 
room.

Air exhaust hose has 
detached from unit.

Technical specifications of 
the unit is not adequate for 
the room in which it is 
located.

Close doors, windows and 
curtains, bearing in mind the 
“tips for correct use” on page
10.

Eliminate the heat sources.

Fit the air exhaust hose to the
housing at the back of the 
unit.

Move air-conditioner to a 
smaller room that suits its 
specifications.

During Operation, there is an 
unpleasant smell in the room.

The air filter is clogged.

Clean the filter as described 
on page 11.

The air-conditioner does not operate 
for about 3 minutes after restarting it.

The internal compressor 
safety device prevents the 
unit from being restarted for 
three minutes after it was last
turned off.

Wait. This delay is part of 
normal operations.

The following messages display on the
panel: Lt / PF / Ft

The appliance has a self-
diagnosis system and has 
diagnosed an error.

Refer to the Self-Diagnosis 
chapter on page 10.

Technical Specifications

Mains Voltage

See ratings label on product.

Max. Power Usage

See ratings label on product.

Refrigerant

See ratings label on product.

Cooling Capacity

See ratings label on product.

Volume of Water Tank

1 litre

Protection Degree

IPX0

Dimensions

695 x 480 x 270mm

12

Summary of Contents for KAPORAIR09A

Page 1: ......

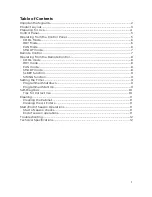
Page 2: ...the Remote Control 8 COOL mode 8 DRY mode 8 FAN mode 8 SMART mode 8 SLEEP function 9 SWING function 9 Setting the Timer 9 Programmed Shutdown 9 Programmed Start Up 9 Self Diagnosis 10 Tips for Correct...

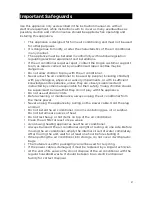
Page 3: ...by someone responsible for their safety Young children should be supervised to ensure that they do not play with the appliance Do not use extension cords Before cleaning or maintenance always unplug...

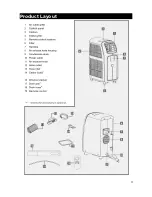
Page 4: ...Product Layout 3...

Page 5: ...the hose so that it reaches the window Make sure the air exhaust hose is unobstructed Open the window or French window slightly and position the outlet Fig 2 If you have a sash window place the bracke...

Page 6: ...ance but to make full use of all of the product potential you must use the remote control Turning the appliance on Plug air conditioner into the mains power Two lines will appear on the display indica...

Page 7: ...is between 24C and 27C It is not recommended to set a temperature too much below the outdoor temperature DRY Mode Ideal to reduce room humidity spring and autumn damp rooms rainy warm weather etc In...

Page 8: ...nditioner ON or OFF 11 TIMER button press this button to set automatic startup or shutdown 12 SLEEP button Press this button to turn the sleep function ON or OFF 13 MODE button press this button to se...

Page 9: ...button until the desired fan speed in selected Note in COOL mode the air conditioner automatically removes excess moisture from the air DRY mode Keep windows and doors closed for effective dehumidifyi...

Page 10: ...the operation periods Programmed Shutdown With the air conditioner on press the TIMER button will be displayed under Set the time you want the air conditioner to switch off using the button time rang...

Page 11: ...rt team Full Tank Safety Tank Full Empty the internal safety tank following the instructions in the End of Season Operations section Tips for Correct Use To get the best from your air conditioner foll...

Page 12: ...ilter once every week of operation The filters are housed in the intake grille as shown to right Use a vacuum cleaner to remove dust accumulations from the filter If it is very dirty immerse in warm w...

Page 13: ...ng in mind the tips for correct use on page 10 Eliminate the heat sources Fit the air exhaust hose to the housing at the back of the unit Move air conditioner to a smaller room that suits its specific...

Reviews: