background image

10

Instructions

NOTE: 
After the rangehood has been properly installed, insert the power plug into an appropriate electrical 
outlet and let the unit run for a few minutes prior to using it while cooking.

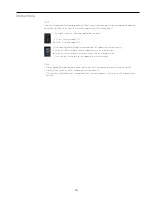
This switch is to turn the rangehood either on or off.  

 I 

   Turns the rangehood ON

O

  Turns the rangehood OFF

 This button toggles between fan speed high, fan speed low and off setting 

=

  Turns on the fan motors to high speed for maximum extraction 

o

  Turns off the fan motors for no extraction, the fan motors are off 

  Turns on the fan motors to low speed minimum extraction

NOTE:

 The rangehood will only operate once the slide-out rail is pulled outwards towards the kitchen.

 Close the front panel and the rangehood will stop working.

 The next time the front panel is pulled back out, the rangehood will start working at the previously  

set level.

Summary of Contents for KASLIDORNGA

Page 1: ...60cm Slideout Range Hood INSTRUCTION MANUAL INSTALLATION MANUAL MODEL KASLIDORNGA...

Page 2: ...2 THIS PAGE IS INTENTIONALLY LEFT BLANK...

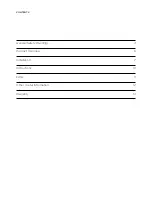
Page 3: ...CONTENTS General Safety Warnings 4 Product Overview 6 Installation 7 Instructions 10 FAQs 11 Other Useful Information 12 Warranty 14...

Page 4: ...ug do not pull by the cord when disconnecting USAGE CONDITIONS AND RESTRICTIONS Domestic use only This rangehood is designed for indoor domestic use only It can be built into a standard kitchen cabine...

Page 5: ...capabilities or lack of experience and knowledge unless they have been given supervision or instructions concerning use of the appliance by a person responsible for their safety Children Supervise yo...

Page 6: ...PRODUCT OVERVIEW FIG 1 1 Rangehood Housing 2 Slide out Front Fascia Rail 3 Inner Aluminium Grease Filter 4 Outer Aluminium Grease Filter 5 On Off Switch Fig 2 6 Fan Speed Switch Fig 3 7 Light 1 2 3 4...

Page 7: ...ase recycle all packaging where possible Plastic wrapping can be a suffocation hazard for babies and young children so ensure all packaging materials are out of their reach and dispose of them safely...

Page 8: ...g to the wall Using a spirit level mark a horizontal line on the wall where the rangehood base will be observing all necessary clearances Fig 5 Check the required clearances in your cooktop stove manu...

Page 9: ...the bottom of the cupboard and secure it in place with four ST4x30mm screws Fig 8 If there is a space between the wall and the rear of the rangehood install the rear underside support mounting bracke...

Page 10: ...n toggles between fan speed high fan speed low and off setting Turns on the fan motors to high speed for maximum extraction o Turns off the fan motors for no extraction the fan motors are off Turns on...

Page 11: ...the air outlet is blocked Select suction speed II if speed I was selected The charcoal filter needs to be replaced The charcoal filter needs to be replaced if food smells start to become noticeable wi...

Page 12: ...airflow We recommend cleaning them at least every two months Push in the plastic opening latch and take the filters out of their frames Fig 9 Wash the filters thoroughly in warm soapy water leaving t...

Page 13: ...omagnetic compatibility RESPONSIBLE DISPOSAL At the end of their working life do not throw any of these appliances out with your household rubbish Electrical and electronic products contain substances...

Page 14: ...ia is not liable in the following situations which are not exhaustive a the Appliance is damaged by i accident ii misuse or abuse including failure to properly maintain or service iii normal wear and...

Page 15: ...15 THIS PAGE IS INTENTIONALLY LEFT BLANK...

Page 16: ...16...

Reviews: