background image


Zones 

Description of the zones 

Zone 0 

Zone 0 is the interior of the basin including any recesses in the walls or 
floor. 

Zone 1 

Zone 1 is limited by: 


Zone 0 


A vertical plane 2m from the rim of the basin. 


The floor or the surface expected to be occupied by persons. 


The horizontal plane 2.5m above the floor or the surface. 

Zone 2 

Zone 2 is limited by: 


A vertical plane external to zone 1 and a parallel plane 1.5m from the 
former. 


The floor or surface intended to be occupied by persons. 


Note: 

The measured zone dimensions are limited by walls and fixed partitions. 

                   BEFORE FIRST USE 

Summary of Contents for KASPAMSBRGA

Page 1: ...INFLATABLE PORTABLE OUTDOOR HOT TUB MASSAGE SPA 6 PERSONS KASPAMSBRGA...

Page 2: ...2 Safety Warnings 3 Components 7 Before First Use 8 Assembly 11 Operation 15 Cleaning Care 18 Specifications 24 Troubleshooting 25...

Page 3: ...perate spa if inlet or outlet pipes are broken or missing Never attempt to replace the inlet and outlet pipes Contact help kogan com for assistance WARNING Inspect the spa cover regularly for leaks pr...

Page 4: ...ents should be located above the spa during use Components containing live parts except parts supplied with safety extra low voltage not exceeding 12V must be out of reach and inaccessible to a person...

Page 5: ...nce the tolerance of water temperature regulating device varies The use of alcohol drugs or medication before or during spa use may lead to unconsciousness with the possibility of drowning The use of...

Page 6: ...eaning and Care section on page 18 of this user guide regarding information pertaining to cleaning maintenance of water and disposal of water Always unplug the spa from the electrical outlet before re...

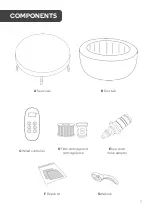
Page 7: ...7 A Spa cover B Spa tub C Wired controller D Filter cartridge and cartridge base E Spa drain Valve adapter F Repair kit G Wrench COMPONENTS...

Page 8: ...m of the basin The floor or the surface expected to be occupied by persons The horizontal plane 2 5m above the floor or the surface Zone 2 Zone 2 is limited by A vertical plane external to zone 1 and...

Page 9: ...e room must be properly ventilated to allow moisture to escape Install a ventilating system to prevent excess condensation moisture in the room Ensure the floor is water resistant and provides a non s...

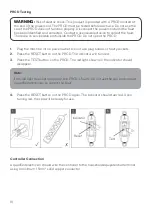
Page 10: ...to the household equipotential terminal using a minimum 1 5mm2 solid copper conductor Indicator Reset Test Note If the red light does not disappear the PRCD is faulty Do not use the spa and contact a...

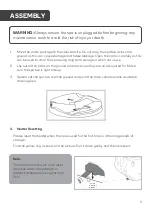
Page 11: ...3 Spread out the spa tub over the ground and point the drain valve towards a suitable draining area 4 Heater Resetting Please reset the heater when the spa is used for the first time or after long pe...

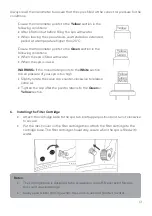
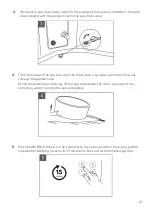
Page 12: ...til the yellow section of the manometer is pushed out Stop pressing the bubble button and turn the knob back to OFF for activating other functions Spa Deflation Unscrew the manometer cap on the spa po...

Page 13: ...e section the air pressure of your spa is too high Slightly rotate the valve cap counter clockwise to release some air Tighten the cap after the pointer returns to the Green or Yellow section 6 Instal...

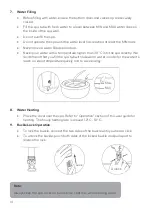
Page 14: ...C into the spa directly We recommend that you fill the spa tub with lukewarm water in order for the water to reach an ideal temperature quickly and to save energy 8 Water Heating Place the cover over...

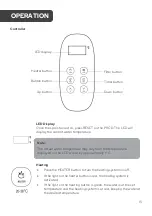
Page 15: ...r button is red the heating system is activated If the light on the heating button is green the water is at the set temperature and the heating system is at rest keeping the water at the desired tempe...

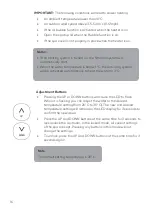
Page 16: ...setting from 20 C to 38 C The new and desired temperature setting will remain on the LED display for 3 seconds to confirm the new value Press the UP and DOWN buttons at the same time for 3 seconds to...

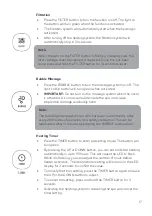
Page 17: ...ou can set and start heating automatically in up to 99 hours This will cause the LED to flash While it is flashing you can adjust the number of hours before heater activation The desired timer setting...

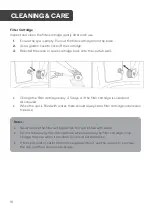
Page 18: ...3 5 days or if the filter cartridge is soiled and discoloured When the spa is filled with water there should always be a filter cartridge installed on the base CLEANING CARE Notes Never remove the fi...

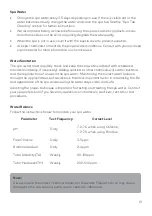
Page 19: ...or other chemicals will control bacteria and the reproduction of viruses in the spa water Maintaining the correct water balance through the appropriate use of sanitisers is the most important factor i...

Page 20: ...omine based products or vice versa it is essential that you change the spa water first Never mix chemicals together Add the chemicals to the spa water separately Thoroughly dissolve each chemical befo...

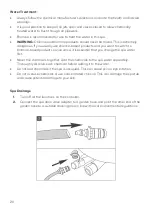
Page 21: ...tub open the drain valve cap water will start to flow out through the garden hose When the water stops draining lift the spa tub towards the drain pouring out any remaining water to empty the spa com...

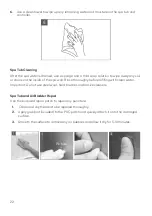
Page 22: ...a wall Rinse thoroughly before refilling with clean water Important Do not use steel wool hard brushes or abrasive cleaners Spa Tub and Air Bladder Repair Use the enclosed repair patch to repair any p...

Page 23: ...all the spa components and accessories are thoroughly cleaned and dried before storage 4 Fold the spa tub loosely and avoid any sharp corners to prevent damage or leakage to the spa lining 5 Prepare a...

Page 24: ...4m Inside diameter 1 6m Height 0 70m Weight 24kg Control System Voltage and frequency AC 220 240V 50Hz Rating power 2100W Heater 1500W Massage air blower 600W Filter pump 1325L hr Top lid Rhino Tech r...

Page 25: ...through LED display shows F1 15 seconds after pressing FILTER or HEATING Add water until the water level reaches at least the MIN water line Clean parts and tubes that water goes through Contact help...

Page 26: ...l the water level reaches the MIN water line marking Heater failure Contact help Kogan com for assistance Filter pump does not work Refer to the Filter pump does not work section of Troubleshooting on...

Page 27: ...if necessary Bubble air blower does not work Turns off after 10 minutes During hot weather it is advisable to check whether some air should be released to avoid any possible damage to the spa pool Int...

Page 28: ...tion We hope that this user guide has given you the assistance needed for a simple set up For the most up to date guide for your product as well as any additional assistance you may require head onlin...

Reviews: