position over the record. The turntable platter will begin when the arm is
moved towards it. Gently let the needle arm descend onto the record to
begin playing.
How to replace the needle
To replace the needle, please refer to the instructions below.
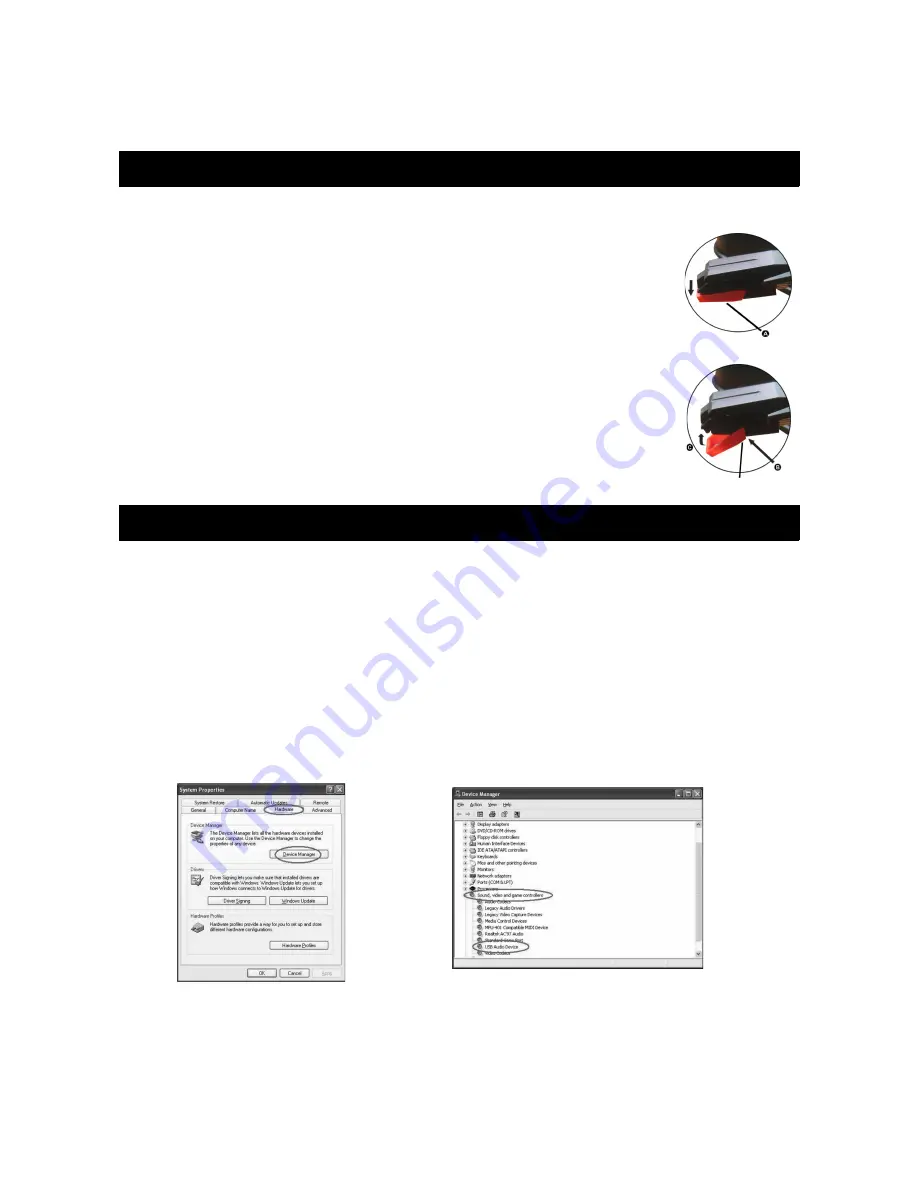
Removing the needle from the cartridge
1. Place a screwdriver at the tip of the needle head shell and
push downwards in the direction shown in image A.
2. Remove the needle head shell by pulling it forwards and
pushing downwards.
Inserting the needle
1. Hold the tip of the needle head shell and insert it by pressing
in the direction illustrated in image B.
2. Push the needle head shell upwards in the direction illustrated
in image as C until the needle locks into the tip position.
PC Hardware and Software Installation
Note: connect your turntable to your computer with the USB cable. No extra
drivers are required.
Hardware Installation
The audio capture device doesn't need any driver installation, as Windows OS will
install the driver automatically. Please connect the audio capture USB connector
into one of your computer's free USB2.0 ports. The system will note “Found new
hardware.” Please wait for a moment until the system reports “The device is ready
to use”. Please check that the hardware has installed correctly.
Right click “My Computer” and select “Properties”, then select “Hardware” and
click the “Device Manager”.
Then please click “Sound, video and game controllers”, where you will then find
the device name - “USB Audio Device”.
3
Guide Pins (inside)
Summary of Contents for KAUSBTNTBLA
Page 1: ......


