TP-6073 4/06
59
Section 9 Generator Disassembly/Reassembly
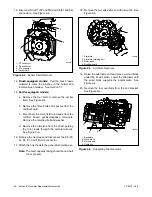
9. Connect the P6, P7, and F1 connectors.
See
Figure 9-12.
10.
Brush-equipped models:
Remove the brush
retainer from the brush holder.
5588614
1
2
3
4
1. P7 connector
2. P6 connector
3. F1 connector
4. Exciter field
Figure 9-12
Installing Exciter Field
11. Install tie wraps to secure the wires as necessary.
12. Route output leads 1, 2, 3, and 4 through the
conduit elbow on the top of the controller box.
Check that the grommet is intact and there are no
sharp edges exposed that could damage the
wiring. Install the box to the generator set with the
original mounting hardware. Connect the stator
leads to the circuit breaker and neutral stud (LO) as
marked during disassembly.
Note:
Check the generator set’s nameplate to
verify the original voltage configuration. See
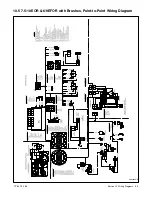
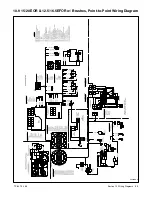
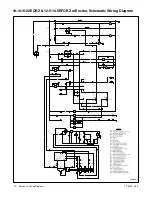
Section 10, Wiring Diagrams.
13. Connect the P4 (22-pin) connector. Connect the
ground strap using a bolt, washer, and lock washer
(install the lock washer against the ground strap).
14. Install the controller cover.
15. Install the end panel with the louvered openings
down.
16. Reconnect all of the external connections—the
exhaust line, the fuel line to the fuel pump filter inlet,
the remote start panel to the controller P3
connector, the AC output leads in controller, and
the battery cables to the battery (negative (--) lead
last).
Summary of Contents for 10EOR
Page 10: ...10 Safety Precautions and Instructions TP 6073 4 06 Notes...
Page 12: ...TP 6073 4 06 12 Service Assistance Notes...
Page 22: ...TP 6073 4 06 22 Section 3 Intake and Exhaust System Notes...
Page 26: ...TP 6073 4 06 26 Section 4 Fuel System Notes...
Page 30: ...TP 6073 4 06 30 Section 5 Cooling System Notes...
Page 38: ...TP 6073 4 06 38 Section 6 Controller Troubleshooting Notes...
Page 54: ...TP 6073 4 06 54 Section 8 Component Troubleshooting Notes...
Page 60: ...TP 6073 4 06 60 Section 9 Generator Disassembly Reassembly Notes...
Page 82: ...TP 6073 4 06 82...
Page 83: ...TP 6073 4 06 83...


