background image

TP-6196 10/09

124 Appendix

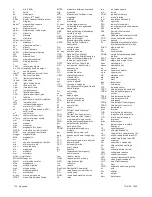
k

kilo (1000)

K

kelvin

kA

kiloampere

KB

kilobyte (2

10

bytes)

KBus

Kohler communication protocol

kg

kilogram

kg/cm

2

kilograms per square
centimeter

kgm

kilogram-meter

kg/m

3

kilograms per cubic meter

kHz

kilohertz

kJ

kilojoule

km

kilometer

kOhm, k

kilo-ohm

kPa

kilopascal

kph

kilometers per hour

kV

kilovolt

kVA

kilovolt ampere

kVAR

kilovolt ampere reactive

kW

kilowatt

kWh

kilowatt-hour

kWm

kilowatt mechanical

kWth

kilowatt-thermal

L

liter

LAN

local area network

L x W x H length by width by height
lb.

pound, pounds

lbm/ft

3

pounds mass per cubic feet

LCB

line circuit breaker

LCD

liquid crystal display

ld. shd.

load shed

LED

light emitting diode

Lph

liters per hour

Lpm

liters per minute

LOP

low oil pressure

LP

liquefied petroleum

LPG

liquefied petroleum gas

LS

left side

L

wa

sound power level, A weighted

LWL

low water level

LWT

low water temperature

m

meter, milli (1/1000)

M

mega (10

6

when used with SI

units), male

m

3

cubic meter

m

3

/hr.

cubic meters per hour

m

3

/min.

cubic meters per minute

mA

milliampere

man.

manual

max.

maximum

MB

megabyte (2

20

bytes)

MCCB

molded-case circuit breaker

MCM

one thousand circular mils

meggar

megohmmeter

MHz

megahertz

mi.

mile

mil

one one-thousandth of an inch

min.

minimum, minute

misc.

miscellaneous

MJ

megajoule

mJ

millijoule

mm

millimeter

mOhm, m

milliohm

MOhm, M

megohm

MOV

metal oxide varistor

MPa

megapascal

mpg

miles per gallon

mph

miles per hour

MS

military standard

ms

millisecond

m/sec.

meters per second

MTBF

mean time between failure

MTBO

mean time between overhauls

mtg.

mounting

MTU

Motoren-und Turbinen-Union

MW

megawatt

mW

milliwatt

µ

F

microfarad

N, norm.

normal (power source)

NA

not available, not applicable

nat. gas

natural gas

NBS

National Bureau of Standards

NC

normally closed

NEC

National Electrical Code

NEMA

National Electrical
Manufacturers Association

NFPA

National Fire Protection
Association

Nm

newton meter

NO

normally open

no., nos.

number, numbers

NPS

National Pipe, Straight

NPSC

National Pipe, Straight-coupling

NPT

National Standard taper pipe
thread per general use

NPTF

National Pipe, Taper-Fine

NR

not required, normal relay

ns

nanosecond

OC

overcrank

OD

outside diameter

OEM

original equipment
manufacturer

OF

overfrequency

opt.

option, optional

OS

oversize, overspeed

OSHA

Occupational Safety and Health
Administration

OV

overvoltage

oz.

ounce

p., pp.

page, pages

PC

personal computer

PCB

printed circuit board

pF

picofarad

PF

power factor

ph.,

phase

PHC

Phillips

#

head Crimptite

#

(screw)

PHH

Phillips

#

hex head (screw)

PHM

pan head machine (screw)

PLC

programmable logic control

PMG

permanent magnet generator

pot

potentiometer, potential

ppm

parts per million

PROM

programmable read-only
memory

psi

pounds per square inch

psig

pounds per square inch gauge

pt.

pint

PTC

positive temperature coefficient

PTO

power takeoff

PVC

polyvinyl chloride

qt.

quart, quarts

qty.

quantity

R

replacement (emergency)
power source

rad.

radiator, radius

RAM

random access memory

RDO

relay driver output

ref.

reference

rem.

remote

Res/Coml Residential/Commercial
RFI

radio frequency interference

RH

round head

RHM

round head machine (screw)

rly.

relay

rms

root mean square

rnd.

round

ROM

read only memory

rot.

rotate, rotating

rpm

revolutions per minute

RS

right side

RTU

remote terminal unit

RTV

room temperature vulcanization

RW

read/write

SAE

Society of Automotive
Engineers

scfm

standard cubic feet per minute

SCR

silicon controlled rectifier

s, sec.

second

SI

Systeme international d’unites,

International System of Units

SI/EO

side in/end out

sil.

silencer

SN

serial number

SNMP

simple network management
protocol

SPDT

single-pole, double-throw

SPST

single-pole, single-throw

spec

specification

specs

specification(s)

sq.

square

sq. cm

square centimeter

sq. in.

square inch

SS

stainless steel

std.

standard

stl.

steel

tach.

tachometer

TD

time delay

TDC

top dead center

TDEC

time delay engine cooldown

TDEN

time delay emergency to
normal

TDES

time delay engine start

TDNE

time delay normal to
emergency

TDOE

time delay off to emergency

TDON

time delay off to normal

temp.

temperature

term.

terminal

THD

total harmonic distortion

TIF

telephone influence factor

TIR

total indicator reading

tol.

tolerance

turbo.

turbocharger

typ.

typical (same in multiple
locations)

UF

underfrequency

UHF

ultrahigh frequency

UL

Underwriter’s Laboratories, Inc.

UNC

unified coarse thread (was NC)

UNF

unified fine thread (was NF)

univ.

universal

US

undersize, underspeed

UV

ultraviolet, undervoltage

V

volt

VAC

volts alternating current

VAR

voltampere reactive

VDC

volts direct current

VFD

vacuum fluorescent display

VGA

video graphics adapter

VHF

very high frequency

W

watt

WCR

withstand and closing rating

w/

with

w/o

without

wt.

weight

xfmr

transformer

Summary of Contents for 12RES

Page 1: ...Residential Commercial Generator Sets Models 8 5RES 12RES 12RESL 12RESM1 12RESNT 12TRES Controllers ADC 2100 ADC RES DC 2200 DC RET TP 6196 10 09a Service ...

Page 2: ......

Page 3: ...ment and Precleaner 23 2 5 Cooling System 24 2 6 Exhaust System 24 2 7 Battery 24 2 7 1 Cleaning Battery 25 2 7 2 Battery Charger 25 2 8 Storage Procedure 26 2 8 1 Lubricating System 26 2 8 2 Fuel System 26 2 8 3 Internal Engine Components Gas Gasoline Fueled Engines 26 2 8 4 Exterior 26 2 8 5 Battery 26 Section 3 Troubleshooting 27 3 1 Introduction 27 3 2 Initial Checks 27 3 3 Troubleshooting Cha...

Page 4: ...p 56 5 3 6 Standby Mode 56 5 3 7 Sleep Mode 56 5 4 Faults 57 5 4 1 Warnings 57 5 4 2 Shutdowns 57 5 5 Controller Configuration and Adjustment ADC RES 59 5 5 1 Controller Time Out 59 5 5 2 Voltage and Frequency Adjustments 59 5 5 3 Controller Application Program Version Number 59 5 5 4 System Parameters 60 5 6 Voltage and Frequency Adjustments 62 5 6 1 Voltage Adjustment 62 5 6 2 Frequency Adjustme...

Page 5: ...wn Switches 92 6 12 Fuel Systems 93 6 12 1 Gas Piping 93 6 12 2 Fuel Solenoid Valve 93 6 12 3 Fuel Regulators 93 6 12 4 Fuel Conversion 94 6 12 5 Digital Spark Advance Ignition 96 6 12 6 Fuel Metering Valve Adjustment 96 6 13 Fuses 98 6 14 Starter Relay 98 6 15 Continuity Checks 98 Section 7 Disassembly Reassembly 101 7 1 Disassembly 101 7 2 Reassembly 105 Section 8 Wiring Diagrams 109 Appendix A ...

Page 6: ...TP 6196 10 09 6 Notes ...

Page 7: ...tor set or connected equipment disable the generator set as follows 1 Move the generator set master switch to the OFF position 2 Disconnect the power to the battery charger 3 Remove the battery cables negative lead first Reconnect the negative lead last when reconnecting the battery Follow these precautions to prevent starting of the generator set by an automatic transfer switch remote start stop ...

Page 8: ...tor fuel line fuel filter fuel pump or other potential sources of spilled fuels or fuel vapors Catch fuels in an approved container when removing the fuel line or carburetor Servicing the air cleaner A sudden backfire can cause severe injury or death Do not operate the generator set with the air cleaner removed Exhaust System Carbon monoxide Can cause severe nausea fainting or death The exhaust sy...

Page 9: ...bble formation A successful test depends on the ability of the solution to bubble Hazardous Noise Hazardous noise Can cause hearing loss Never operate the generator set without a muffler or with a faulty exhaust system CAUTION Hazardous Voltage Moving Parts Hazardous voltage Can cause severe injury or death Operate the generator set only when all guards and electrical enclosures are in place Movin...

Page 10: ... Heavy Equipment Unbalanced weight Improper lifting can cause severe injury or death and equipment damage Do not use lifting eyes Lift the generator set using lifting bars inserted through the lifting holes on the skid WARNING Hot Parts Hot engine and exhaust system Can cause severe injury or death Do not work on the generator set until it cools WARNING Servicing the alternator Hot parts can cause...

Page 11: ... by appropriately skilled and suitably trained maintenance personnel familiar with generator set operation and service For engine service procedures not covered in this manual refer to the Engine Service Manual TP 2428 List of Related Materials Separate manuals contain operation installation and parts information not provided in this manual Separate engine operation and service manuals are also av...

Page 12: ...arters Europe Middle East Africa EMEA Kohler Power Systems 3 rue de Brennus 93200 Saint Denis France Phone 33 1 49 178300 Fax 33 1 49 178301 Asia Pacific Power Systems Asia Pacific Regional Office Singapore Republic of Singapore Phone 65 264 6422 Fax 65 264 6455 China North China Regional Office Beijing Phone 86 10 6518 7950 86 10 6518 7951 86 10 6518 7952 Fax 86 10 6518 7955 East China Regional O...

Page 13: ...ed Kohler engines Some of the engine features include One side serviceability of air cleaner carburetor oil fill dipstick and oil drain Efficient overhead valve design and full pressure lubrication for maximum power torque and reliability under all operating conditions Electronic governor to ensure AC power output is maintained at desired frequency Overspeed shutdown to prevent governed frequency ...

Page 14: ...aft material Heat treated ductile iron Main bearings number type 2 parent material Governor Electronic Lubrication system Full pressure Oil capacity w filter L qt 1 9 2 0 2 2 1 Oil pressure kPa psi 172 241 25 35 Fuel system LP gas or natural gas LP natural gas minimum supply pressure in H2O oz in 2 7 11 4 6 Battery voltage 12 VDC Battery ground Negative Spark plug gap mm in 0 51 0 020 0 76 0 030 I...

Page 15: ...tor resistance ohms cold Single Phase Leads 1 2 3 4 0 07 N A Three Phase Leads 1 4 2 5 3 6 7 10 8 11 9 12 N A 0 18 Leads 11 44 0 14 N A 55 66 0 70 0 15 Stator output voltage with separately excited rotor using 12 volt battery minimum Single Phase Leads 1 2 3 4 132 V N A Three Phase Leads 1 4 2 5 3 6 7 10 8 11 9 12 N A 115 V 11 44 264 V N A 55 66 145 V 150 V Rotor field voltage current readings at ...

Page 16: ...e 13 Oil drain valve 14 Oil filter 15 Exhaust 16 Equipment ground 17 Starter relay 18 Battery charger 19 DSAI lead location 20 Fuel block 21 Gas regulator assembly 22 Fuel solenoid valve 23 Fuel inlet 24 Air intake 25 Engine starting battery location battery purchased separately 26 DSAI ground screw 27 Starter solenoid 28 Positive battery connection 29 Negative battery connection 7 6 5 8 9 Control...

Page 17: ...TP 6196 10 09 17 Section 1 Specifications 1 GM66010 1 Emergency stop button 2 Field connection terminal block and circuit breakers 3 Cable inlet area 2 3 Figure 1 2 Additional Components 3 Phase Models ...

Page 18: ...ery location 14 Oil drain hose 15 High engine temperature HET sensor located on non service side 16 Oil drain valve 17 Oil filter 18 Air intake alternator 19 Exhaust 20 Spark arrestor not visible in this view 21 Relay interface board RIB 22 SCR module 23 Digital spark advance module leads DSAM leads ignition timing 24 Multi fuel block 25 Secondary fuel regulator assembly 26 Fuel solenoid valve 27 ...

Page 19: ...tributor dealer perform generator set service Alternator Service Under normal operating conditions the generator set alternator does not require scheduled service Refer to the service schedule for items that require maintenance Engine Service Perform generator set engine service at the intervals specified by the engine service literature Contact an authorized Kohler distributor dealer to obtain en...

Page 20: ...otion X X Six Months Tighten control and power wiring connections X Yearly Wire cable insulation breakdown X 3 yr or 500 hr Engine and Mounting General inspection E E Weekly Air cleaner and precleaner service 2 4 X X Yearly or 100 hr Spark plugs 2 3 X Yearly Replace spark plugs 2 3 E R E 500 hr Stepper motor coupling and bushing 6 9 R 3 yr or 500 hr Generator Compartment condition X X Weekly Inspe...

Page 21: ... generator set and wait several minutes before checking the oil level 2 2 3 Engine Oil Recommendation Use synthetic oil of API American Petroleum Institute Service Class SG or higher Synthetic oil causes fewer deposits on the engine intake valves and pistons because it oxidizes and thickens less than other oils See Figure 2 3 and Figure 2 4 Model L Qt 8 5kW 1 9 2 0 12kW 2 0 2 1 Figure 2 3 Oil Capa...

Page 22: ...oil filter to stop any leaks f Reinstall the housing side panel 2 2 5 Oil Cooler Inspect and clean the oil cooler at the intervals shown in the Service Schedule The oil cooler must be kept free of debris See Figure 2 2 and Figure 2 5 for the oil cooler location Clean the outside of the oil cooler with a brush or compressed air If it is necessary to clean the back of the oil cooler remove the two s...

Page 23: ...usty or dirty conditions Refer to Maintenance and Service Parts in the Introduction section of this manual for replacement part numbers Keep the area around the air cleaner housing free of dirt and debris Note Operating the engine with loose or damaged air cleaner components could allow unfiltered air into the engine causing premature wear and failure 1 2 3 4 5 6 7 586536 1 Cover knob 2 Air cleane...

Page 24: ... generator set engine starting battery negative lead last b Reconnect the power to the battery charger 2 5 Cooling System Fans in the engine and generator draw cooling air through the louvered openings in the sides and end of the sound enclosure The cooling air mixes with the engine exhaust and is discharged through the outlet end To prevent generator set damage caused by overheating keep the hous...

Page 25: ...ry before generator set installation or maintenance Remove all jewelry before servicing the equipment Use tools with insulated handles Remove the negative lead first when disconnecting the battery Reconnect the negative lead last when reconnecting the battery Never connect the negative battery cable to the positive connection terminal of the starter solenoid Do not test the battery condition by sh...

Page 26: ...or SAE 10 engine oil into the air intake for about two minutes until the engine stops 2 Place the generator set master switch in the OFF RESET position If a fogging agent is not available perform the following 1 Remove the spark plugs 2 Pour one tablespoon of engine oil into each spark plug hole Install the spark plugs and ground the spark plug leads Do not connect the leads to the plugs 3 Toggle ...

Page 27: ... the fuel supply Check the fuel supply pressure to the generator set See Section 6 12 Fuel Systems 3 3 Troubleshooting Chart Use the following table as a reference in troubleshooting individual problems Generator set faults are listed in groups and include likely causes and remedies The simplest and most likely causes of the problem are listed first follow the recommendations in the order shown Th...

Page 28: ...pin pusher to remove leads from the connector if necessary If replacing the leads does not solve the problem replace the controller circuit board Section 8 ADV 7325 Section 4 8 or 5 7 Generator set master switch Check connections to the master switch Section 6 15 Test function of master switch Section 6 15 Poor ground connection Clean and retighten Starter relay Check connections to the starter re...

Page 29: ...ire s Check spark plug wires and connections Replace spark plug wires Engine S M Ignition components spark control or ignition module Test replace ignition components Engine S M Insufficient fuel pressure Check fuel pressure Section 6 12 3 Worn piston rings valves Check compression Engine S M Starts but shuts down Fault shutdown Check for a fault shutdown code on the controller s LED display Corre...

Page 30: ...r loose connections to the mag pickup Section 6 9 Governor adjustment incorrect Adjust governor stability Section 6 9 or 6 10 Ignition system Test and or replace components Engine S M Inadequate cooling hot engine only Inspect air inlet and outlet Section 2 5 Carbon buildup in engine Clean cylinder head Engine S M Engine valves not seating correctly Check cylinder pressures with leakdown test Insp...

Page 31: ... 6 4 Stator open grounded or shorted windings Test and or replace Section 6 3 Brush connection Check for loose brush connections Check the resistance through the brushes Resistance through the brushes should be low 0 1 0 2 ohms without meter lead resistance Section 6 6 Low engine speed causing voltage roll off Check system voltage frequency Uu and engine type Ec parameters Adjust engine governor s...

Page 32: ... 13 Section 8 Brushes Inspect brushes and replace if worn Section 6 6 Check for brushes sticking in brush holder or broken brush spring Section 6 6 Rotor connections Check for open circuit in rotor connection circuit leads FN and FP to SCR and RIB Section 8 Rotor slip rings dirty or corroded Check slip ring condition Section 6 4 Rotor open grounded or shorted windings Check voltage and continuity ...

Page 33: ...he controller at lead PF1 Check replace fuse F3 Check battery Section 8 Check controller fuse F3 Replace controller fuse Section 8 Check controller wiring and connections Tighten connections and or replace wiring Replace SCR module and recheck voltage Replace the SCR module Section 6 8 Perform all tests listed under high output voltage Replace the controller only if previous steps do not solve the...

Page 34: ...TP 6196 10 09 34 Section 3 Troubleshooting Notes ...

Page 35: ...s the sequence of operation and faults are described in Section 4 4 Controller configuration and adjustment are covered in Section 4 5 A silicon controlled rectifier SCR module works with the controller to regulate the output voltage See Section 6 8 A relay interface board RIB is used with the ADC controller Section 4 8 describes the standard and optional RIBs 1 GM29253 1 Controller 2 SCR module 3...

Page 36: ...ngine The last digit flashes during the crank cycle rest periods Runtime hours Displays total generator set runtime hours when no other code is displayed Fault codes Flashes a 2 or 3 letter fault code to indicate various fault conditions See Section 4 4 System parameters Displays 2 letter codes or 4 digit alphanumeric codes during system configuration or adjustment See Section 4 5 Application prog...

Page 37: ...ery 4 3 2 Starting Sequence Remote Start When the master switch is set to the AUTO position the generator set starts when the remote start switch or transfer switch engine start contacts close The start sequence proceeds as described in Section 4 3 1 Starting Sequence Master Switch Moved to RUN 4 3 3 Running Sequence When the engine speed reaches 750 rpm the crank relay deenergizes and the crank L...

Page 38: ...r a 12 VDC system or above 30 VDC for a 24 VDC system for more than one minute when the engine is not running This fault condition does not inhibit engine starting The fault condition clears when the battery voltage returns to a voltage within the limits for more than 10 seconds Check the battery rating and condition Check the battery charger operation LB Low battery voltage warning Fault code is ...

Page 39: ... pickup connections and operation Check for a locked rotor 6 9 4 6 4 OF Overfrequency Shutdown occurs when the governed frequency exceeds 110 of the system s frequency setpoint for more than 5 seconds This protective becomes active 10 seconds after engine start 10 second inhibit Check system frequency setting parameter UU on controller Measure output frequency and adjust if necessary Check governo...

Page 40: ...uency and unit configuration and engine type are factory set for each type of generator set and engine and should not require changes unless the controller is replaced The controller s advanced configuration mode allows the user to set the data input type for engine senders toggle the battery voltage between 12 and 24 volts and change the controller communications setting for optional meters not o...

Page 41: ...cy adjustments may be required after controller replacement or other service procedures The generator set must be running during these adjustments Use a multimeter to measure the generator set output voltage and frequency during adjustments Refer to Sections 6 7 2 Voltage Adjustment and 6 9 5 Frequency Adjustment for instructions to measure the output voltage and frequency Note Be sure to save you...

Page 42: ... A d n c Press Now release the Select button or To enter advanced configuration mode Go to Figure 4 9 or To proceed to the save mode without entering the advanced configuration mode Go to Figure 4 10 Now either save your settings or enter the Advanced Configuration Mode to set the engine data inputs battery voltage and communications Press S A V E E d 0 5 E c 0 Shaded boxes show which number in th...

Page 43: ... Be sure to save your settings before exiting the configuration mode The controller reverts to the last saved settings when the master switch is moved to the OFF RESET position Figure 4 9 Advanced Configuration Mode engine data input types battery voltage and engine communications To save changes To discard changes without saving or X in the runtime hours display above denotes any number from 0 to...

Page 44: ... or To raise or lower the voltage stability gain in smaller increments To enter volts Hz adjustment mode To raise or lower the volts Hz 00 low 09 high or Hold Wait about 5 seconds until the display changes from runtime hours to the program version number Press the down arrow key and then the up arrow key 3 times to enter the adjustment mode This is the controller password x x x x x x 1 P 1 P 2 P S...

Page 45: ...ity gain fine adjustment mode To raise or lower the engine governor stability gain in smaller increments 4 P 4 P or or or Continued from Figure 4 11 Press 5 P 5 P Shaded boxes show which character in the controller display changes for each adjustment X in the examples above denotes any number from 0 to 9 The actual values may vary from model to model S A V E To enter SAVE mode Go to Figure 4 13 x ...

Page 46: ...or death Disconnect the battery cables before working on the generator set Remove the negative lead first when disconnecting the battery Reconnect the negative lead last when reconnecting the battery WARNING Disabling the generator set Accidental starting can cause severe injury or death Before working on the generator set or connected equipment disable the generator set as follows 1 Move the gene...

Page 47: ...s it is not necessary to disconnect the continuous power mode jumper 1 Prevent the generator set from starting a Move the generator set master switch to the OFF RESET position b Disconnect power to the battery charger c Disconnect the generator set engine starting battery negative lead first 2 Remove the controller from the generator set housing a Disconnect the engine wiring harness connector P1 ...

Page 48: ...ads does not solve the problem replace the RIB The individual relays are not replaceable If one or more relays are faulty replace the entire RIB To replace the RIB 1 Disconnect P14 and the brush leads FP and FN 2 Pull the board straight off the mounting stand offs 3 Snap the new board onto the stand offs and reconnect P14 and the brush leads The generator set may be equipped with an optional RIB w...

Page 49: ...iguration and to change the settings if necessary After the controller configuration has been checked and set to match the generator set use a voltmeter to check the generator set output voltage and frequency If the output voltage or frequency needs adjustment use the Voltage and Frequency Adjustment Procedure in Section 6 7 2 and the controller voltage and speed adjustment instructions in Section...

Page 50: ...roller See Figure 4 19 d Loosen and remove four controller mounting screws at the front of the controller See Figure 4 20 Remove the controller from the compartment e Place the new controller into position and install the four mounting screws f Attach connectors P1 P15 and P16 to the new controller g Replace the cover on the controller compartment h Replace the front panel on the air intake end of...

Page 51: ...to the battery charger 11 Replace the roof and tighten the four roof screws 12 Follow the instructions in Section 4 5 2 to change the new controller s configuration settings to match the generator set system voltage and frequency unit configuration engine type engine data input types battery voltage and communications settings 13 Use a voltmeter to check the output voltage Follow the instructions ...

Page 52: ...TP 6196 10 09 52 Section 4 ADC 2100 and DC 2200 Controllers Notes ...

Page 53: ...dures See Figure 5 1 for the controller location 1 Controller display 2 Keypad ADC RES only see Figure 5 2 3 Generator set master switch RUN OFF RESET AUTO 4 Line circuit breaker load connection 5 Fuses F1 F2 and F3 6 Serial port for communication connection remove plug to access GM57149 10 4 4 3 6 9 12 5 1 2 5 7 Front View 7 Logic board 8 Optional relay board location 9 L0 stud 10 Ground stud 11 ...

Page 54: ...on 6 15 for master switch connections 5 2 2 LED Display The LED display shows runtime hours fault codes application program version number or controller parameters during configuration and adjustment See Figure 5 4 1 2 1 LED display 2 Generator set master switch RUN OFF RESET AUTO GM57149 Figure 5 3 DC RET Controller The LED display is activated by a start or RUN command as follows Move the master...

Page 55: ...Have setup and adjustments performed only by an authorized distributor dealer Generator set master switch Three position switch Switch functions as the generator set operation and controller reset switch Figure 5 4 Controls and Indicators 5 2 3 Keypad The three button keypad is a feature of the ADC RES controller The keypad is used to check system status change controller settings and adjust the g...

Page 56: ...e generator set master switch must be in the AUTO position for remote start stop by a remote switch or automatic transfer switch The remote start contact closes across engine start leads 3 and 4 to start the generator set The start sequence proceeds as described in Section 4 3 1 Starting Sequence Master Switch Moved to RUN 5 3 3 Running Sequence When the engine speed reaches 750 rpm the crank rela...

Page 57: ...e is displayed if the engine starting battery voltage rises above 16 VDC for a 12 VDC system or above 30 VDC for a 24 VDC system for more than one minute when the engine is not running This fault condition does not inhibit engine starting The fault condition clears when the battery voltage returns to a voltage within the limits for more than 10 seconds Check the battery rating and condition Check ...

Page 58: ...ds after the fault is detected Check mag pickup connections and operation Check for a locked rotor 6 9 4 OF Overfrequency Shutdown occurs when the governed frequency exceeds 110 of the system s frequency setpoint for more than 5 seconds This protective becomes active 10 seconds after engine start 10 second inhibit Check system frequency setting parameter UU on controller 4 5 Measure output frequen...

Page 59: ...he controller exits the configuration mode before the settings have been saved Changes in voltage and speed adjustments are also lost if they are not saved before the generator set shuts down The generator set continues to run with the new settings until it shuts down but then reverts to the previous settings at the next startup Be sure to save your changes immediately after making adjustments 5 5...

Page 60: ...n from the beginning if the controller exits the configuration mode before the settings have been saved Note Be sure to save your settings before exiting the configuration mode The controller reverts to the last saved settings when the master switch is moved to the OFF RESET position Voltage frequency setting Uu Select the system voltage and frequency from the table in Figure 5 8 Note The Uu param...

Page 61: ...ich number in the controller display changes when the up or down arrow key is pressed X in the runtime hours display above denotes any number from 0 to 9 Press the down arrow key and then the up arrow key 3 times to enter the configuration mode This is the controller password Controller Configuration Mode To SAVE CHANGES To DISCARD CHANGES without saving Y E S Now move the master switch to OFF RES...

Page 62: ... generator set shuts down The generator set continues to run with the new settings until it shuts down but then reverts to the previous settings at the next startup if the changes have not been saved 5 6 1 Voltage Adjustment Note Refer to the flowcharts in Figure 5 13 through Figure 5 15 during the following procedure Voltage Adjustment Procedure 1 With the generator set off connect a digital mult...

Page 63: ...fer to the flowcharts in Figure 5 13 through Figure 5 15 during the following procedure 1 Attach a frequency meter to the AC output leads or an electrical outlet on the load side of the generator set 2 Start and run the generator set until it reaches normal operating temperature at least 10 minutes 3 Adjust electronic governor speed parameter 4P to obtain a frequency reading of 60 Hz or 50 Hz if a...

Page 64: ... mode or To raise or lower the voltage stability gain in smaller increments Parameter 2P To enter volts Hz adjustment mode Parameter 3P To raise or lower the volts Hz 00 low 09 high or Hold Wait about 5 seconds until the display changes from runtime hours to the program version number Press the down arrow key and then the up arrow key 3 times to enter the adjustment mode This is the controller pas...

Page 65: ...ernor stability gain fine adjustment mode Parameter 5P To raise or lower the engine governor stability gain in smaller increments 4 P 4 P or or or Continued from Figure 5 13 Press 5 P 5 P Shaded boxes show which character in the controller display changes for each adjustment X in the examples above denotes any number from 0 to 9 The actual values may vary from model to model S A V E To enter SAVE ...

Page 66: ...ated but the relay is not activated the relay is faulty The individual relays are not replaceable If one or more relays are faulty replace the logic board LED 4 lights to indicate a fault condition See Section 4 4 Faults The controller board is protected by a 10 amp fuse F2 located on the controller If the fuse blows repeatedly disconnect the board loads one at a time to identify the cause of the ...

Page 67: ...iring for open circuits or shorts Replace the harness or customer wiring as necessary Check that the ratings of the customer s connected equipment do not exceed the relay contact specifications shown in Figure 5 22 An LED is associated with each relay See Figure 5 18 The LED indicates power to the corresponding relay If the LED is illuminated but the relay is not activated the relay is faulty The ...

Page 68: ...ON FAULT NO Common fault relay normally open contact Closes on a fault AUX RUN NC Auxiliary run relay normally closed contact Open when generator set is running AUX RUN COM Auxiliary run relay common AUX RUN NO Auxiliary run relay normally open contact Closed when generator set is running Note Use maximum 14 AWG wire for TB1 connections Figure 5 21 TB1 Customer Connections Contact Ratings 10 A 120...

Page 69: ...connect the negative lead last when reconnecting the battery Follow these precautions to prevent starting of the generator set by an automatic transfer switch remote start stop switch or engine start command from a remote computer 1 Access the controller junction box to locate the relay board See Figure 5 17 2 Disconnect relay board harness connector P3 from connector P14 on the relay board 3 Pull...

Page 70: ...ncy needs adjustment use the voltage and frequency adjustment procedure in Section 6 7 2 and the controller voltage and speed adjustment instructions in Section 5 6 Also see the frequency adjustment procedure in Section 6 9 5 Hazardous voltage Will cause severe injury or death Disconnect all power sources before opening the enclosure DANGER Controller Replacement Procedure 1 Remove the service doo...

Page 71: ... window with the larger rectangular opening 13 Press the membrane firmly into place 14 Connect the ribbon cable to the P8 connector on the logic board 15 Verify that the generator set master switch is in the OFF position 16 Reconnect the engine starting battery negative lead last 17 Reconnect power to the battery charger 18 Replace the front panel 19 Check settings and adjustments for the ADC RES ...

Page 72: ...TP 6196 10 09 72 Section 5 ADC RES and DC RET Controller Notes ...

Page 73: ...roubleshooting flow chart in Figure 6 2 Before beginning the test procedures read all safety precautions at the beginning of this manual Many of the test procedures include additional safety precautions No Generator Output Separate Excitation Output within Specifications Check Rotor Check Wiring Fuses SCR Module and Controller Check Stator TP563273 Erratic or No Output Figure 6 2 Generator Trouble...

Page 74: ...e The approximate ammeter reading should be the battery voltage divided by the specified rotor resistance See Section 1 Specifications for specified rotor resistance values Example 12 volts battery voltage 4 ohms rotor resistance 3 amps rotor current 3 Start the engine and check that the ammeter reading remains stable An increasing meter reading indicates a shorted rotor A meter reading decreasing...

Page 75: ...and black meter leads together and setting the ohmmeter reading to zero Then check the stator continuity by connecting the meter leads to the stator leads as shown in Figure 6 4 R14807 14 Figure 6 4 Testing Stator Windings Note For single phase models leads 1 2 3 and 4 are the generator output leads Leads 11 44 55 and 66 are the controller and SCR module sensing and supply leads Refer to the schem...

Page 76: ...se a megohmmeter to test the stator as described in the next step Note Because ohmmeter accuracy varies resistance readings are approximate readings Take readings of the rotor and stator at room temperature Note Make sure that all stator leads are disconnected before running the megohmmeter test 9 Use a megohmmeter to determine whether the stator is shorted to ground a Apply 500 volts DC to any st...

Page 77: ...ore servicing the equipment Nevercontact electricalleadsor applianceswhen standingin wateror onwet ground because these conditions increase the risk of electrocution Rotor Test Procedure 1 Place the generator set master switch in the OFF position 2 Disconnect power to the battery charger 3 Disconnect the generator set engine starting battery negative lead first 4 Remove the brush cover from the al...

Page 78: ... the slip rings The brushes should last the life of the generator Abrasive dust on the slip rings however shortens the life of the brushes Excessive arcing at the brushes could damage the SCR module and the controller Weak springs damaged slip rings sticking brushes a loose brush holder or poor brush contact causes arcing The brushes must be free to move within the holder and be held in contact wi...

Page 79: ...speed returns to normal 60 Hz or 50 Hz as load is accepted the generator output also returns to normal See Section for more information about the volts Hz droop adjustment Hazardous voltage Can cause severe injury or death Operate the generator set only when all guards and electrical enclosures are in place Moving parts WARNING Short circuits Hazardous voltage current can cause severe injury or de...

Page 80: ...ge across circuit breaker terminals L0 and L1 L2 or L3 Figure 6 14 Voltage Measurement Three Phase Models 7 Set the voltmeter to measure voltage Adjust the volts Hz parameter 3P until the voltage level measured by the voltmeter begins to drop When set the generator as load is applied attempts to maintain normal output until the engine speed drops below the cut in frequency set in step 6 Note See S...

Page 81: ...ection NO TAG Remember to save your settings Each step of 3P changes the amount of voltage droop approximately 0 5 of system voltage for each cycle Hz below the cut in frequency See Figure 6 15 3P Voltage Droop of System Voltage per 1 Hz Cycle Below Cut In Frequency 0 0 1 0 5 2 1 0 3 1 5 4 2 0 5 2 5 6 3 0 7 3 5 8 4 0 9 4 5 Figure 6 15 Voltage Droop Adjustments 6 7 4 Voltage Connections Single Phas...

Page 82: ...through stator leads 55 and 66 connected to SCR terminals AC1 and AC2 Leads G connected to terminals G1 and G2 provide the controller signal Leads FP and FN connected to the positive and negative SCR terminals provide excitation current to the rotor See Figure 6 18 and the wiring diagrams in Section 8 The SCR module is protected by a 20 amp fuse F1 in lead 55 on the controller Check the fuse and r...

Page 83: ... 6 19 Connect the negative lead from the DC power source to the positive terminal on the SCR module Note The SCR module may be damaged if the power supply is connected incorrectly Be sure to connect the negative lead from the battery to the positive terminal on the SCR module 1 tp6196 1 12 VDC power source 2 12 VDC test lamp 3 SCR module 4 Jumper 5 100 500 ohm resister G1 AC2 AC1 G2 2 3 4 5 Figure...

Page 84: ...n unstable hunting surging condition occurs Adjusting the gain may require readjustment of the engine speed See Section 6 9 3 6 9 2 Initial Checks and Operation Test The factory sets the electronic governor Under normal circumstances the electronic governor requires no further adjustment Verify that the governor stepper motor moves smoothly and steadily during operation If the engine operates erra...

Page 85: ...hich affects the throttle operation Verify that the carburetor is mounted as close to the governor actuator stepper motor as the mounting holes allow b Refer to the engine service manual for other engine diagnostic and service information 6 9 4 Governor System Magnetic Pickup Operation Test If the engine continues to operate erratically after the previous checks test the governor system operation ...

Page 86: ...m during engine cranking 6196 Figure 6 22 Magnetic Pickup Leads 5 If the voltmeter displays less than 1 75 volts AC check the air gap as described in the following steps before replacing the sensor Verify that the magnetic pickup air gap is 0 5 mm 0 020 in Measure the air gap at 3 or 4 places to get an accurate reading See Figure 6 23 a Stop the generator set Remove housing panels as required to g...

Page 87: ...ads 1A 1B 2A and 2B to pins P1 4 P1 5 P1 6 and P1 7 Check the pins and connections at plugs J6 and P6 See the wiring diagrams in Section 8 11 Check the stepper motor coil resistance across pins 2 and 3 and across pins 1 and 4 Only two stepper motor leads of each coil group are used BLK YEL and RED WHT See Figure 6 24 The resistance per half coil is 38 5 ohms If one of the coils has a significantly...

Page 88: ...or set becomes stable with no hunting or surging Observe the frequency reading 6 Repeat steps 4 and 5 to obtain the rated frequency and stable operation 7 Save the settings as instructed in Section 4 5 Note The controller will revert to the previous settings at the next startup if the changes are not saved within one minute after the last change 8 Apply rated load to the generator set and observe ...

Page 89: ...henever the governor arm is loosened or removed from the cross shaft See Figure 6 26 and adjust as follows 1 Make sure the throttle linkage is connected to the governor arm and the throttle lever on the carburetor 2 Loosen the hex nut holding the governor lever to the cross shaft 3 Move the governor lever toward the carburetor as far as it will move wide open throttle and hold in this position 4 I...

Page 90: ...rnor cross shaft 2 To decrease the sensitivity move the spring away from the governor cross shaft 1 Governor lever 2 Cross shaft 1 2 photo5005 Figure 6 27 Governor Sensitivity Adjustment Engine Speed Frequency Adjustment Mechanical Governor Use the adjusting nut shown in Figure 6 28 to adjust the engine speed if necessary Recommended engine speeds with no load and full load are shown in Figure 6 2...

Page 91: ...tly for your unit See Section 4 5 and Figure 4 7 for the settings System voltage frequency parameter UU Unit configuration parameter UC Engine type parameter EC Engine data input type parameter ED Hot engine and exhaust system Can cause severe injury or death Do not work on the generator set until it cools WARNING Servicing the exhaust system Hot parts can cause severe injury or death Do not touch...

Page 92: ... bodily injury and or equipment damage Do not contact electrical connections with tools or jewelry while making adjustments or repairs Remove all jewelry before servicing the equipment Temperature Sensor CTS The coolant temperature sensor CTS is used to monitor engine temperature for the high engine temperature fault shutdown HE See Section 1 7 Service View for the coolant temperature sensor locat...

Page 93: ...egulator to the end of the pipe where it connects to the fuel inlet of the generator set Add 2 4 m 8 ft for each bend in the pipe Compare the total length with the chart in Figure 6 32 If the piping is longer than the maximum length shown in the chart replace it with a larger pipe size Bleed the air from the gas lines after installation Figure 6 33 lists the maximum gas flow rates for each model P...

Page 94: ... 7 2 7 7 11 Figure 6 34 Fuel Supply Pressure 6 12 4 Fuel Conversion The multi fuel system allows conversion from natural gas to LP vapor or vice versa in the field while maintaining emissions standard compliance A trained technician or authorized distributor dealer can convert the fuel system Two fuel connections on the fuel metering valve allow field conversion between natural gas and LP vapor Th...

Page 95: ... valve 3 Fuel inlet 1 2 in NPT female 3 1 Figure 6 36 Generator Set Fuel System Location Air Inlet Side 1 Place the generator set master switch in the OFF position 2 Disconnect the power to the battery charger 3 Disconnect the generator set engine starting battery negative lead first 4 Turn off the fuel supply 5 Remove the hose clamp and fuel hose from the hose fitting in the fuel metering valve S...

Page 96: ...GO sensor to check the fuel mixture after replacing the fuel regulator carburetor or silencer Use the following procedure to check the fuel mixture after the engine has reached normal operating temperature The fuel metering valves are sealed to prevent field adjustments If the fuel metering valve requires adjustment do not break the seals on the fuel metering valve Obtain a new fuel metering valve...

Page 97: ...s LP 8 5kW 2 40 0 05 2 25 0 05 12kW 2 60 0 05 2 60 0 05 Figure 6 39 Acceptable Oxygen Sensor Readings 11 When the fuel mixture is correct use thread sealant to seal the metering valve adjustment screws 12 Remove the load and allow the generator set to run unloaded to cool for at least 5 10 minutes 13 Place the generator set master switch in the OFF position 14 Disconnect the generator set engine s...

Page 98: ...t parts 6 14 Starter Relay The starter relay contains an internal diode across the relay coil See Figure 6 42 Continuity checks across the coil terminals will show continuity low resistance in one direction and an open circuit in the other Figure 6 43 shows the starter relay connections 259391 Figure 6 42 Starter Relay Relay Terminal Lead 30 14P 85 N7 86 71 87 14S 87A NC Figure 6 43 Starter Relay ...

Page 99: ... 100 RUN Zero ohms continuity Any other reading indicates a bad switch OFF RESET No reading open circuit Any other reading indicates a bad switch AUTO and VBAT see Figure 6 44 R x 100 AUTO Zero ohms continuity Any other reading indicates a bad switch OFF RESET No reading open circuit Any other reading indicates a bad switch P1 wiring harness P1 27 and ground R x 1 OFF RESET Zero ohms continuity An...

Page 100: ...TP 6196 10 09 100 Section 6 Component Testing and Adjustment Notes ...

Page 101: ...he generator set from service and remove the generator set enclosure a Remove the enclosure service side door See Figure 7 1 tp6196 4 1 Roof 2 Roof locating pin 3 Roof screws 4 ea 4 Service side door 5 Front panel air intake end 6 Rear panel exhaust end 6 1 5 1 3 2 Figure 7 1 Generator Set Weather Housing b Place the generator set master switch in the OFF position c Remove 4 roof screws Lift the r...

Page 102: ... the alternator leads inside the controller box See Figure 7 4 or Figure 7 5 and the wiring diagrams in Section 8 3 Remove the engine exhaust muffler and alternator heat shield See Figure 7 6 a Disconnect the muffler from the engine exhaust pipe at the two flange connections b Remove the bolts holding the muffler to the alternator heat shield and remove the muffler c Remove the bolts securing the ...

Page 103: ...xhaust shield and alternator air inlet duct See Figure 7 7 1 GM29253 1 Exhaust shield screws 2 Alternator air inlet duct screws 2 Top View Figure 7 7 Shield and Alternator Air Inlet Duct Top View a Remove two bolts securing the exhaust shield at the exhaust end and remove the shield b Remove three bolts securing the alternator air inlet duct to the base and remove the duct 5 Remove the alternator ...

Page 104: ... 10 and Figure 7 11 TP5867 1 2 3 Front View Side View 1 2 3 New 1 9 cm 0 75 in 4 5 6 1 7 8 2 2 3 1 Brush holder 2 Slip ring 3 Brush es 4 Retainer wire 5 Shim 6 Spring 7 Correctly positioned brush 8 Incorrectly positioned brush GM29253B P Figure 7 11 Brush Details e Remove the alternator overbolts and centering washers See Figure 7 10 f Using a soft faced hammer strike the side of the end bracket w...

Page 105: ...nto the engine a Attach the generator adapter and alternator adapter guard to the engine using four 7 16 14 x 1 0 hex cap bolts and washers See Figure 7 13 b Torque the bolts to 40 Nm 28 ft lb 2 Install the rotor See Figure 7 12 a Clean the crankshaft stub and mating surface on the fan hub Do not use antisieze compound when reassembling the rotor b Install the rotor onto the engine crankshaft c Th...

Page 106: ...ee Figure 7 16 5 Tighten the hardware to the following torques See Figure 7 16 a Tighten the rotor thrubolt to 40 Nm 28 ft lb It may be necessary to keep the engine flywheel from turning while torquing the rotor thrubolt b Tighten the four alternator assembly overbolts to 7 Nm 60 in lb tp6196 1 2 3 1 Alternator assembly overbolts 2 Rotor thrubolt 3 Vibromount plate Figure 7 16 Generator Set Right ...

Page 107: ... to the heat shield with M8 hardware d Torque the nuts securing the engine muffler flange to the engine to 24 Nm 216 in lb ADV 7466 1 1 Engine exhaust muffler 2 Muffler bolts 3 Heat shield 4 Flange connection 5 Heat shield bolts 4 3 2 5 Figure 7 19 Exhaust System 10 Reconnect the alternator leads inside the controller box See the wiring diagrams in Section 8 for connections 11 Reinstall the enclos...

Page 108: ...ve lead last c Reconnect power to the battery charger if equipped 13 Turn on the fuel supply Move the generator set master switch to the RUN position and check for leaks with the engine running 14 Move the generator set master switch to the OFF RESET position Move the switch to the AUTO position if an automatic transfer switch or remote start stop switch is used 15 Reinstall the generator set hous...

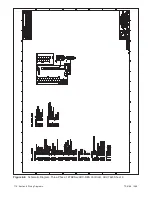
Page 109: ...odel No Controller Schematic Point to Point Wiring Diagram Drawing Number Page Drawing Number Page 8 5RES ADC 2100 ADV 6835A 110 GM29358 118 ADV 6835B 111 8 5RES ADC RES ADV 7592 115 GM66285 121 12RES ADC 2100 ADV 6835A 110 GM29358 118 ADV 6835B 111 12RES ADC RES ADV 7592 115 GM66285 121 12RESL 12RESM1 DC 2200 ADV 7296A 112 GM49761 119 ADV 7296B 113 12RESL 12RESM1 12RESNT DC RET ADV 7351 114 GM524...

Page 110: ...TP 6196 10 09 110 Section 8 Wiring Diagrams Figure 8 2 Schematic Diagram Single Phase 8 5 12RES w ADC 2100 Controller ADV 6835A E ...

Page 111: ...TP 6196 10 09 111 Section 8 Wiring Diagrams Figure 8 3 Schematic Diagram Single Phase 8 5 12RES w ADC 2100 Controller ADV 6835B E ...

Page 112: ...TP 6196 10 09 112 Section 8 Wiring Diagrams Figure 8 4 Schematic Diagram Single Phase 12RESL RESM1 w DC 2200 Controller ADV 7296A ...

Page 113: ...TP 6196 10 09 113 Section 8 Wiring Diagrams Figure 8 5 Schematic Diagram Single Phase 12RESL RESM1 w DC 2200 Controller ADV 7296B ...

Page 114: ...TP 6196 10 09 114 Section 8 Wiring Diagrams Figure 8 6 Schematic Diagram Single Phase 12RESL RESM1 RESNT w DC RET Controller ADV 7351 D ...

Page 115: ...TP 6196 10 09 115 Section 8 Wiring Diagrams Figure 8 7 Schematic Diagram Single Phase 8 5 12RES w ADC RES Controller ADV 7592 ...

Page 116: ...TP 6196 10 09 116 Section 8 Wiring Diagrams Figure 8 8 Schematic Diagram Three Phase 12TRES w ADC RES Controller ADV 7623 Sheet 3 ...

Page 117: ...TP 6196 10 09 117 Section 8 Wiring Diagrams Figure 8 9 Schematic Diagram Three Phase 12TRES w ADC RES Controller ADV 7623 Sheet 4 ...

Page 118: ...TP 6196 10 09 118 Section 8 Wiring Diagrams Figure 8 10 Point to Point Wiring Diagram Single Phase 8 5 12RES w ADC 2100 Controller GM29358 E ...

Page 119: ...TP 6196 10 09 119 Section 8 Wiring Diagrams Figure 8 11 Point to Point Wiring Diagram Single Phase 12RESL RESM1 w DC 2200 Controller GM49761 A ...

Page 120: ...TP 6196 10 09 120 Section 8 Wiring Diagrams Figure 8 12 Point to Point Wiring Diagram Single Phase 12RESL RESM1 RESNT w DC RET Controller GM52471 C ...

Page 121: ...TP 6196 10 09 121 Section 8 Wiring Diagrams Figure 8 13 Point to Point Wiring Diagram Single Phase 8 5 12RES w ADC RES Controller GM66285 ...

Page 122: ...TP 6196 10 09 122 Section 8 Wiring Diagrams Figure 8 14 Point to Point Wiring Diagram Three Phase 12TRES w ADC RES Controller GM63546 Sheet 3 ...

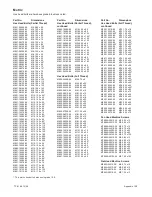
Page 123: ...riter s Laboratories CUL Canadian Underwriter s Laboratories cu in cubic inch cw clockwise CWC city water cooled cyl cylinder D A digital to analog DAC digital to analog converter dB decibel dB A decibel A weighted DC direct current DCR direct current resistance deg degree dept department DFMEA Design Failure Mode and Effects Analysis dia diameter DI EO dual inlet end outlet DIN Deutsches Institut...

Page 124: ...S oversize overspeed OSHA Occupational Safety and Health Administration OV overvoltage oz ounce p pp page pages PC personal computer PCB printed circuit board pF picofarad PF power factor ph phase PHC Phillips head Crimptite screw PHH Phillips hex head screw PHM pan head machine screw PLC programmable logic control PMG permanent magnet generator pot potentiometer potential ppm parts per million PR...

Page 125: ...top of nut 3 Below top of nut Figure 1 Acceptable Bolt Lengths Steps for common hardware application 1 Determine entry hole type round or slotted 2 Determine exit hole type fixed female thread weld nut round or slotted For round and slotted exit holes determine if hardware is greater than 1 2 inch in diameter or 1 2 inch in diameter or less Hardware that is greater than 1 2 inch in diameter takes ...

Page 126: ... 0 895 Metric Fasteners Torque Specifications Measured in Nm ft lb Size mm Assembled into Cast Iron or Steel Assembled into Aluminum Grade 5 8 or 8 8 Grade 5 8 Grade 8 8 Grade 10 9 M6 x 1 00 6 2 4 6 9 5 7 13 6 10 See Note 3 M8 x 1 25 15 0 11 23 0 17 33 0 24 M8 x 1 00 16 0 11 24 0 18 34 0 25 M10 x 1 50 30 0 22 45 0 34 65 0 48 M10 x 1 25 31 0 23 47 0 35 68 0 50 M12 x 1 75 53 0 39 80 0 59 115 0 85 M1...

Page 127: ...nal External Tooth Lock Hardness Grades American Standard Grade 2 Grade 5 Grade 8 Grade 8 9 Hex Socket Head Metric Number stamped on hardware 5 8 shown 5 8 Allen head screw is a trademark of Holo Krome Co Phillips screw is a registered trademark of Phillips Screw Company Sample Dimensions 1 4 20 x 1 Major Thread Diameter In Fractional Inches Or Screw Number Size Length In Inches Screws and Bolts T...

Page 128: ...24 2 7 16 14 x 1 00 X 6024 8 7 16 14 x 1 25 X 6024 3 7 16 14 x 1 50 X 6024 4 7 16 14 x 2 00 X 6024 11 7 16 14 x 2 75 X 6024 12 7 16 14 x 6 50 X 129 15 1 2 13 x 75 X 129 17 1 2 13 x 1 00 X 129 18 1 2 13 x 1 25 X 129 19 1 2 13 x 1 50 X 129 20 1 2 13 x 1 75 X 129 21 1 2 13 x 2 00 X 129 22 1 2 13 x 2 25 X 129 23 1 2 13 x 2 50 X 129 24 1 2 13 x 2 75 X 129 25 1 2 13 x 3 00 X 129 27 1 2 13 x 3 50 X 129 2...

Page 129: ...3 00 x 160 M931 24200 60 M24 3 00 x 200 Hex Head Bolts Full Thread M933 04006 60 M4 0 70 x 6 M933 05030 60 M5 0 80 x 30 M933 05035 60 M5 0 80 x 35 M933 05050 60 M5 0 80 x 50 M933 06010 60 M6 1 00 x 10 M933 06012 60 M6 1 00 x 12 M933 06014 60 M6 1 00 x 14 M933 06016 60 M6 1 00 x 16 M933 06020 60 M6 1 00 x 20 M933 06025 60 M6 1 00 x 25 M933 06030 60 M6 1 00 x 30 M933 06040 60 M6 1 00 x 40 M933 06050...

Page 130: ...M12 1 75 Spiralock M982 12 80 M12 1 75 Elastic Stop M982 14 60 M14 2 00 Elastic Stop M6923 16 80 M16 2 00 Spiralock M982 16 80 M16 2 00 Elastic Stop M934 18 80 M18 2 5 Standard M982 18 60 M18 2 50 Elastic Stop M934 20 80 M20 2 50 Standard M982 20 80 M20 2 50 Elastic Stop M934 22 60 M22 2 50 Standard M934 24 80 M24 3 00 Standard M982 24 60 M24 3 00 Elastic Stop M934 30 80 M30 3 50 Standard Washers ...

Page 131: ......

Page 132: ...O Kohler Wisconsin 53044 Phone 920 565 3381 Fax 920 459 1646 For the nearest sales service outlet in the US and Canada phone 1 800 544 2444 KohlerPower com Kohler Power Systems Asia Pacific Headquarters 7 Jurong Pier Road Singapore 619159 Phone 65 6264 6422 Fax 65 6264 6455 ...

Reviews: