7
114014-2-
AA
(9537)
Kohler Co., Kohler WI
9.
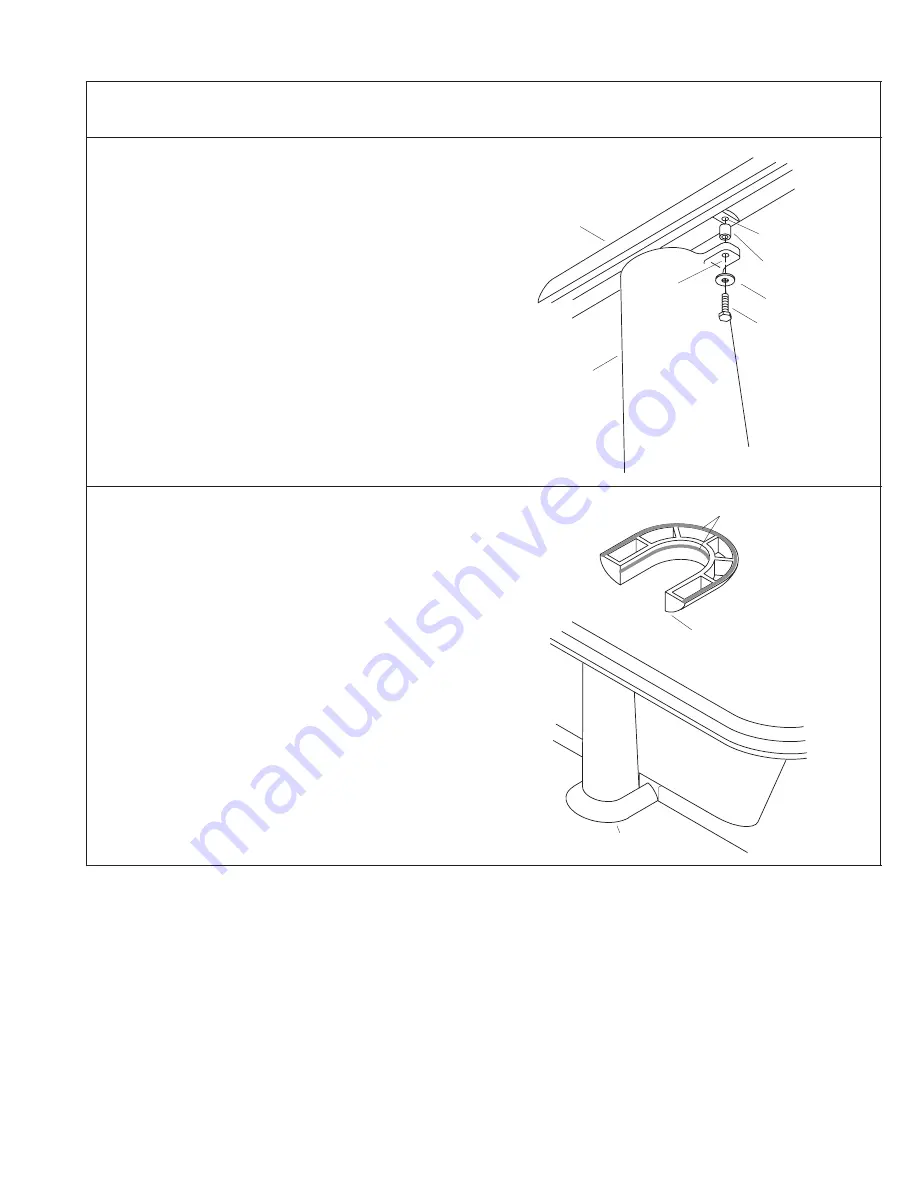
OPTIONAL K-8740 DRAIN SHROUD INSTALLATION
Slip a flat washer onto each of the hex-head screws
provided. Insert one of these screw/washer
combinations up through the hole in one of the drain
shroud tabs. Set a plastic spacer over the screw so the
spacer rests upon the top of the drain shroud tab.
Carefully lift the drain shroud up against the underside
of the bath rim, and start to thread the screw into the
corresponding threaded hole in the rim. Repeat this step
for the second screw.
Press the drain shroud tightly against the apron wall, and
use a 7/16” ratchet or combination wrench to tighten
each screw until the drain shroud is secure.
NOTE: Do not overtighten the screws.
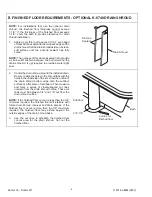
Bath
Plastic Spacer
Flat Washer
Hex-head
Screw
Rim Hole
Drain Shroud
Tab
Apply a thin bead of silicone sealant to the bottom,
outside edge of the shroud base. Apply a second thin
bead of silicone sealant close to the bottom of the inside
surface of the shroud base.
Carefully install the shroud base at the bottom of the
drain shroud so there is a small, uniform gap between
the drain shroud and the shroud base.
Allow the silicone sealant to cure before cleaning the
drain shroud and shroud base.
Shroud Base
Silicone Sealant
Shroud Base


