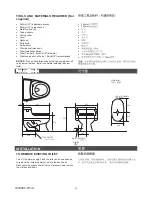
Fig.#2
2
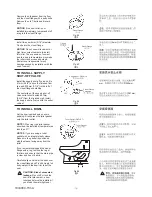
Fig.#3
3
Fig.#4
4
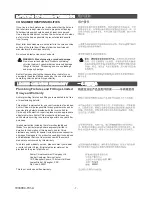
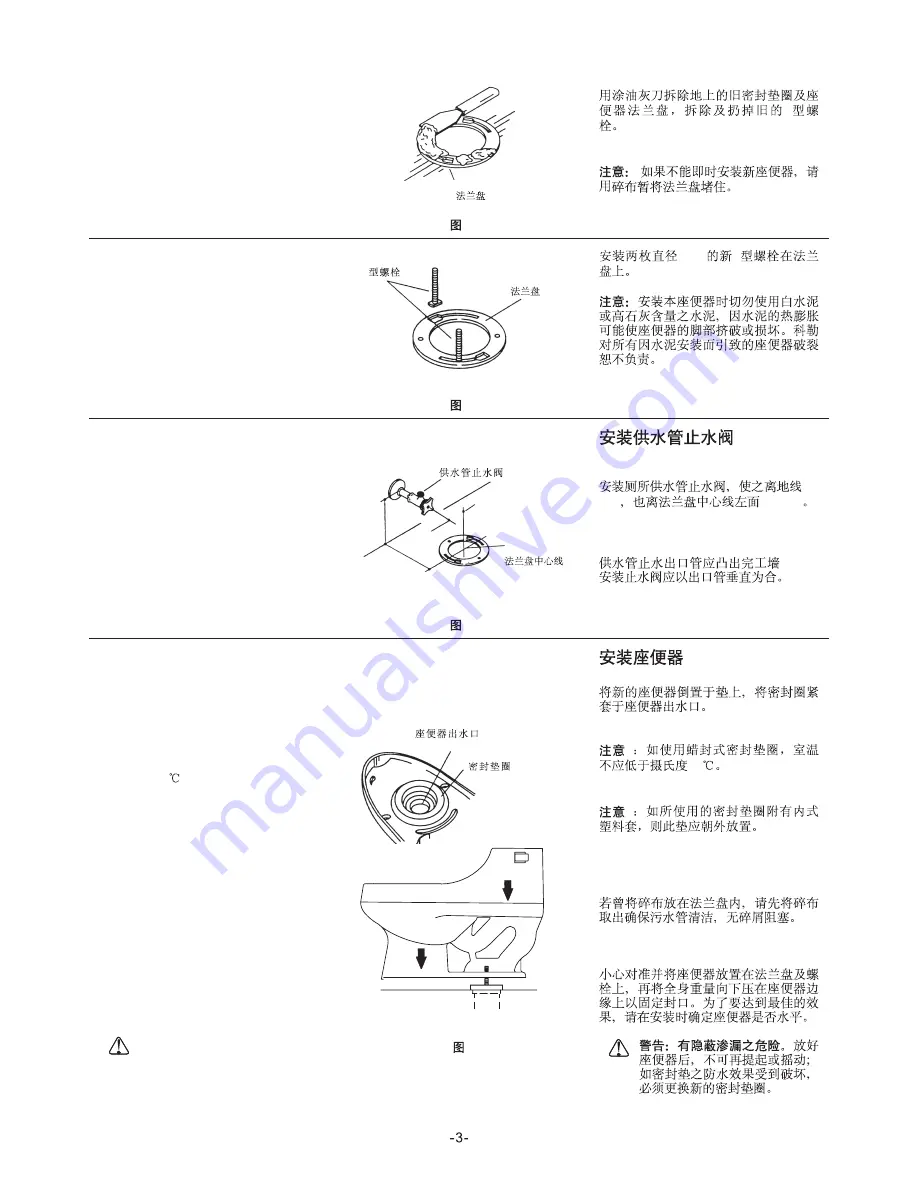
Remove the old gasket from the floor
and the closet flange with a putty knife.
Remove the old T-bolts and discard
them.
if the new toilet is not
installed immediately, temporarily stuff
a rag into the closet flange.
NOTICE:
T
Install two new 8mm (5/16") diameter
T-bolts into the closet flange.
Do not use white cement or
high lime content cements to install
this toilet. The expansion of cement
due to a rise in temperature may make
the toilet crack or cause damage.
Kohler is not responsible for any
damage caused by installation with the
use of cement.
NOTICE:
8mm
T
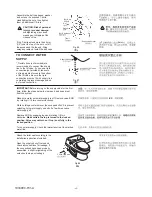
TO INSTALL SUPPLY
SHUT-OFF VALVE
Install the supply shut-off valve so it is
67mm (2-5/8") above the finished floor
line, and 200mm (7-7/8") to the left of
the closet flange centerline.
The centerline of the supply shut-off
valve outlet should extend 67mm
(2-5/8") from the finished wall. Install
the supply shut-off valve with the outlet
vertical.
200mm
67mm;
67
mm
TO INSTALL BOWL
Set the bowl upside down on some
padding. Firmly press the toilet gasket
onto the toilet outlet.
Wax ring type toilet gasket
should not be installed at temperatures
less than 21
.
if you are using a toilet
gasket with an integral plastic sleeve,
make sure the gasket is positioned
with the sleeve facing away from the
toilet.
If you temporarily plugged the closet
flange with a rag, remove the rag at
this time and ensure that the drain pipe
is clear and free of debris.
Carefully align and lower the bowl over
the closet flange and T-bolts. Apply full
body weight to the bowl rim to set the
seal.
Do not lift or rock the
bowl after placement - a new
toilet gasket must be installed if
you break the watertight seal.
NOTE 1:
NOTE 2:
CAUTION: Risk of concealed
leakage:
1
21
2
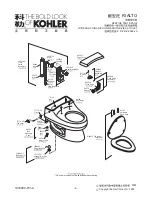
Closet Flange
Closet Flange
T-bolts
T
Supply Shut-Off Valve
Closet Flange
Centerline
200
305
67
Toilet Outlet (OUTLET)
Toilet Gasket
Fig.#5
5
1033004-T01-A

