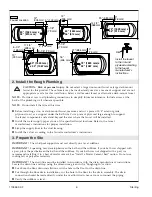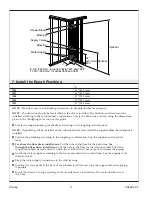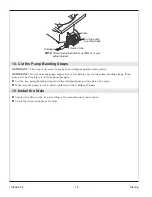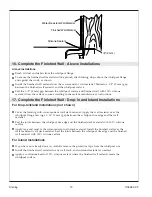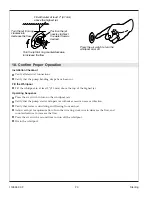
7. Install the Rough Plumbing
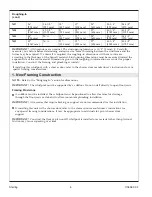
C
7626
16
″
(406 mm)
7627
18
″
(457 mm)
7628
21
″
(533 mm)
7630
18
″
(457 mm)
7631
21
″
(533 mm)
NOTE:
Provide access to all plumbing connections to simplify further maintenance.
NOTE:
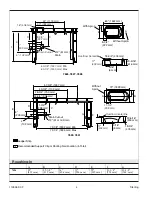
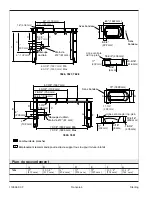
The drain line should be located before the unit is installed. The overflow and drain must be
installed according to the manufacturer’s instructions. Locate the drain line and trap using the dimensions
given in the
″
Roughing-In
″
section of this guide.
Locate the rough plumbing for the drain according to the roughing-in dimensions.
NOTE:
If plumbing will be installed on the unfinished stud wall, install the supplies
after
the whirlpool is
installed.
Position the plumbing according to the roughing-in information. Cap the supplies and check for
leaks.
For above-the-floor drain installations:
Cut the hole in the floor for the drain line.
For
through-the-floor drain installations:
Cut the hole in the floor for the drain assembly. The drain
connection should be made directly under the overflow drain. Leave room to connect the piping.
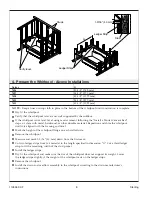
Install the water supplies according to the faucet manufacturer’s instructions. Cap the supplies and
check for leaks.
Strap the water supply connections to the stud framing.
Provide an access panel at the back of the plumbing wall for servicing the supply and waste piping,
if possible.
Install the shower valving according to the manufacturer’s instructions. Do not install the trim at
this time.
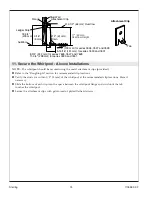
Optional
Optional
Blocking
Blocking
Supply Valves
Water Supply
Shower Elbow
24"
(610 mm)
Min
8-3/4" (222 mm) for series 7626, 7627 and 7628
11-3/4" (298 mm) for series 7630 and 7631
C
Sterling
11
1105582-2-F


