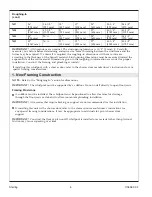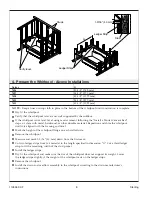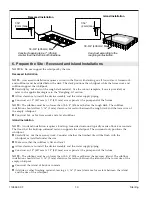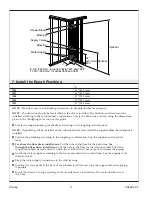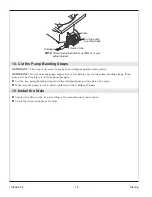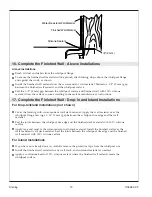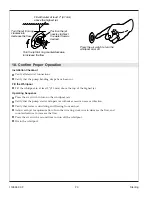
4. Prepare the Whirlpool - Alcove Installations
Series
G
7626
30-1/4
″
(768 mm)
7627
34-1/4
″
(870 mm)
7628
40-1/4
″
(1022 mm)
7630
34-1/4
″
(870 mm)
7631
40-1/4
″
(1022 mm)
NOTE:
Keep a liner or drop cloth in place in the bottom of the whirlpool until construction is complete.
Dry fit the whirlpool.
Verify that the whirlpool is level and well supported by the subfloor.
If the whirlpool is not level, level using mortar cement following the
″
Install a Mortar Cement Bed
″
steps, or shim with metal, hardwood, or other durable material. Reposition and shim the whirlpool
until it is aligned with the framing and level.
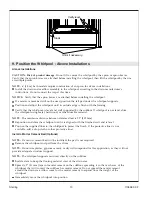
Mark the height of the whirlpool flange on each walled side.
Remove the whirlpool.
Measure and mark 1-9/16
″
(40 mm) down from the first mark.
Cut two ledger strips from 1x4 material to the length specified in dimension
″
G.
″
Cut a third ledger
strip to fit the remaining width of the stud pocket.
Install the ledger strips.
Dry fit the whirlpool and make sure the rim of the whirlpool does not support its weight. Lower
the ledger strips slightly if the weight of the whirlpool rests on the ledger strips.
Remove the whirlpool.
Install the drain and overflow assembly to the whirlpool according to the drain manufacturer’s
instructions.
Stud
Studs
Verify level.
Ledger Strip
Ledger Strips
G
1-9/16" (40 mm)
1105582-2-F
8
Sterling


