background image

5

35 590 02 Rev. C

KohlerPower.com

EN

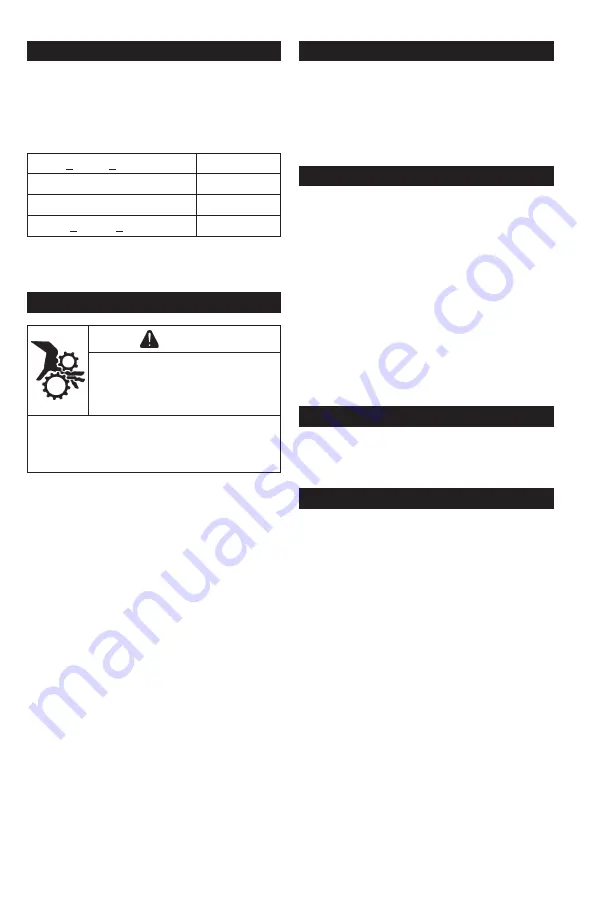
Cold Weather Starting

NOTE:  Ensure water in pump body is not 

frozen before starting.

When starting pump in low ambient 

temperatures, allow engine to idle before 

increasing flow of liquid. Follow chart for 

temperature and time.

< -4° F (< -20° C)

5 minutes

-4° to 14° F (-20° to -10° C)

2 minutes

14° to 23° F (-10° to -5° C)

1 minutes

> 41° F (> 5° C)

20 seconds

1. Use proper oil for temperature expected.
2. Use fresh winter grade fuel. Winter grade 

fuel has higher volatility to improve starting.

Operation


WARNING

Rotating Parts can cause severe 

injury.
Stay away while pump is in 

operation.

Keep hands, feet, hair, and clothing away 

from all moving parts to prevent injury. Never 

operate pump with covers, shrouds, or 

guards removed.

NOTE:  If there is no flow of liquid through 

pump, stop it and check suction circuit 

(suction strainer (N) and pipes).

NOTE:  Avoid placing any flammable materials 

near exhaust outlet during operation.


Do not place any material on pump 

during operation.

Pump controls flow of liquid in accordance with 

its running speed. Pump engine is equipped 

with a lever (F) that enables flow from pump to 

be controlled.
Flow from pump also depends on suction 

and discharge elevation heads and on quality 

of liquid that is being pumped (clean/muddy 

water).

Angle of Operation

Do not operate this engine exceeding maximum 

angle of operation; see specification table. 

Engine damage could result from insufficient 

lubrication.

Stopping

1. Move lever (F) to stop position.
2. Pump stops.
3. Disconnect suction and discharge pipes and 

allow liquid to flow out.

4. If pump is not used again on same day, rinse 

it out.

Rinsing

After pump has stopped and cooled down.
1. Fill pump body with clean water via pump 

discharge port (B) or through pump filler cap 

(E).

2. Slowly pull on recoil starter handle (I) several 

times until resistance is encountered and 

then allow it to return gently.

3. Unscrew and remove pump drain plug (G) 

from pump and allow water to flow out.

4. Screw pump drain plug (G) back into 

position.

5. Repeat operation if necessary.
6. Clean suction strainer (N), remove any dirt if 

necessary and rinse with clean water.

Engine Speed

NOTE:  Do not tamper with governor setting to 

increase maximum engine speed. 

Overspeed is hazardous and will void 

warranty.

High Altitude Operation

If this engine is operated at an altitude of 4000 

ft. (1219 meters) or above, a high altitude 

carburetor kit is required. To obtain high altitude 

carburetor kit information or to find a Kohler 

authorized dealer, visit KohlerEngines.com or 

call 1-800-544-2444 (U.S. and Canada).
This engine should be operated in its original 

configuration below 4000 ft. (1219 meters).

Operating this engine with the wrong engine 

configuration at a given altitude may increase 

its emissions, decrease fuel efficiency and 

performance, and result in damage to the 

engine.

Summary of Contents for WA 2.0

Page 1: ...ead all safety precautions and instructions carefully before operating equipment Ensure unit is stopped and level before performing any maintenance or service Record product information to reference when ordering parts or obtaining warranty coverage Specification Serial Number Purchase Date EN ESS ...

Page 2: ...an cause severe injury Stay away while pump is in operation Keep hands feet hair and clothing away from all moving parts to prevent injury Never operate pump with covers shrouds or guards removed CAUTION Electrical Shock can cause injury Do not touch wires while engine is running Never operate pump in rain or snow Never touch pump with wet hands or electrical shock will occur Safety Precautions WA...

Page 3: ... Cap F Lever G Pump Drain Plug H Oil Drain Plug I Recoil Starter Handle J Air Cleaner Cover K Paper Element L Foam Element M Air Cleaner Base N Suction Strainer O Clamp P Coupling Q Rubber Seal R Hose Joint S Push Here T Cover Latch U Air Cleaner Base V Paper Element W Air Cleaner Cover X Wing Nut Y Precleaner Z Dual Element Air Cleaner WA 2 0 WA 3 0 WB 2 0 WB 3 0 X U V W Y Z ...

Page 4: ...G Rotating Parts can cause severe injury Stay away while pump is in operation Keep hands feet hair and clothing away from all moving parts to prevent injury Never operate pump with covers shrouds or guards removed NOTE Never attempt to operate pump without priming water or pump will overheat Extended dry operation will destroy mechanical seal If unit has been operated dry stop engine immediately a...

Page 5: ...ngine exceeding maximum angle of operation see specification table Engine damage could result from insufficient lubrication Stopping 1 Move lever F to stop position 2 Pump stops 3 Disconnect suction and discharge pipes and allow liquid to flow out 4 If pump is not used again on same day rinse it out Rinsing After pump has stopped and cooled down 1 Fill pump body with clean water via pump discharge...

Page 6: ...n securely Change Oil Change oil while engine is warm 1 Clean area around oil fill cap dipstick C and oil drain plug H 2 Remove oil drain plug H and oil fill cap dipstick C Drain oil completely 3 Reinstall oil drain plug H Torque to 13 ft lb 17 6 N m Maintenance Instructions All maintenance operations are to be carried out as described in maintenance table Their frequency is given for your informa...

Page 7: ...il fill cap dipstick C and tighten securely 6 Dispose of used oil in accordance with local ordinances Oil Sentry if equipped This switch is designed to prevent engine from starting in a low oil or no oil condition Oil Sentry may not shut down a running engine before damage occurs In some applications this switch may activate a warning signal Read your equipment manuals for more information Assembl...

Page 8: ...l To prevent over heating clean screens cooling fins and other external surfaces of engine Avoid spraying water at wiring harness or any electrical components See Maintenance Schedule Repairs Service Parts We recommend that you use a Kohler portable dealer for all maintenance service and replacement parts for engine To find a Kohler portable dealer visit KohlerPower com or call 1 800 544 2444 U S ...

Page 9: ...riming Fault Low Flow Air cleaner blocked Fuel level too low Blocked fuel filter Fuel supply blocked or leaking Level of liquid being pumped is too low Water level too low in pump body Intake is blocked Half couplings not making an airtight connection Inadequate tightening of pump drain plug G Air in suction circuit Engine lever F set to slow position Pipe too long or bent Suction side is too high...

Page 10: ...n 287 5 gal min 1 088 3 l min Maximum Suction Head 26 ft 8 m 85 ft 26 m Maximum Lift Head Engine Specifications Bore 2 7 in 68 mm Stroke 2 1 in 54 mm Displacement 12 cu in 196 cc Oil Capacity Refill 0 63 U S qt 0 60 L Spark Plug Gap 0 03 in 0 76 mm Maximum Angle of Operation full oil level 25 Fuel Gasoline Fuel Tank Capacity 2 0 qt 2 1 L Exceeding maximum angle of operation may cause engine damage...

Page 11: ...o screws Torque to 221 in lb 25 N m Install Leg Kit Leg Kit NOTE Tilt unit so fuel tank cap is upward to ensure no fuel leakage NOTE A clamping device or an assistant to hold assembly while installing kit will make process easier Leg kit includes 2 legs and mounting hardware Leg kit and wheel kit are designed to be installed together 2 leg kits can be combined for a 4 legged configuration 1 Place ...

Page 12: ...gn handle with holes on frame 2 Place washers between handle and frame while installing screw 3 Thread nut to screw Torque to 4 in lb 0 5 N m Install Isolator Kit Isolator Kit Isolator Kit includes 4 isolators and mounting hardware 1 Align isolator holes under holes of frame 2 While holding in this position install screws 3 Thread nuts to screws Torque to 221 in lb 25 N m ...

Page 13: ... y precauciones de seguridad antes de poner el equipo en funcionamiento Asegúrese de que la unidad está parada y nivelada antes de realizar tareas de mantenimiento o reparación Registre la información del producto con el fin de consultarla para realizar pedidos de piezas o para obtener la cobertura de la garantía Especificación Número de serie Fecha de compra ...

Page 14: ...ones graves Manténgase alejado de la bomba cuando esté en funcionamiento Para evitar lesiones mantenga las manos los pies el pelo y la ropa alejados de las piezas en movimiento No ponga nunca la bomba en funcionamiento con las cubiertas revestimientos térmicos o protecciones desmontados PRECAUCIÓN Las descargas eléctricas pueden provocar lesiones No toque los cables con el motor en funcionamiento ...

Page 15: ...enaje de la bomba H Tapón de drenaje del aceite I Manivela del motor de arranque de retroceso J Tapa del filtro de aire K Filtro de papel L Elemento de espuma M Soporte del filtro de aire N Filtro de succión O Abrazadera P Acople Q Sello de goma R Junta del tubo S Presionar aquí T Cierre de la tapa U Soporte del filtro de aire V Filtro de papel W Tapa del filtro de aire X Tuerca mariposa Y Prefiltro ...

Page 16: ...as pueden causar lesiones graves Manténgase alejado de la bomba cuando esté en funcionamiento Para evitar lesiones mantenga las manos los pies el pelo y la ropa alejados de las piezas en movimiento No ponga nunca la bomba en funcionamiento con las cubiertas revestimientos térmicos o protecciones desmontados NOTA Nunca intente operar la bomba sin el agua de cebado o la bomba se calentará La operaci...

Page 17: ...motor si supera el ángulo máximo de funcionamiento consulte la tabla de especificaciones El motor puede dañarse como resultado de una lubricación insuficiente Parada 1 Mueva la palanca F hasta la posición STOP 2 La bomba se para 3 Desconecte los tubos de succión y descarga y permita que el líquido fluya hacia afuera 4 Si no va a usar la bomba de nuevo ese día enjuáguela Enjuague Después que la bom...

Page 18: ...l cuello de llenado 4 Vuelva a colocar la varilla de nivel C o el tapón de llenado C y apriete firmemente Cambio del aceite Cambie el aceite con el motor caliente 1 Limpie el área que rodea el tapón de llenado de aceite varilla C y el tapón de drenaje H 2 Quite el tapón de drenaje H y el tapón de llenado con varilla C Drene el aceite por completo Instrucciones de mantenimiento Todas las operacione...

Page 19: ...l acople P Descarga 1 Conecte el filtro de succión N a un extremo del tubo y sujete con la abrazadera O 2 Introduzca el extremo menor de la junta del tubo R por el extremo mayor del acople P Conecte el otro extremo del tubo a la junta del tubo R y al acople P y sujete con la abrazadera O 3 Coloque el sello de goma Q en el extremo de la junta del tubo R y conecte la junta del tubo R al puerto de de...

Page 20: ...das No modifique la bomba Coloque la bomba en un lugar donde no la vayan a tocar los peatones ni los niños Asegúrese de transportar la bomba por sus asas de transporte únicamente Es esencial una refrigeración adecuada Para evitar el sobrecalentamiento limpie los filtros los álabes de refrigeración y demás superficies externas del motor Evite rociar agua al haz de cables o a cualquier componente el...

Page 21: ...a del cebado automático Flujo bajo Filtro de aire bloqueado Nivel de combustible muy bajo Filtro de combustible bloqueado Suministro de combustible bloqueado o con fuga El nivel de líquido que se está bombeando es muy bajo El nivel del agua es muy bajo en el cuerpo de la bomba La entrada está bloqueada Los semicoples no hacen una conexión hermética Apretamiento inadecuado del tapón de drenaje de l...

Page 22: ...6 ft Elevación máxima del cabezal 26 m 85 ft Especificaciones del motor Orificio 68 mm 2 7 in Carrera 54 mm 2 1 in Desplazamiento 196 cc 12 cu in Capacidad de aceite rellenado 0 60 L 0 63 U S qt Abertura de bujía 0 76 mm 0 03 in Ángulo de funcionamiento máximo con nivel máximo de aceite 25 Combustible Gasolina Capacidad del tanque de combustible 2 1 L 2 0 qt Si se excede el ángulo máximo de funcio...

Page 23: ...in lb Instalación del kit de patas Kit de patas NOTA Incline la unidad de manera que el tapón del tanque de combustible quede hacia arriba para que no se produzcan fugas de combustible NOTA Un dispositivo de sujeción o un ayudante que sujete el conjunto durante la instalación del kit facilitarán el proceso El kit de patas incluye 2 patas y herramienta de montaje Los kits de patas y ruedas están di...

Page 24: ...azo y el bastidor cuando instale el tornillo 3 Enrosque la tuerca en el tornillo Aplique un par de apriete de 0 5 Nm 4 in lb Instalación del kit del aislador Kit de aislador El kit de aislantes incluye 4 aislantes y los elementos de montaje 1 Alinee los orificios del aislante bajo los orificios del bastidor 2 Mientras sujeta en esta posición instale los tornillos 3 Enrosque las tuercas en los torn...

Reviews: