AUTO PICLE-S
19
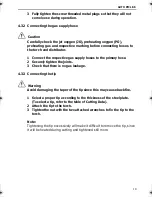
3 Fully tighten the screw-threaded metal plugs so that they will not
come loose during operation.
4.3.2 Connecting the gas supply hose
Caution
Carefully check the jet oxygen (JO), preheating oxygen (PO),
preheating gas and respective marking before connecting hoses to
the torch and distributor.
1 Connect the respective gas supply hoses to the primary hose.
2 Securely tighten the joints.
3 Check that there is no gas leakage.
4.3.3 Connecting the tip
Warning
Avoid damaging the taper of the tip since this may cause backfire.
1 Select a proper tip according to the thickness of the steel plate.
(To select a tip, refer to the table of Cutting Data).
2 Attach the tip to the torch.
3 Tighten the nut with the two attached wrenches to fix the tip to the
torch.
Note:
Tightening the tip excessively will make it difficult to remove the tip, since
it will be heated during cutting and tightened still more.
Auto Picle-S.book Page 19 Thursday, April 11, 2002 11:15 AM
Summary of Contents for AUTO PICLE-S
Page 1: ...AUTO PICLE S REMOTE CONTROL GAS MOTORIZED PIPE CUTTING MACHINE KOIKE SANSO KOGYO CO LTD...
Page 11: ...AUTO PICLE S 10...
Page 13: ...AUTO PICLE S 12...
Page 25: ...AUTO PICLE S 24...
Page 31: ...AUTO PICLE S 30...
Page 37: ...AUTO PICLE S 36...
Page 39: ...AUTO PICLE S 38 8 2 Assembly drawing figure 8 2...
Page 40: ...AUTO PICLE S 39 9 Parts list 9 1 Body unit...
Page 43: ...AUTO PICLE S 42 9 2 Driving unit...
Page 46: ...AUTO PICLE S 45 9 3 Electrical and gas unit...
Page 49: ...AUTO PICLE S 48 9 4 Guide rail...
Page 51: ...AUTO PICLE S 50...

