9
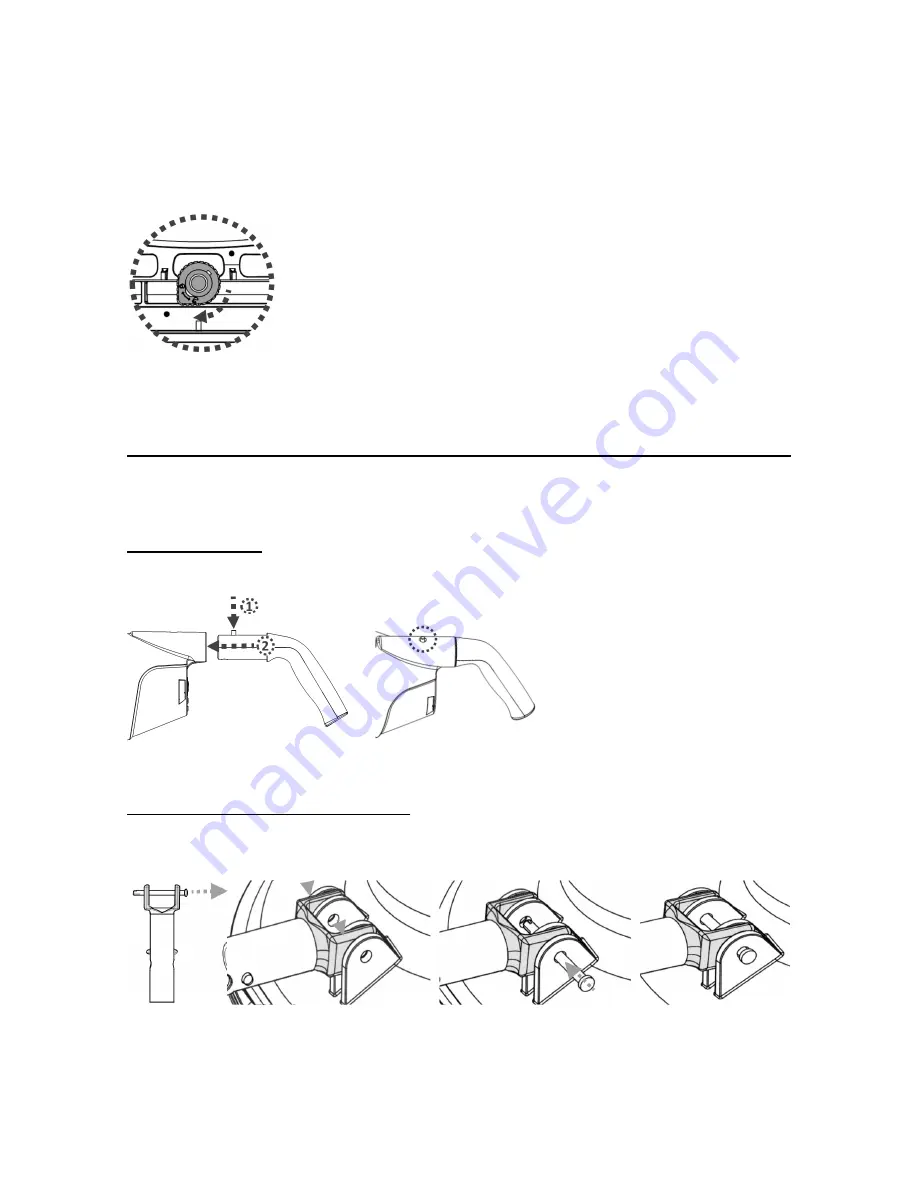
To re-position the transparent case (with the filter cone inside) to the rear body, make
sure the locking knob on both sides is turned to the unlock position. Align the raised
arch on both sides of the transparent case with the locking knobs and then turn the
knob clockwise until it points to the red marking to secure the assembly.
Attention: The case has one correct position only. The water-draining valve must be
facing the bottom when holding the cleaner horizontally by the handle.
FACT: Rechargeable lithium-Ion battery is classified as a consumable item. It has a
limited life and will gradually lose its capacity to hold a charge. Therefore, running
time of the pool vacuum will gradually reduce through repeated charging and
discharging in operation.
NOTE: Let the pool vacuum rest for around 30 to 40 minutes before charging it again.
Set-Up Before Use
Handle assembly
Insert the handle into the pool vacuum as shown, until the side pin on the handle is
secured to the handle’s locking hole on the rear body.
To release the handle, press down on the side pin and pull out the handle.
Telescopic pole connector assembly
Pull to detach the locking pin from the pole connector. Align the holes on the front
arms of the pole connector to the holes of the hinge on the transparent lid. Insert the
locking pin through all the holes in order to secure the pole connector on the lid.
Summary of Contents for Telsa 80
Page 48: ......


