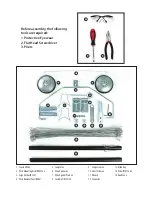
STEP 1: Assembling the Cage
STEP 2: Assembling the Handle
Insert one coupler at the end of the handle. Insert the other handle into the end of coupler. Tighten using the allen key provided.
Insert the second coupler at the end of the handle and attach the connector. Tighten with the allen key.
The numbered white sticker on the mounting disk helps to indicate the next available slot. Insert one wire (R101) as shown into
slot #1 on the mounting disk. You will hear it click into place.
DO NOT INSERT THE WIRE UPSIDE DOWN.
Being careful not to
miss any slots, continue inserting wires in numeric order until all 60 slots are full.
(For pickleball, insert wires into EVERY 2ND SLOT).
Take the second disk, face the silver section of each disk towards each other, then insert the other end of the wires into the 60 slots in
numeric order. Remove the white stickers and store the 2 extra wires in case damaged wires need to be replaced in the future.
X
Take the centre tensioning bar and push one end into one of the four slits in the centre of the wire mounting disc.
Repeat on the other wire mounting disc.


