CONTROL AND ADJUSTMENT OF THE TRACK-SHOE TENSION
20-36
TESTING AND ADJUSTMENTS
CONTROL AND ADJUSTMENT OF THE TRACK-SHOE TENSION
1. Test
H
Test conditions:
.
Solid, flat ground.
.
Working equipment: resting on the ground.
1 -
Only for machines with rubber track-shoes
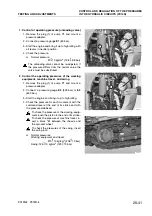
Move the machine backwards and forwards until
the track-shoe joint is uppermost and halfway bet-
ween the sprocket wheel and the track-shoe stret-
cher wheel.
2 - Rotate the revolving frame 90ë towards the side of
the track-shoe to be checked.
3 - Close the bucket, bring the arm perpendicular to
the ground and rest the bucket on the ground.
4 - Force the boom downwards until the track-shoe to
be checked is completely raised.
5 - Measure the distance "
A
" between the track-shoe
race and the lower central rollers.
H
Standard measurements
Model
RUBBER TRACK-
SHOE
STEEL TRACK-SHOE
PC12R
A=10 ± 15 mm
A=10 ± 20 mm
PC15R
A=10 ± 15 mm
A=10 ± 20 mm
2. Adjustment
If the track-shoe tensions do not fall within permissible
limits, adjust them as follows:
H
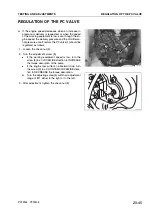
On completion of the adjustment and before en-
gaging the greasing pump
G1
, thoroughly clean
the grease nipple and surrounding area.
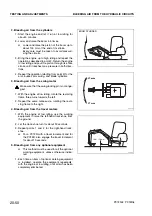
1 - If the tension is too low.
Inject grease through the grease nipple (1) using
the grease pump
G1
.
H
If difficulties are found when injecting the
grease, move the machine slowly backwards
and forwards over a short distance.
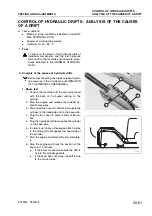
2 - If the tension is too high.
Slowly loosen the union (2) in order to let grease
out of the valve.
The grease in the stretcher cylinder is under
pressure and could seriously injure the ope-
rator. For this reason the valve should not
be loosened for more than one turn.
H
If the grease does not come out easily,
move the machine slowly backwards
and forwards over a short distance.
PC12R-8 PC15R-8
RKP04690
100
÷
150 mm
RKPA0220
RKPA0230
"A"
"A"
RKPA0240
2
1
Summary of Contents for PC12R-8 MISTRAL
Page 1: ......
Page 2: ...40 28 PC15R 8 ...
Page 4: ...00 2 PC12R 8 PC15R 8 ...
Page 17: ...GROUP 10 ...
Page 18: ...40 28 PC15R 8 ...
Page 30: ...10 12 PC12R 8 PC15R 8 PAGE INTENTIONALLY LEFT BLANK ...
Page 32: ...10 14 PC12R 8 PC15R 8 PAGE INTENTIONALLY LEFT BLANK ...
Page 34: ...10 16 PC12R 8 PC15R 8 PAGE INTENTIONALLY LEFT BLANK ...
Page 36: ...10 18 PC12R 8 PC15R 8 PAGE INTENTIONALLY LEFT BLANK ...
Page 38: ...10 20 PC12R 8 PC15R 8 PAGE INTENTIONALLY LEFT BLANK ...
Page 40: ...10 22 PC12R 8 PC15R 8 PAGE INTENTIONALLY LEFT BLANK ...
Page 42: ...10 24 PC12R 8 PC15R 8 PAGE INTENTIONALLY LEFT BLANK ...
Page 44: ...10 26 PC12R 8 PC15R 8 PAGE INTENTIONALLY LEFT BLANK ...
Page 79: ...10 61 PC12R 8 PC15R 8 PAGE INTENTIONALLY LEFT BLANK ...
Page 130: ...10 112 PC12R 8 PC15R 8 PAGE INTENTIONALLY LEFT BLANK ...
Page 132: ......
Page 133: ...GROUP 20 ...
Page 134: ...40 28 PC15R 8 ...
Page 158: ...20 24 PC12R 8 PC15R 8 PAGE INTENTIONALLY LEFT BLANK ...
Page 198: ......
Page 199: ...GROUP 30 ...
Page 200: ...40 28 PC15R 8 ...
Page 283: ...GROUP 40 ...
Page 284: ...40 28 PC15R 8 ...
Page 317: ...40 33 PC12R 8 PC15R 8 PAGE INTENTIONALLY LEFT BLANK ...
Page 324: ......


