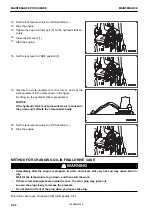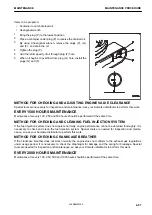
METHOD FOR CHANGING OIL IN HYDRAULIC TANK, CLEANING HYDRAULIC
TANK STRAINER
k
k
WARNING
• The opening and closing (tilting) operation of the floor is necessary when performing this mainte-
nance, and it may cause serious personal injury or death.
Before opening and closing the floor, thoroughly read “METHOD FOR OPENING AND CLOSING
FLOOR UNIT”, and then start the operation, or ask your Komatsu distributor to perform the work.
• Immediately after the engine is stopped, its parts and oil are still very hot and may cause burn in-
jury.
Wait for the temperature to go down, and then start the work.
• When removing the oil filler cap, the oil may spout out. Turn it slowly to release the internal pres-
sure, then remove it carefully.
NOTICE
If the machine is equipped with a hydraulic breaker, the hydraulic oil deteriorates faster than in the nor-
mal bucket digging operation. Accordingly, perform maintenance referring to “MAINTENANCE INTER-
VAL FOR HYDRAULIC BREAKER”.
Hydraulic tank refill capacity: 20 ℓ
Items to be prepared
• Container to catch drained oil
• Socket wrench handle
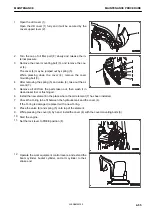
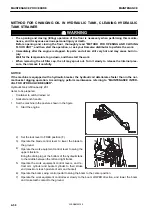
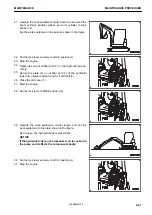
1.
Set the machine in the posture shown in the figure.
1) Start the engine.
2) Set the lock lever to FREE position (F).
3) Operate the blade control lever to lower the blade to
the ground.
4) Operate the work equipment control lever to swing the
upper structure.
Bring the drain plug at the bottom of the hydraulic tank
to the middle between the left and right tracks.
5) Operate the work equipment control levers, and re-
tract arm cylinder and bucket cylinder to their stroke
end (maximum reach posture of arm and bucket).
6) Operate the boom swing control pedal to swing the boom to the center position.
7) Operate the work equipment control lever slowly to the boom LOWER direction, and lower the boom
and make tooth contact to the ground.
MAINTENANCE PROCEDURE
MAINTENANCE
4-58
WENAM00150
Summary of Contents for PC30MR-5
Page 2: ......
Page 66: ...WENAM00150 ...
Page 69: ... 14 Engine rear cover 15 Cooling cover 16 Battery OPERATION GENERAL VIEW 3 3 WENAM00150 ...
Page 325: ...SPECIFICATIONS 5 1 WENAM00150 ...
Page 363: ...REPLACEMENT PARTS 7 1 WENAM00150 ...
Page 370: ...WENAM00150 ...
Page 379: ......
Page 380: ......


