MAINTENANCE
Service procedure
Every 500 hours service
4-49
Clean water separator strainer
0.
WARNING
Engine is at high temperature immediately after the machine has been operated. Wait for engine to
cool down before replacing the filter.
Do not bring fire or sparks near the fuel.
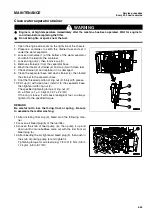
1. Open the engine side cover on the right side of the chassis.
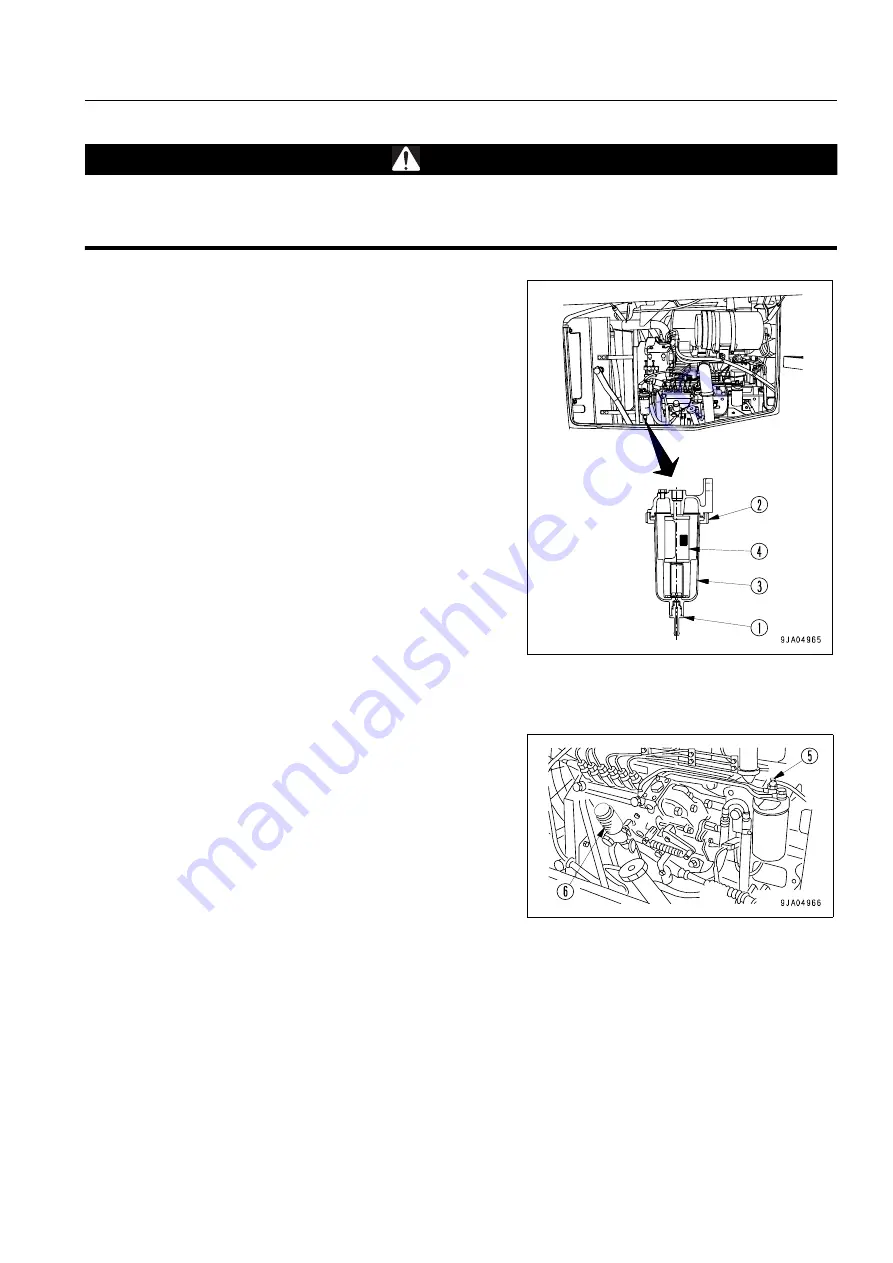
2. Prepare a container to catch the drained fuel and set it
under the water separator.
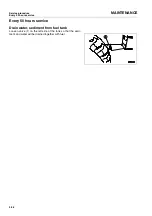
3. Loosen drain valve (1) at the bottom of the water separator
and drain the fuel into the container.
4. Loosen ring nut (2), then remove cup (3).
5. Remove strainer (4) from the separator base.
6. Wash the interior of strainer (4) and cup (3) with clean fuel.
7. Check strainer (4) and replace it if it is damaged.
8. Clean the separator base and wash strainer (4), then install
the strainer to the separator base.
9. Coat the threaded portion of ring nut (2) thinly with grease.
10.Fill cup (3) with clean fuel, install it to the separator base,
then tighten it with ring nut (2).
The specified tightening torque of ring nut (2):
40 ± 3 N·m (4.1 ± 0.3 kgf·m, 29.7 ± 2.2 lbft)
If the ring is loose, it will cause leakage of fuel, so always
tighten it to the specified torque.
REMARK
Be careful not to lose the O-ring, float, or spring. Be sure
to assemble them after washing.
11. After installing filter cup (3), bleed air in the following man-
ner.
12.Loosen air bleed plug (5) of the fuel filter.
13.Loosen the knob of feed pump (6), then pump it up and
down until no more bubbles come out with the fuel from air
bleed plug (5).
14.After bleeding the air, tighten air bleed plug (5), then push in
the knob of priming pump (6) and tighten it.
Tightening torque for air bleed plug: 7.8 to 11.8 N·m (0.8 to
1.2 kgf·m, 5.8 to 8.7 lbft)
Summary of Contents for WA250PT-5H
Page 2: ......
Page 3: ...FOREWORD 11...
Page 16: ...Contents FOREWORD 1 14...
Page 24: ...SAFETY 2 2...
Page 58: ...Precautions with tires SAFETY Precautions when storing tires 2 36...
Page 60: ...OPERATION 3 2...
Page 233: ...TECHNICAL DATA 45...
Page 235: ...TECHNICAL DATA Technical data 5 3...
Page 250: ...Central lubrication system ATTACHMENTS OPTIONS 6 14...
Page 251: ...INDEX 67...
Page 252: ...INDEX 7 2...
Page 255: ...Index 7 5...

