4.9 Service procedure
When required
Maintenance
4-34
WA470-6H – VEAM946100
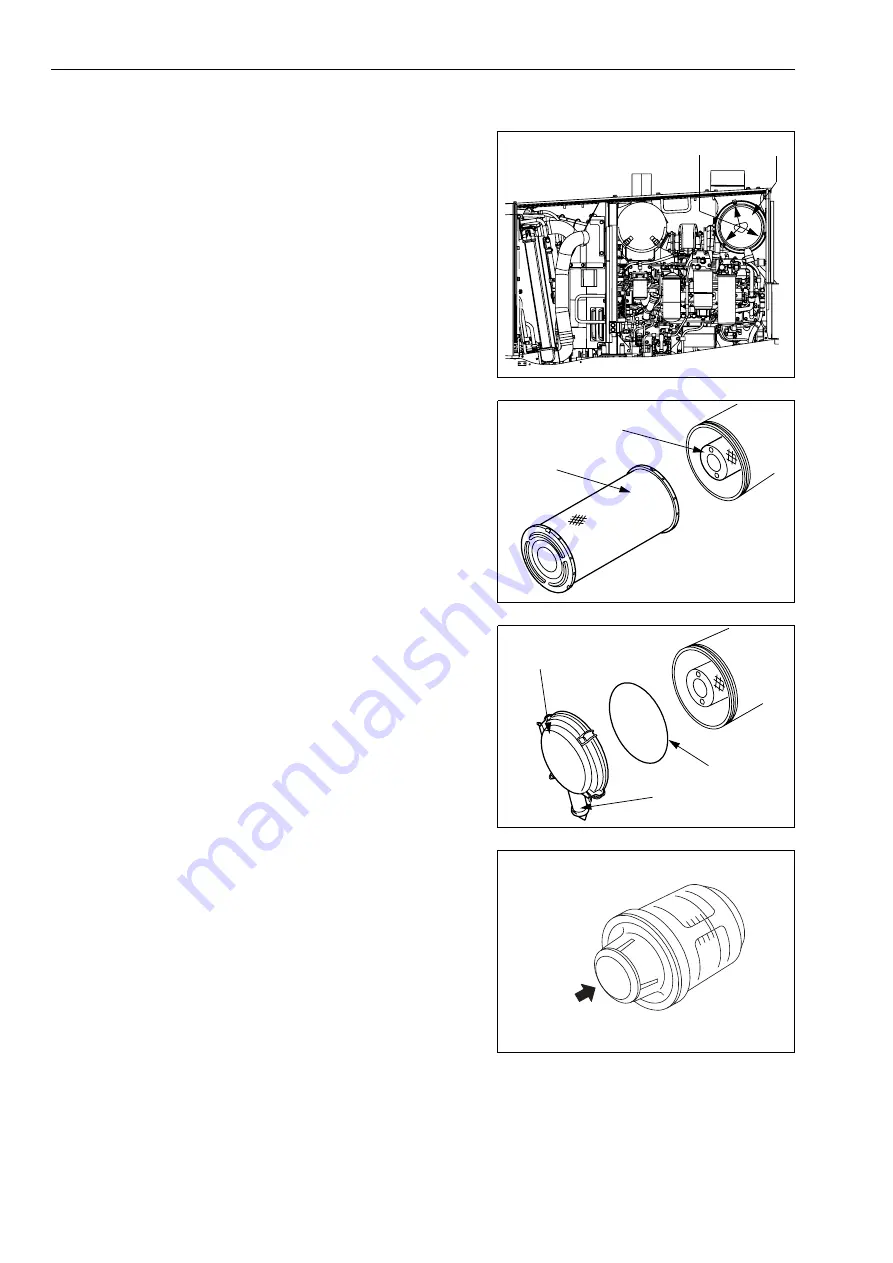
Replacing element
1. Open the engine side cover on the right side of the machine.
2. Remove three clips (2), then remove cover (3).
3. Remove outer element (4).
Do not remove inner element (5) at this time, however.
4. Clean the inside of the air cleaner body and dust cup.
5. Remove inner element (5), then install a new inner element
immediately.
6. Fit new outer element (4), replace O-ring (7) with a new part,
install cover (3), then secure with clips (2).
7. Press the button of dust indicator to return the yellow piston
to its original position.
8. Close the engine side cover on the right side of the machine.
GK047015
2
3
GK032239
4
5
GK032240
7
6
3
GK043050
Summary of Contents for WA470-6 2006
Page 2: ......
Page 3: ...Foreword WA470 6H VEAM946100 1 1 1 Foreword...
Page 22: ...1 5 Contents Foreword 1 20 WA470 6H VEAM946100 7 Index 7 1 7 1 Index 7 2 8 Notes 8 1...
Page 28: ...1 7 CE Conforming equipment Foreword 1 26 WA470 6H VEAM946100...
Page 250: ...3 7 Troubleshooting Operation 3 178 WA470 6H VEAM946100...
Page 340: ...4 9 Service procedure Every 12000 hours service Maintenance 4 90 WA470 6H VEAM946100...
Page 341: ...Technical Data WA470 6H VEAM946100 5 1 5 Technical Data...
Page 343: ...Technical Data 5 1 Technical data WA470 6H VEAM946100 5 3 GK032301 A B H I G C E F D...
Page 348: ...5 4 Limit values for slopes Technical Data 5 8 WA470 6H VEAM946100...
Page 381: ...Index WA470 6H VEAM946100 7 1 7 Index...
Page 387: ...Notes WA470 6H VEAM946100 8 1 8 Notes...
Page 388: ...Notes 8 2 WA470 6H VEAM946100...
Page 389: ...Notes WA470 6H VEAM946100 8 3...
Page 390: ...Notes 8 4 WA470 6H VEAM946100...
Page 391: ...Notes WA470 6H VEAM946100 8 5...
Page 392: ...Notes 8 6 WA470 6H VEAM946100...


