Attachments, Options
6.1 Handling load meter
WA500-6H – VEAM430100
6-5
Method of calculation and display
The load is calculated from the pressure on the lift arm cylinder
(bottom, head), the lift arm angle, and the angle speed.
Even if the bucket holds a load of the same weight, if the center
of gravity is different (in particular, to the front or rear), the pres-
sure on the lift arm cylinder changes. If the calibration is carried
out with the load in the actual load posture, and the load is mea-
sured in the same posture, the measurement will be more accu-
rate. When the load is measured, if the load is to the front of the
position when the load calibration was carried out, the load dis-
play will show a greater weight than the actual load. The more
the load is to the front, the greater the weight display becomes.
The calculation is made once in 1 second, but for the first 0.5
seconds after the lift arm starts to rise, the pressure changes, so
no measurement is made. If the lift arm RAISE operation contin-
ues for 1.5 - 2.5 seconds, the measurement is carried out once;
if it continues for 2.5 - 3.5 seconds, the measurement is carried
out twice; if it continues for more than 3.5 seconds, the mea-
surement is carried out three times. The final calculation is the
average of the measurements. The more measurements that
are made, the more accurate the measurement becomes.
If the lift arm RAISE operation continues for 1.5 - 2.5 seconds
(starting from the point where the lift arm goes above -30°), only
one measurement is made, so the accuracy may be poor. In this
case, the result of the measurement will appear in a flashing dis-
play. If this happens, press the load meter cancel switch and
carry out the measurement again.
6.1.3
Points to remember to ensure high accuracy
Calibration
1. Necessity
The pressure when unloaded and loaded (rated load, 1/2 rated
load) <-> load map is registered in the machine monitor panel.
However, there are variations in each machine, so it is neces-
sary to compensate for the variations in each machine in order
to ensure at accuracy of the load meter. For this reason, there is
a calibration system (unloaded, loaded). Calibration must be
carried out in the following cases.
z
When new machine is delivered
z
When lift arm is changed
z
When machine monitor panel is replaced
z
When the pressure sensor, lift arm angle sensor is replaced
z
Periodically (every 3 months)
Summary of Contents for WA500-6H
Page 2: ......
Page 3: ...Foreword WA500 6H VEAM430100 1 1 1 Foreword...
Page 26: ...1 7 CE Conforming equipment Foreword 1 24 WA500 6H VEAM430100...
Page 254: ...3 7 Troubleshooting Operation 3 188 WA500 6H VEAM430100...
Page 344: ...4 9 Service procedure Every 12000 hours service Maintenance 4 90 WA500 6H VEAM430100...
Page 345: ...Technical Data WA500 6H VEAM430100 5 1 5 Technical Data...
Page 347: ...Technical Data 5 1 Technical data WA500 6H VEAM430100 5 3 GK032301 A B H I G C E F D...
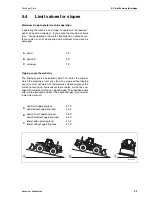
Page 352: ...5 4 Limit values for slopes Technical Data 5 8 WA500 6H VEAM430100...
Page 401: ...Index WA500 6H VEAM430100 7 1 7 Index...
Page 407: ...Notes WA500 6H VEAM430100 8 1 8 Notes...
Page 408: ...Notes 8 2 WA500 6H VEAM430100...
Page 409: ...Notes WA500 6H VEAM430100 8 3...
Page 410: ...Notes 8 4 WA500 6H VEAM430100...
Page 411: ...Notes WA500 6H VEAM430100 8 5...
Page 412: ...Notes 8 6 WA500 6H VEAM430100...


