


MAINTENANCE
SERVICE PROCEDURE
4-37
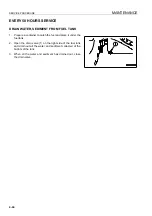
BLEEDING AIR FROM HYDRAULIC TANK
4
After replacing oil and filter element or cleaning strainer, bleed the air from the circuit.
When changing the oil in the hydraulic tank, or removing the piston pump, or removing the piping of the piston
pump, bleed the air in the following way after assembling.
After bleeding air from piston pump, bleed air from hydraulic circuit.
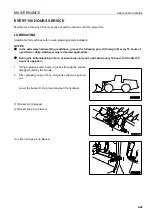
BLEEDING AIR FROM PISTON PUMP
NOTICE
If the air is not bleed completely, the piston pump may be damaged, so always carry out the air bleeding
operation correctly.
Before bleeding the air from the piston pump, check that the hydraulic is filled with oil up to the top of the sight
gauge. (If the oil level is low, add oil.) The cap of the hydraulic tank remains removing, until the air bleeding of the
piston pump finishes.
Leave the hydraulic tank cap off until the air is completely bled from the piston pump.
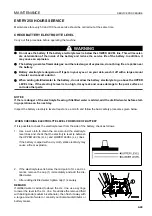
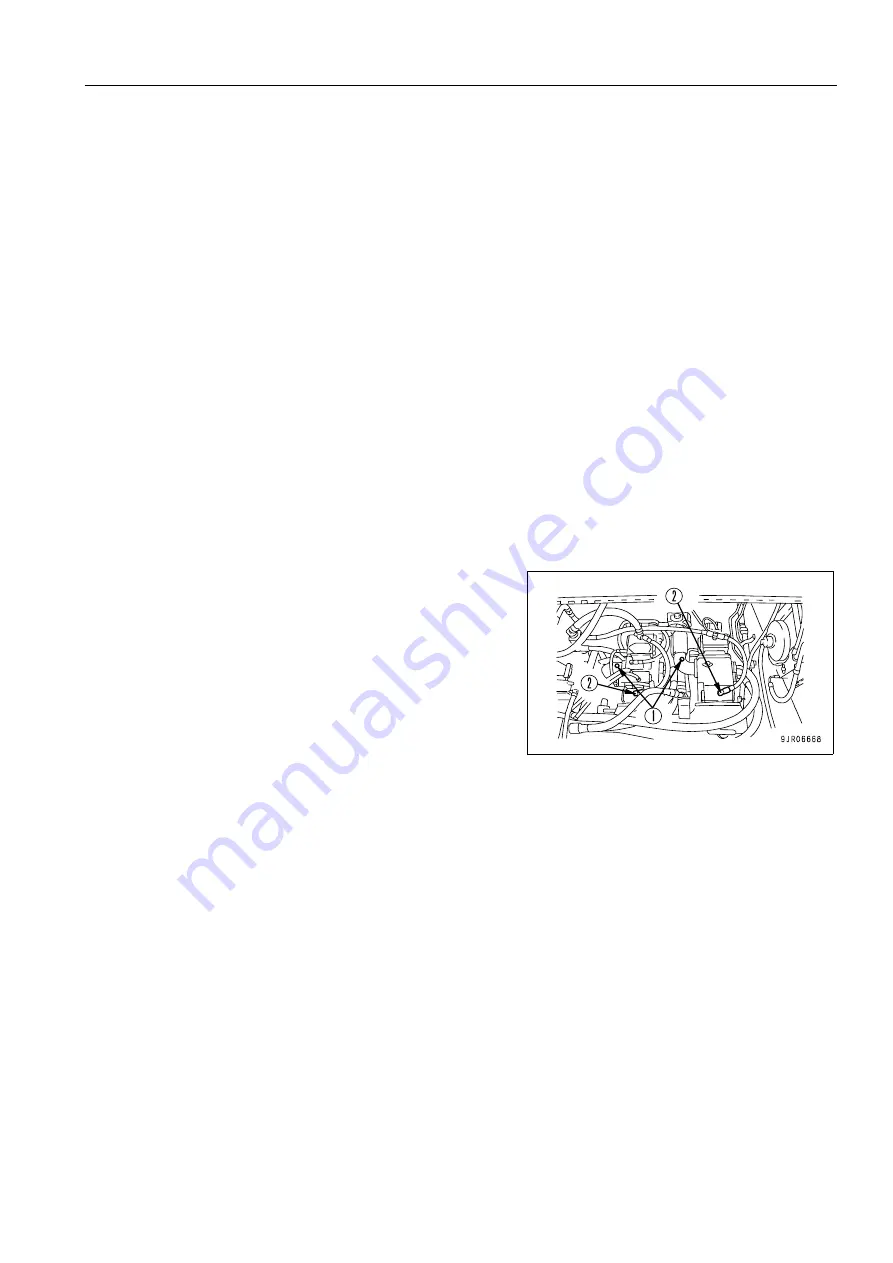
1.
Before starting up the engine, loosen plug (1) installed
above the tube on the suction side of the piston pump.
There is a plug on each pump, so loosen all 3 plugs.
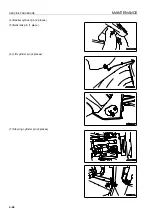
2.
Tighten plug (1) after confirming that air has been com-
pletely bled and oil begins to run out of plug (1).
3.
Keep plug (1) tightened for 10 minutes to allow the pump to
be filled with oil.
4.
Loosen plug (2) installed on the elbow in the upper part of
the piston pump.
There is a plug on each pump, so loosen all 3 plugs.
5.
Tighten plug (2) after confirming that air has been completely bled and oil begins to run out of plug (2).
6.
Start the engine and run for approx. 5 minutes at low idling.
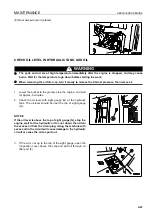
7.
Loosen plug (2) installed on the elbow in the upper part of the piston pump.
8.
Tighten plug (2) after confirming that air has been completely bled and oil begins to run out of plug (2).
9.
Stop the engine.
10. Check the oil level. If the oil level is low, add oil to the specified level. For details, see “CHECK OIL LEVEL IN
Summary of Contents for WA800-3E0
Page 2: ......
Page 3: ...FOREWORD 11...
Page 27: ...SAFETY SAFETY LABELS 2 5 LOCATION OF SAFETY LABELS 2...
Page 66: ...GENERAL VIEW OPERATION 3 4...
Page 84: ...EXPLANATION OF COMPONENTS OPERATION 3 22 SWITCHES 3...
Page 224: ...TROUBLESHOOTING OPERATION 3 162...
Page 309: ...SPECIFICATIONS 15...
Page 330: ...HANDLING MACHINES EQUIPPED WITH VHMS ATTACHMENTS OPTIONS 6 20...
Page 331: ...INDEX 17...
Page 332: ...INDEX 7 2...
Page 335: ...COLOPHON 18...


