background image

- 3 -

Technical data

Rated voltage:

220 - 240 V ~ 50Hz

max. Power consumption: 70 W
Temperature range :

4 - 22°C

LED-Class:

1

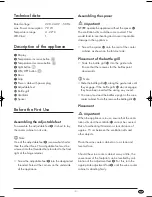
Description of the appliance

1

Display

2

Temperature increase button 

3

Temperature decrease button 

4

Light button 

5

ON/OFF button 

6

Door

7

Grip

8

Power cable with power plug

9

Adjustable feet

0

Bottle grill

q

Ventilator

w

Spacer

Before the First Use

Assembling the adjustable feet

To assemble the adjustable feet 

9

it is best to lay

the cooler cabinet on its side.

Note:

One of the adjustable feet 

9

is somewhat shorter

than the other three. This adjustable foot must be
screwed into the threaded hole located to the front
right of the hinge retainer.

• Screw the adjustable feet 

9

into the designated

threaded holes at the corners on the underside
of the appliance. 

Assembling the spacer

Important!

NEVER operate the appliance without the spacer 

w

!

The ventilation slits could become covered. This
would lead to overheating and cause irreparable
damage to the appliance.

• Screw the spacer 

w

onto the rear of the cooler

cabinet, as shown on the fold-out side.

Placement of the bottle grill

• Slide the bottle grill 

0

into the guide rails. 

Ensure that the recesses for the bottles point
downwards.

Note:

• Slide the bottle grills 

0

along the guide rails until

they engage. If the bottle grills 

0

do not engage,

they have been inserted the wrong way round. 

• You can also stand the bottles upright in the wine

cooler cabinet. To do this, remove the bottle grills 

0

.

Placement

Important!

When the appliance is in use, ensure that the venti-
lation slits and the ventilator 

q

cannot be covered.

Risk of overheating! Maintain a clear distance of
approx. 15 cm between the ventilation slits and 
other objects.

Place the wine cooler cabinet on to a clean and 
level surface. 

Should the wine cooler cabinet sway a little, the
unevenness of the footprint can be levelled by cali-
bration of the adjustment feet 

9

. For this, turn the

appropriate adjustment foot 

9

until the wine cooler

cabinet is standing firmly.

IB_KH1220_E23705_LB6  18.07.2008  13:57 Uhr  Seite 3

Summary of Contents for KH1220

Page 1: ...6 KOMPERNASS GMBH BURGSTRASSE 21 D 44867 BOCHUM www kompernass com ID Nr KH1220 05 08 V2 ...

Page 2: ...WINE COOLER Operating instructions WINE COOLER KH1220 ...

Page 3: ......

Page 4: ...KH 1220 w q 8 7 6 0 9 1 5 4 3 2 ...

Page 5: ......

Page 6: ......

Page 7: ...ttle grill 3 Placement 3 Operation 4 Temperature control of wine 4 Illumination 4 Recommended temperatures 5 Cleaning and Care 5 Troubleshooting 6 Disposal 7 Importer 7 Warranty and Service 7 Read these operating instructions carefully before using the appliance for the first time and preserve this maual for later reference Pass this manual on to whoever might acquire the appliance at a future dat...

Page 8: ...e unless they are supervised by a person responsible for their safety or receive from this person instruction in how the appliance is to be used Children should be supervised to ensure that they do not play with the appliance Important Appliance Damage Do NOT place vases or other containers filled with liquids on the appliance Ensure that the ventilation slits of the appliance are not covered when...

Page 9: ...e covered This would lead to overheating and cause irreparable damage to the appliance Screw the spacer w onto the rear of the cooler cabinet as shown on the fold out side Placement of the bottle grill Slide the bottle grill 0 into the guide rails Ensure that the recesses for the bottles point downwards Note Slide the bottle grills 0 along the guide rails until they engage If the bottle grills 0 d...

Page 10: ...rior tempe rature of the wine cooler cabinet 3 Press either the button 2 or 3 to set the desired temperature The display 1 blinks and shows the programmed temperature When you stop pressing the button the blinking stops and the display 1 shows once again the current interior temperature The wine cooler cabinet now slowly cools down to the programmed temperature To switch the wine cooler cabinet of...

Page 11: ...e warms quickly in a glass it is better to serve it a little too cool than a little too warm Cleaning and Care Attention Danger Always remove the plug 8 from the power socket before cleaning the appliance There is a risk of receiving an electric shock NEVER submerge the appliance in water or other liquids The appliance could be irrepa rably damaged CAUTION Appliance Damage Do not use abrasive or a...

Page 12: ...ure is incorrectly programmed The location is unsuitable There are a lot of bottles in the wine cooler cabinet Wait for a short period Check the programmed temperature Place the appliance at a cooler location The appliance needs longer to cool down The ventilator of the cooler runs often or always The door 6 is not properly closed It has been programmed to a very low temperature or the difference ...

Page 13: ...eceipt as proof of pur chase In the case of a warranty claim please make contact by telephone with our service department Only in this way can a post free despatch for your goods be assured The warranty covers only claims for material and maufacturing defects not for worn parts or for damage to fragile components e g buttons or batteries This product is for private use only and is not intended for...

Reviews: