24
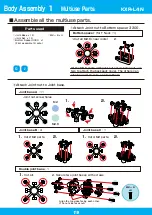
Right
Front
Leg
Left
Front
Leg
Right
Rear
Leg
Left
Rear
Leg
Front
Rear
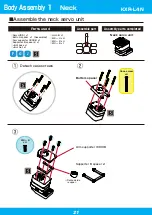
①-5.
Apply the decal to the cable.
*As seen upside down
①-4.
Secure with tape, etc. so it doesn't come out easily.
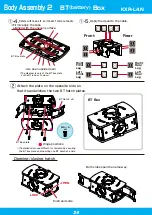
BT Box plate
(The diagram is only of the BT box plate
so that it is easy to view.)
②
Attach the plate on the opposite side so
that it sandwiches the two BT hatch plates.
BT Hatch x2
*If installation proves difficult, try temporarily securing
the BT box plate and inserting one BT hatch at a time.
Hinge positions
BT Box plate
Opening/closing hatch
Push and slide.
Both sides open the same way.
LOCK
OPEN
BT Box
M2 ー 6
x4
*Firmly apply the tape
aligned with the uneven surface.
Body Assembly 2
BT
(battery)
Box
KXR-L4N
Summary of Contents for KXR-L4N
Page 42: ...42 Complete Assembly completed KXR L4N ...
Page 65: ......


