50
* If the robot does not move, the following causes may be considered.
●
The KXR Power is not turned ON.
Check the battery mounting or AC adapter connections and turn the robot’s power ON.
●
The Switch Harness is not connected correctly to the RCB-4.
Check the connection between the Switch Harness and the RCB-4.
* Note: Make sure the power switch is OFF before proceeding.
●
The battery is not charged.
If the robot does not move, even though the battery is correctly mounted and the power is turned
ON, then the battery may not be charged. Charge the battery.
●
The RCB-4 and the computer communication rates do not match.
Select "115200" for the COM communication rate in the Project Setting window.
Once the correct posture is confirmed, proceed to the Trim Adjustment process.
When the RAM button is clicked, the robot will assume this posture. If the robot does
not match this pose, then the origin setting is wrong. Retrace the origin setting steps to
determine and correct the part that is off track. Proceeding to set the Home Position
without confirming this posture can cause damage to the servo motors. Make sure that
the robot assumes this posture before continuing any further.
When given power, a servo may vibrate slightly (hunting); this is not a malfunction. Hunting
occurs when the stretch (holding force) is set at a high level to maintain neutral; when you
press down lightly and hold it still, hunting will stop. In the upright position of the sample
motion registered in the next step, stretch is set at a low level to help prevent hunting from
occurring. If hunting does occur depending on the posture of the robot (when the robot is
lifted up or shaken lightly, etc.), try holding the robot still.
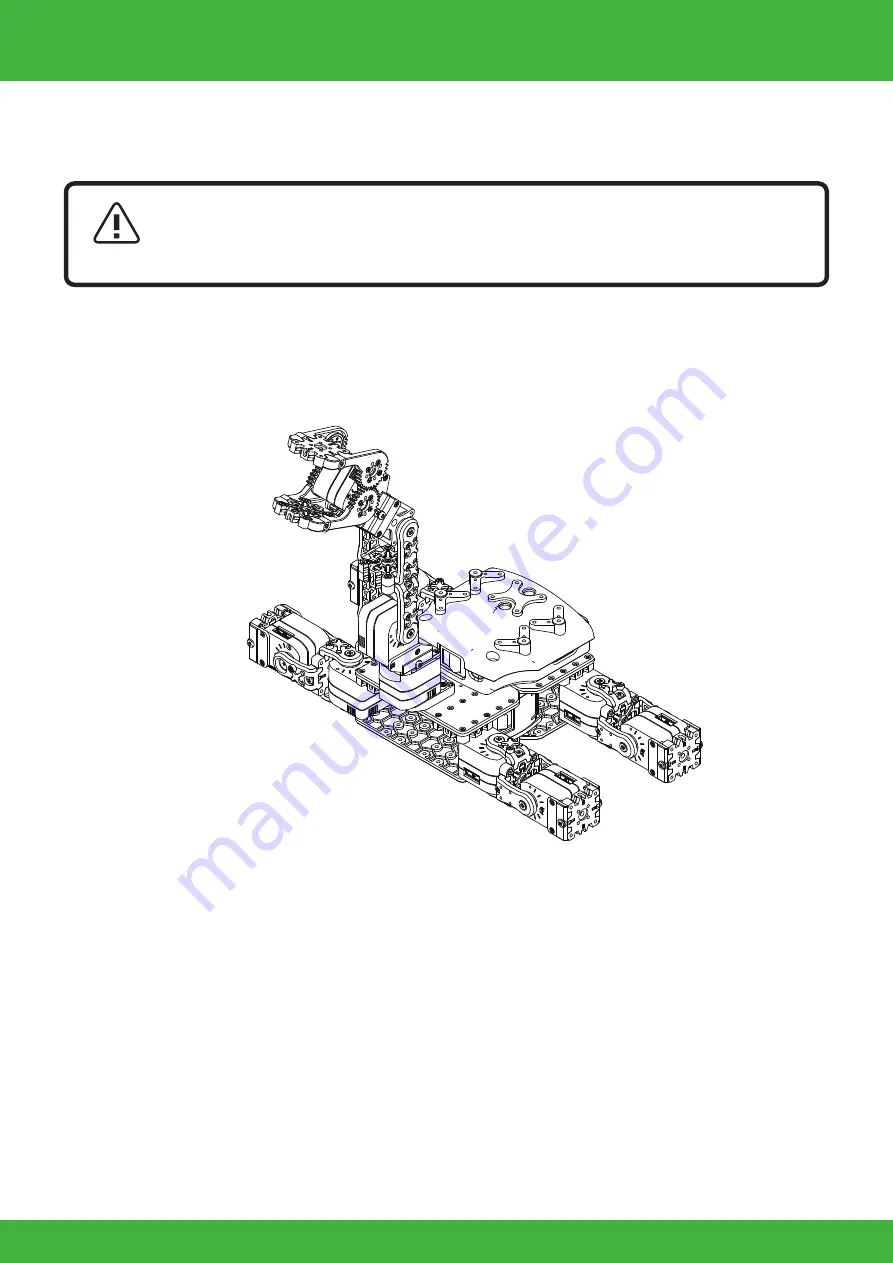
The correct trim position is the pose shown in the diagram below. Press
the RAM button and confirm that the robot assumes this pose.
DANGER
11. Adjust areas where the trim is out of alignment with reference to the image.
The trim position is an important base position for executing motions. In particular, if the left
and right legs are not in perfect alignment, walking, etc. in the sample motion will not pro-
ceed smoothly. When the trim is out of alignment, the overall motion will also be off, so
adjust the trim properly so that the robot stands perfectly upright.
9.
Click the "Trim Adjustment" tab at the top of
the Project Setting window, to change
screens.
10. Press the "Sync" button in the toolbar
of the Main Window. If the color of the
button changes after pressing, it is
turned ON.
In the Sync state, the corresponding
servo motor operates on a real-time
basis by moving the HeartToHeart4
slide bar.
*The screen layout is an example for
reference purposes.
This applies when you run the robot for the first
time. When the servos are shipped from the factory,
there is no data loaded into them, thus the "RAM"
button needs to be clicked multiple times for initiali-
sation. Once initialised, pressing "RAM" once will be
enough to get robot moving.
8. Keep clicking on "RAM" button, al-
lowing 2 to 3 seconds between
each click until the robot slowly
moves to trim position.
Confirm Trim Position
Summary of Contents for KXR-L4N
Page 42: ...42 Complete Assembly completed KXR L4N ...
Page 65: ......


