Read
Lithium batteries safety procedures
on page 125 before handling the batteries.
Procedure
1
Open the SCU.
See
Opening the Subsea Control Unit
on page 78.
2
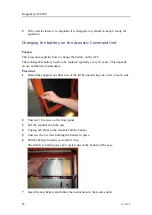
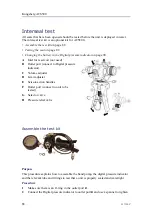
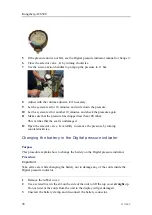
Grab the handle and pull out the old battery.
3
Insert the new battery.
Inserting the battery at an angle makes it easier.
4
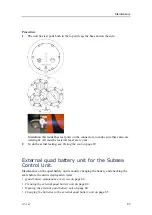
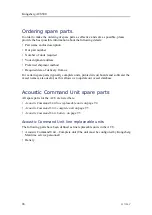
Place the top end cap back on.
Observe the alignment marks on the lid and the body of the SCU.
Follow the open procedure in reverse order. See
on page 78.
5
Clean and screw in the vent screw if it has been opened.
6
Replace the six M6 screws.
7
Perform an interseal test for the top end cap and the vent screw.
397128/C
81
Summary of Contents for ACS500
Page 1: ...INSTRUCTION MANUAL ACS500 Acoustic Control System Gisma testport system...
Page 2: ......
Page 15: ...ACS500 System with interface cables 397128 C 13...
Page 38: ...Kongsberg ACS500 ACU Computer buttons on page 37 User interface on page 38 36 397128 C...
Page 71: ...Simulation and test 397128 C 69...
Page 113: ...Drawing file Dunking transducer unit outline dimensions 397128 C 111...
Page 114: ...Kongsberg ACS500 Acoustic Command Unit outline dimensions 112 397128 C...
Page 115: ...Drawing file Subsea Control Unit outline dimensions 397128 C 113...
Page 116: ...Kongsberg ACS500 Subsea Control Unit arrangement 114 397128 C...
Page 117: ...Drawing file Subsea Control Unit bracket 397128 C 115...
Page 118: ...Kongsberg ACS500 TDR30V 34GT Subsea transducer outline dimensions 116 397128 C...
Page 119: ...Drawing file External quad battery unit for SCU outline dimensions 397128 C 117...
Page 120: ...Kongsberg ACS500 Simulator outline dimensions 118 397128 C...
Page 138: ...Kongsberg ACS500 Appendix A Type approval certificate 136 397128 C...
Page 139: ...Appendix A Type approval certificate 397128 C 137...
Page 140: ...Kongsberg ACS500 138 397128 C...
Page 141: ...Appendix A Type approval certificate 397128 C 139...
Page 142: ...Kongsberg ACS500 140 397128 C...
Page 148: ...2016 Kongsberg Maritime...


