RA83/84/85/93/94/95 Series
Chapter 4
Operation Manual
Installation
AIS connector pinouts and cable color coding designation:
Cable type name Port name
Pin number
Signal name
Color code
CW-387-5M AIS 1
Shield Braid
2
IN-B
Red
dot/Orange
3
IN-A
Black
dot/Orange
4
OUT-B
Red
dot/White
5
OUT-A
Black
dot/White
6
GND
Black
dot/Grey
7
AIS
ALARM+
Red
dot/Pink
8
AIS
ALARM-
Black
dot/Pink
About AIS malfunction alarm
If the AIS transponder gets failed in operation, the AIS ABNORMAL status is supplied
from the transponder to the display causing the error message to appear on the
screen.
NOTE: In case no alarm signal lines are available in the AIS transponder, link the AIS
ALARM+ (Red dot/Pink wire) and AIS ALARM- (Black dot/Pink) signal lines at the
cable end at the transponder side. This processing is necessary to prevent the AIS
alarm message from being shown mistakenly on the display.
Installation of the Gyro Interface module, KSA-08A
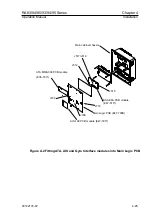
The Gyro Interface module (KSA-08A) is installed inside the processor unit. Use the
following instructions for installation.
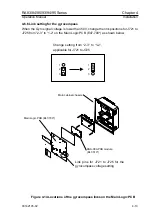
(1) Dismount the Main Logic PCB E47-700* disconnecting cables connected to
the
PCB.
(2) Unscrew the four 3 mm fixing screws on the corner of the Power PCB E47-600*.
The four screws will be used for fixing the Gyro Interface chassis.
(3) Locate the position of the four fixing studs at the corner on the Power PCB
prepared for the KSA-08A module. (Refer to the figure A.2)
(4) Put and fix the KSA-08A module chassis with E47-510A PCB on the studs
using the four 3 mm fixing screws and connect cables to connector J708 on
the backside of the Main Logic PCB. (Refer to the figure A.2)
(5) Fix the Main Logic PCB E47-700* at the position again.
(6) Reconnect the cables to the connectors J707 and J718 on the topside of the
93142105-02
4-23

