3-4
AIRe Lens
Getting ready to use the AIRe Lens
3
3.1
2
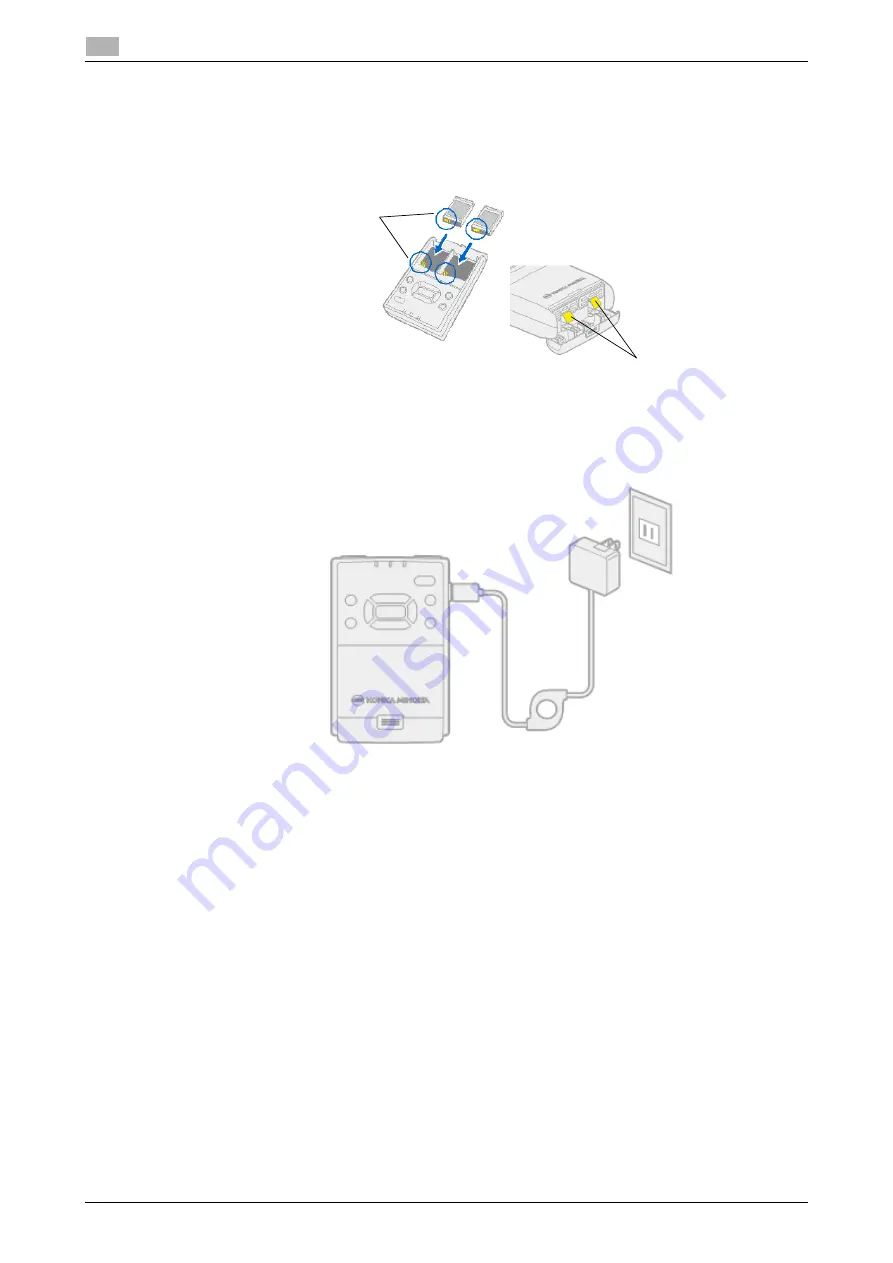
Align the battery terminals correctly and slide the battery in as far as it will go. And then make sure that
the latches move up.
3
Connect the USB cable for charging the AC adapter for charging
*1
to C-BOX. Next, plug the AC adapt-
er into a power outlet.
%
*1
: An AC adapter for charging is not included. Purchase one that meets the specifications below.
KONICA MINOLTA Specifications
Rated Voltage: 5 V;
Rated Current: 1.5 A minimum;
USB Type A output
Latches
Align terminals
correctly
Summary of Contents for AIRe Lens
Page 1: ...AIRe Lens USER S GUIDE ...
Page 2: ... ...
Page 5: ...1 Introduction ...
Page 6: ......
Page 15: ...2 Product configuration and basic components ...
Page 16: ......
Page 23: ...3 Using the product ...
Page 24: ......
Page 69: ...4 Admin maintenance tool ...
Page 70: ......
Page 94: ...4 26 AIRe Lens Wireless LAN connection setting 4 4 11 ...
Page 95: ...5 AIRe Lens remote viewer ...
Page 96: ......
Page 104: ...5 10 AIRe Lens Viewer troubleshooting 5 5 7 ...
Page 105: ...6 Product maintenance ...
Page 106: ......
Page 109: ...7 Product troubleshooting ...
Page 110: ......
Page 113: ...8 Other ...
Page 114: ......


