background image

User's Guide 


- 197 - 

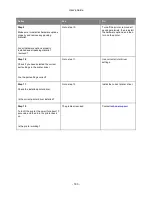
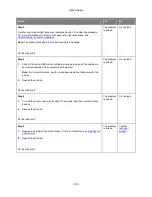
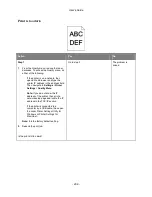
Unexpected page breaks occur 

Action


Yes


No


Step 1


From the Setup menu, adjust the print timeout setting. To access the Setup 

menu, do either of the following: 

  If the printer is on a network, then access the Embedded Web Server: 

a. 

Open a Web browser, and then type the printer IP address in the 

address field. 

Note:

 If you do not know the IP address of the printer, then print a 

network setup page and locate the IP address in the TCP/IP section. 

b. 

Navigate to: 

Settings

 >

General Settings

 >

Timeouts

 > adjust the print timeout 

setting >

Submit


  If the printer is connected to a computer by a USB cable, then open the 

Local Printer Settings Utility for Windows or Printer Settings for Macintosh. 


Does the file print correctly? 

The problem 

is solved. 

Go to step 2. 

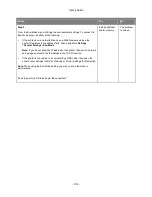
Step 2


1. 

Check the original file for manual page breaks. 

2. 

Resend the print job. 


Does the file print correctly? 

The problem 

is solved. 

Contact 

technical 

support


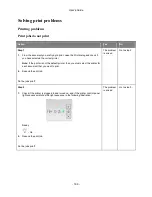
Print quality problems 

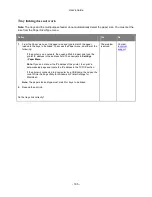
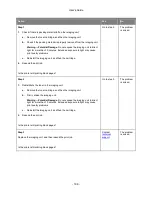
Printer is printing blank pages 


Summary of Contents for bizhub 3300P

Page 1: ...User s Guide 1 User s Guide 2012 10 A63P 9560 00A...

Page 2: ...22 Installing an optional card 23 Installing hardware options 25 Installing optional trays 25 Attaching cables 27 Accessing the controller board 28 Setting up the printer software 29 Installing the pr...

Page 3: ...name 47 Configuring a custom paper type 47 Assigning a custom paper type 48 5 Paper and specialty media guide 49 Paper guidelines 49 Paper characteristics 49 Unacceptable paper 50 Selecting paper 50...

Page 4: ...e Type menu 62 Configure MP menu 65 Substitute Size menu 65 Paper Texture menu 66 Paper Weight menu 68 Paper Loading menu 70 Custom Types menu 71 Universal Setup menu 71 Reports menu 72 Reports menu 7...

Page 5: ...ure 102 Statement of Volatility 102 Erasing volatile memory 103 Erasing non volatile memory 103 10 Maintaining the printer 105 Cleaning the printer 105 Cleaning the printer 105 Checking the status of...

Page 6: ...pen front door 20y xx 120 x page jam open rear door 20y xx 124 x page jam clear standard bin 20y xx 126 x page jam remove tray 1 to clear duplex 23y xx 128 x page jam remove tray x 24y xx 131 x page j...

Page 7: ...ht notice 231 Edition notice 231 Trademarks 231 Software License Agreement 232 Noise emission levels 233 For EU member states only 234 Product disposal 234 ENERGY STAR 234 What is an ENERGY STAR produ...

Page 8: ...n the printer off using the power switch and then unplug the power cord from the electrical outlet Disconnect all cords and cables from the printer before moving it If an optional tray is installed th...

Page 9: ...r service or repairs other than those described in the user documentation to a service representative CAUTION SHOCK HAZARD To avoid the risk of electrical shock when cleaning the exterior of the print...

Page 10: ...er cord supplied in the package If a power cord is not supplied use only the power cord and plug that are specified in the user documentation Failure to use this cord could result in a fire or electri...

Page 11: ...t may cause personal injury Certain areas inside the printer may become very hot and cause burns When checking the inside of the printer for malfunctions such as media jams do not touch the locations...

Page 12: ...es are available on the Printer Driver and Documentations CD Instructions for Connecting the printer to an Ethernet network Troubleshooting printer connection problems Networking Guide Insert the Prin...

Page 13: ...62 standard or the CEN Technical Committee 156 standard Provide a flat sturdy and stable surface Keep the printer Clean dry and free of dust Away from stray staples and paper clips Away from the dire...

Page 14: ...educe the risk of equipment instability load each tray separately Keep all trays closed until needed You can configure your printer by adding one optional 250 or 550 sheet tray For instructions on ins...

Page 15: ...tray 8 50 sheet multipurpose feeder 9 Front door Using the printer control panel Light or button Color Description 1 Error light Yellow An error has occurred 2 Paper jam light Yellow A paper jam has o...

Page 16: ...leep mode or Hibernate mode 7 Start button and light Green Use this to initiate a print job 8 Stop or cancel button Red Use this to cancel a print job Understanding the printer control panel light seq...

Page 17: ...Replace imaging unit Replace unsupported toner cartridge Replace unsupported imaging unit Toner cartridge imaging unit mismatch Canceling print job Flushing buffer Resolution reduced Non Printer Manu...

Page 18: ...User s Guide 18 Light sequence Message Service error Load paper Remove paper from standard bin Change paper Toner cartridge low Imaging unit low Ready Waiting Busy Not ready...

Page 19: ...the message in the same row Primary light sequence Supplemental light sequence Message Missing or unresponsive toner cartridge Replace toner cartridge Toner cartridge printer region mismatch Missing...

Page 20: ...clear standard bin Paper jam remove standard tray to clear duplex Paper jam open rear door Paper jam remove standard tray to clear duplex Paper jam remove standard tray to clear duplex Paper jam open...

Page 21: ...ge and then finding the TCP IP section For more information see Printing a menu settings and network setup page Notes An IP address appears as four sets of numbers separated by periods such as 123 123...

Page 22: ...ng If you have other devices attached to the printer then turn them off as well and unplug any cables going into the printer Warning Potential Damage Controller board electronic components are easily...

Page 23: ...as well and unplug any cables going into the printer Warning Potential Damage Controller board electronic components are easily damaged by static electricity Touch a metal surface on the printer befo...

Page 24: ...to the card and the controller board Note The entire length of the connector on the card must touch and be flushed against the controller board 5 Close the controller board access door Note When the p...

Page 25: ...m the electrical outlet before continuing If you have any other devices attached to the printer then turn them off as well and unplug any cables going into the printer 1 Turn off the printer using the...

Page 26: ...tlet and then turn on the printer Note When the printer software and any hardware options are installed it may be necessary to manually add the options in the printer driver to make them available for...

Page 27: ...ial Damage Do not touch the USB cable any network adapter or the printer in the area shown while actively printing Loss of data or a malfunction can occur Use the To 1 USB port Attach an optional wire...

Page 28: ...tlet before continuing If you have any other devices attached to the printer then turn them off as well and unplug any cables going into the printer 1 Open the controller board access door 2 Use the f...

Page 29: ...For OS X 10 6 10 7 the driver folder varies depending on the paper size Select the appropriate driver folder for your environment To use inch based paper size 8 1 2 x 11 in letter size Select a file...

Page 30: ...network The network gateway The network mask A nickname for the printer optional Note A printer nickname can make it easier for you to identify your printer on the network You can choose to use the d...

Page 31: ...up Note For OS X 10 6 10 7 the driver folder varies depending on the paper size Select the appropriate driver folder for your environment To use inch based paper size 8 1 2 x 11 in letter size Select...

Page 32: ...oc Channel for ad hoc networks The channel defaults to automatic for infrastructure networks Some ad hoc networks will also require the automatic setting Check with your system support person if you a...

Page 33: ...he printer to a wireless network using the Wi Fi Protected Setup PIN The printer supports only the personal identification number PIN method of connecting to a wireless network using Wi Fi Protected S...

Page 34: ...llation Install the printer on additional network computers Please refer to Software CD for installation and access of the Wireless Setup Assistant Included with printer models shipped in spring 2013...

Page 35: ...if the printer options are installed correctly The network setup page prints at the same time containing the current network settings of the printer and levels of supplies From the printer control pan...

Page 36: ...Menu Using the printer settings on the computer Depending on your operating system access the Paper menu using the Local Printer Settings Utility or Printer Settings Note The paper size and type sett...

Page 37: ...versal paper size and then select Universal as the paper size Using the standard bin and paper stop The standard bin holds up to 150 sheets of 20 lb paper It collects prints facedown The standard bin...

Page 38: ...equipment instability load each tray separately Keep all other trays closed until needed 1 Pull out the tray completely Note Do not remove trays while a job prints or while the following light sequenc...

Page 39: ...User s Guide 39 2 Squeeze and then slide the width guide tab to the correct position for the size of the paper you are loading...

Page 40: ...ommodate their length When loading legal size paper the length guide extends beyond the base leaving the paper exposed to dust To protect the paper from dust you can purchase a dust cover separately I...

Page 41: ...imum fill indicator located on the side of the width guide Notes Load with the printable side facedown when using recycled or preprinted paper Load prepunched paper with the holes on the top edge towa...

Page 42: ...Local Printer Settings Utility or Printer Settings depending on your operating system Set the correct paper size and type to avoid paper jams and print quality problems Loading the multipurpose feeder...

Page 43: ...Pull the multipurpose feeder extender b Pull the extender gently so the multipurpose feeder is fully extended and open 2 Squeeze the tab on the left width guide and then move the guides for the paper...

Page 44: ...em and then fan them Straighten the edges on a level surface Note Avoid touching the printable side of the transparencies Be careful not to scratch them Flex the stack of envelopes back and forth to l...

Page 45: ...rencies came in Load letterhead faceup with the top edge entering the printer first For two sided duplex printing load letterhead facedown with the bottom edge of the sheet entering the printer first...

Page 46: ...ys Using the Embedded Web Server 1 Open a Web browser and then type the printer IP address in the address field Notes Print a network setup page or menu settings page and then locate the IP address in...

Page 47: ...Click Custom Types and then verify if the new custom paper type name has replaced the custom name Using the printer settings on the computer Windows only Access the Custom menu using the Local Printer...

Page 48: ...s four sets of numbers separated by periods such as 123 123 123 123 If you are using a proxy server then temporarily disable it to load the Web page correctly 2 Click Settings Paper Menu 3 From the Tr...

Page 49: ...he tendency for paper to curl at its edges Excessive curl can cause paper feeding problems Curl can occur after the paper passes through the printer where it is exposed to high temperatures Storing pa...

Page 50: ...ntaminate the printer Preprinted papers that can be affected by the temperature in the printer fuser Preprinted papers that require a registration the precise print location on the page greater or les...

Page 51: ...per examples Test results indicate that the following paper types are at risk for use with laser printers Chemically treated papers used to make copies without carbon paper also known as carbonless pa...

Page 52: ...aser printers Check with the manufacturer or vendor to ensure that the envelopes can withstand temperatures up to 230 C 446 F without sealing wrinkling curling excessively or releasing hazardous emiss...

Page 53: ...d could void the printer and toner cartridge warranties Do not use labels with exposed adhesive Do not print within 1 mm 0 04 inch of the edge of the label of the perforations or between die cuts of t...

Page 54: ...her Storing paper Use these paper storage guidelines to help avoid jams and uneven print quality For best results store paper where the temperature is 21 C 70 F and the relative humidity is 40 percent...

Page 55: ...2 x 10 1 in X Letter 216 x 279 mm 8 5 x 11 in Legal 216 x 356 mm 8 5 x 14 in Executive 184 x 267 mm 7 3 x 10 5 in X Oficio Mexico 1 216 x 340 mm 8 5 x 13 5 in Folio 216 x 330 mm 8 5 x 13 in Statement...

Page 56: ...148 mm 4 1 x 5 8 in Universal is supported only in the optional 250 or 550 sheet tray if the paper size is at least 148 x 210 mm 5 8 x 8 3 in Universal is only supported in duplex mode if the width i...

Page 57: ...Letterhead Preprinted Colored Paper Light Paper Heavy Paper 2 Rough Cotton 1 One sided paper labels designed for laser printers are supported for occasional use It is recommended to print 20 or fewer...

Page 58: ...erating system 2 Send the print job For Windows users a With a document open click File Print b Click Properties Preferences Options or Setup c Adjust the settings if necessary d Click OK Print For Ma...

Page 59: ...on the computer Depending on your operating system adjust the toner darkness settings using the Local Printer Settings Utility or Printer Settings Canceling a print job Canceling a print job from the...

Page 60: ...Local Printer Settings Utility for Windows or Printer Settings for Macintosh Menus list Paper Menu Reports Network Ports Default Source Paper Size Type Configure MP Substitute Size Paper Texture Paper...

Page 61: ...t jobs Notes Tray 1 standard tray is the factory default setting From the Paper menu set Configure MP to Cassette for MP Feeder to appear as a menu setting If two trays contain paper of the same size...

Page 62: ...s empty the print job continues using the linked tray The A6 paper size is supported only in Tray 1 and the multipurpose feeder Tray x Type Plain Paper Transparency Recycled Labels Bond Letterhead Pre...

Page 63: ...MP to Cassette for MP Feeder Size to appear as a menu The multipurpose feeder does not automatically detect paper size Make sure to set the paper size value MP Feeder Type Plain Paper Card Stock Trans...

Page 64: ...d Letterhead Preprinted Colored Paper Light Paper Heavy Paper Rough Cotton Custom Type x Specify the paper type being manually loaded Notes Plain Paper is the factory default setting From the Paper me...

Page 65: ...assette configures the multipurpose feeder as the default paper source Manual sets the multipurpose feeder only for manual feed print jobs First sets the multipurpose feeder as the primary paper sourc...

Page 66: ...Note Normal is the factory default setting Recycled Texture Smooth Normal Rough Specify the relative texture of the recycled paper loaded Note Normal is the factory default setting Labels Texture Smo...

Page 67: ...aper loaded Note Normal is the factory default setting Light Texture Smooth Normal Rough Specify the relative texture of the paper loaded Note Normal is the factory default setting Heavy Texture Smoot...

Page 68: ...ansparencies loaded Note Normal is the factory default setting Recycled Weight Light Normal Heavy Specify the relative weight of the recycled paper loaded Note Normal is the factory default setting La...

Page 69: ...lt setting Colored Weight Light Normal Heavy Specify the relative weight of the colored paper loaded Note Normal is the factory default setting Light Weight Light Specify that the weight of the paper...

Page 70: ...inting for all print jobs that specify Colored as the paper type Light Loading Duplex Off Determine and set two sided printing for all print jobs that specify Light as the paper type Heavy Loading Dup...

Page 71: ...n Labels Envelope Specify a paper type when the Recycled setting is selected in other menus Notes Paper is the factory default setting The Recycled paper type must be supported in the selected tray or...

Page 72: ...s Page Print a report containing information about the paper loaded in trays installed memory total page count alarms timeouts printer control panel language TCP IP address status of supplies status o...

Page 73: ...is the factory default setting When Off is used the printer does not examine incoming data The printer uses PCL emulation if PCL SmartSwitch is set to On It uses the default printer language specifie...

Page 74: ...stScript print jobs Notes Auto is the factory default setting Off filters print jobs using the standard protocol On processes raw binary PostScript print jobs Reports menu Use To Print Setup Page Prin...

Page 75: ...s the factory default setting Enable AutoIP Yes No Specify the Zero Configuration Networking setting Note Yes is the factory default setting Enable FTP TFTP Yes No Enable the built in FTP server which...

Page 76: ...nected to print servers Use To Enable IPv6 On Off Enable Internet Protocol Version Six IPv6 in the printer IPv6 uses bigger numbers to create IP addresses Note On is the factory default setting Auto C...

Page 77: ...printer and entering it into the wireless settings of the access point Network Mode Infrastructure Ad hoc Specify the network mode Notes Ad hoc is the factory default setting This configures wireless...

Page 78: ...the assigned AppleTalk name Note The name can be changed only from the Embedded Web Server View Address Show the assigned AppleTalk address Note The address can be changed only from the Embedded Web...

Page 79: ...rinter does not examine incoming data and it uses the default printer language specified in the Setup menu NPA Mode On Off Auto Set the printer to perform the special processing required for bidirecti...

Page 80: ...y PS On Off Auto Only shown if PostScript level is non zero Note Auto is the factory default setting ENA Address xxx xxx xxx xxx Only shown if ENA attached to device s USB port ENA Netmask xxx xxx xxx...

Page 81: ...h On Off Set the printer to automatically switch to PS emulation when a print job received through a serial port requires it regardless of the default printer language Notes On is the factory default...

Page 82: ...estart The menu selection is then updated Advanced Status On Off Enable bidirectional communication through the parallel port Notes On is the factory default setting Off disables parallel port negotia...

Page 83: ...rnal print server Note This menu item is available only if the printer is attached to an external print server through the USB port ENA Netmask yyy yyy yyy yyy Set the netmask information for an exter...

Page 84: ...the printer Time Zone setting Note On is the factory default setting UTC GMT Offset input time in minutes Set the time offset from Coordinated Universal Time or Greenwich Mean Time Note The setting ap...

Page 85: ...d Web Server Local Printer Settings for Windows or Printer Settings for Macintosh Note Not all languages are available for all printers Show Supply Estimates Show estimates Do not show estimates Displ...

Page 86: ...is the factory default setting This setting supports the performance specifications for your printer On configures the printer to produce as little noise as possible This setting is best suited for pr...

Page 87: ...ore energy but may require longer warm up times Select a high setting if the printer is in constant use Under most circumstances this keeps the printer ready to print with minimum warm up time To wake...

Page 88: ...Press the Sleep button for less than three seconds if Press Sleep Button is set to Hibernate Press and hold the Sleep button for more than three seconds if Press and Hold Sleep Button is set to Hibern...

Page 89: ...20 Determine the number of automatic restarts the printer can perform Notes 5 is the factory default setting When the number of restarts equals the specified value then the error message appears Prin...

Page 90: ...is the factory default setting Off prints a partial page when there is not enough memory to print the whole page On sets the printer to process the whole page so that the entire page prints Press Slee...

Page 91: ...e moved outside the Normal defined logical page area However if the user prints any data in the non printable area then the printer clips the image at the boundary defined by the Normal setting This s...

Page 92: ...ne the way two sided pages are bound and printed Notes Long Edge is the factory default setting Long Edge binds pages along their long edge left edge for portrait and top edge for landscape Short Edge...

Page 93: ...r Source Tray x Multi Purpose Feeder Specify the paper source for separator sheets Note Tray 1 standard tray is the factory default setting Paper Saver Off 2 Up 3 Up 4 Up 6 Up 9 Up 12 Up 16 Up Print m...

Page 94: ...xels to print in clusters for clarity in order to enhance images horizontally or vertically or to enhance fonts Note Off is the factory default setting Toner Darkness 1 10 Lighten or darken the printe...

Page 95: ...e factory default setting Contrast 0 5 Adjust the contrast of printed objects Note 0 is the factory default setting XPS menu Use To Print Error Pages Off On Print a page containing information on erro...

Page 96: ...page Landscape prints text and graphics parallel to the long edge of the page PCL Emulation Settings Lines per Page 1 255 Specify the number of lines that print on each page Notes 64 is the default s...

Page 97: ...printer to work with printer software or programs that use different source assignments for trays and feeders Notes Off is the factory default setting None cannot be selected It is only displayed whe...

Page 98: ...nting You can Use both sides of the paper If your printer model supports duplex printing you can control whether print appears on one or two sides of the paper by selecting 2 sided printing from the P...

Page 99: ...ur sets of numbers separated by periods such as 123 123 123 123 If you are using a proxy server then temporarily disable it to load the Web page correctly 2 Click Settings General Settings Sleep Butto...

Page 100: ...Local Printer Settings Utility Setting Hibernate Timeout Hibernate Timeout lets you set the amount of time the printer waits after a print job is processed before it goes into a reduced power state Us...

Page 101: ...IP address in the TCP IP section The IP address appears as four sets of numbers separated by periods such as 123 123 123 123 If you are using a proxy server then temporarily disable it to load the We...

Page 102: ...ettings and user data Type of memory Description Volatile memory Your printer uses standard random access memory RAM to temporarily buffer user data during simple print jobs Non volatile memory Your p...

Page 103: ...memory The volatile memory RAM installed in your printer requires a power source to retain information To erase the buffered data simply turn off the printer Erasing non volatile memory 1 Turn off the...

Page 104: ...matches the light sequence in the following illustration and then press Blinking Blinking The printer will restart several times during this process Note Wipe All Settings securely removes device set...

Page 105: ...der 3 Remove any dust lint and pieces of paper around the printer using a soft brush or vacuum 4 Dampen a clean lint free cloth with water and use it to wipe the outside of the printer Warning Potenti...

Page 106: ...uine KONICA MINOLTA parts and supplies Your KONICA MINOLTA printer is designed to function best with genuine KONICA MINOLTA supplies and parts Use of third party supplies or parts may affect the perfo...

Page 107: ...e imaging unit parts to fail prior to exhaustion of toner from toner cartridge For more information on replacing the imaging unit see the instruction sheet that came with the supply Part name Destinat...

Page 108: ...artridge 1 Press the button on the right side of the printer and then open the front door 2 Pull the toner cartridge out using the handle 3 Unpack the toner cartridge and then remove all packing mater...

Page 109: ...ght for more than 10 minutes Extended exposure to light may cause print quality problems 6 Close the front door Note Dispose of the empty toner cartridge according to your local regulations Do not bur...

Page 110: ...User s Guide 110 2 Pull the toner cartridge out using the handle 3 Lift the green handle and then pull the imaging unit out of the printer 4 Unpack the new imaging unit and then shake it...

Page 111: ...m Doing so may affect the print quality of future print jobs 6 Insert the imaging unit into the printer by aligning the arrows on the side rails of the imaging unit with the arrows on the side rails i...

Page 112: ...ift it Make sure your fingers are not under the printer when you set it down Before setting up the printer make sure there is adequate clearance around it Use only the power cord provided with this pr...

Page 113: ...User s Guide 113 Shipping the printer When shipping the printer use the original packaging...

Page 114: ...n the TCP IP section The IP address appears as four sets of numbers separated by periods such as 123 123 123 123 If you are using a proxy server then temporarily disable it to load the Web page correc...

Page 115: ...all supplies occurs E mail Only The printer generates an e mail when the supply condition is reached The status of the supply appears on the menus page and status page Warning The printer displays a...

Page 116: ...separated by periods such as 123 123 123 123 If you are using a proxy server then temporarily disable it to load the Web page correctly 2 Click the Copy Printer Settings tab 3 If you want to change t...

Page 117: ...reprints jammed pages unless the memory required to hold the pages is needed for other printer tasks Avoiding jams Load paper properly Make sure paper lies flat in the tray Correct loading of paper I...

Page 118: ...nly recommended paper or specialty media Do not load wrinkled creased damp bent or curled paper Flex fan and straighten paper before loading it Do not use paper that has been cut or trimmed by hand Do...

Page 119: ...y Tray 2 5 Multipurpose feeder door 6 Front door Notes When Jam Assist is set to On the printer automatically flushes blank pages or pages with partial prints to the standard bin after a jammed page h...

Page 120: ...e 120 x page jam open front door 20y xx On On If the printer control panel light sequence matches the light sequence in the preceding illustration then press twice quickly to see the supplemental ligh...

Page 121: ...ration then do the following CAUTION HOT SURFACE The inside of the printer might be hot To reduce the risk of injury from a hot component allow the surface to cool before touching it 1 Press the butto...

Page 122: ...hotoconductor drum Doing so may affect the print quality of future print jobs 4 Place the imaging unit aside on a flat smooth surface Warning Potential Damage Do not expose the imaging unit to direct...

Page 123: ...ails of the unit with the arrows on the side rails inside the printer and then insert the imaging unit into the printer 8 Insert the toner cartridge by aligning the side rails of the cartridge with th...

Page 124: ...ontrol panel light sequence matches the light sequence in the preceding illustration then press twice quickly to see the supplemental light sequence On On On If the supplemental light sequence matches...

Page 125: ...right side of the printer and then open the front door 2 Gently pull down the rear door CAUTION HOT SURFACE The inside of the printer might be hot To reduce the risk of injury from a hot component al...

Page 126: ...emoved 4 Close the rear and front doors 5 From the printer control panel press to clear the message and continue printing x page jam clear standard bin 20y xx On On If the printer control panel light...

Page 127: ...e light sequence in the preceding illustration then do the following 1 Firmly grasp the jammed paper on each side and then gently pull it out Note Make sure all paper fragments are removed 2 From the...

Page 128: ...clear duplex 23y xx On On If the printer control panel light sequence matches the light sequence in the preceding illustration then press twice quickly to see the supplemental light sequence Suppleme...

Page 129: ...plemental light sequence matches any of the light sequences in the preceding illustrations then do the following CAUTION HOT SURFACE The inside of the printer might be hot To reduce the risk of injury...

Page 130: ...mpletely 2 Locate the blue lever and then pull it down to release the jam Note If the jammed paper is not visible in the duplex area then open the rear door and then gently remove the jammed paper Mak...

Page 131: ...ents are removed 4 Insert the tray 5 From the printer control panel press to clear the message and continue printing x page jam remove tray x 24y xx On On If the printer control panel light sequence m...

Page 132: ...s Guide 132 Supplemental light sequences Light sequence On On On On On On On On If the supplemental light sequence matches any of the light sequences in the preceding illustrations then do the follow...

Page 133: ...ay completely 2 Firmly grasp the jammed paper on each side and then gently pull it out Note Make sure all paper fragments are removed 3 Insert the tray 4 From the printer control panel press to clear...

Page 134: ...134 x page jam clear manual feeder 250 xx On On If the printer control panel light sequence matches the light sequence in the preceding illustration then press twice quickly to see the supplemental li...

Page 135: ...then gently pull it out Note Make sure all paper fragments are removed 2 Flex the sheets of paper back and forth to loosen them and then fan them Do not fold or crease the paper Straighten the edges...

Page 136: ...anel light sequence matches the light sequence in the preceding illustration then do the following 1 Check if the toner cartridge and imaging unit are both MICR Magnetic Imaging Content Recording or n...

Page 137: ...If the printer control panel light sequence matches the light sequence in the preceding illustration then you may need to order a toner cartridge If necessary press on the printer control panel to co...

Page 138: ...if necessary to continue printing Cartridge very low 88 xy Blinking On On If the printer control panel light sequence matches the light sequence in the preceding illustration then you may need to rep...

Page 139: ...tential Damage Use of third party supplies or parts may affect warranty coverage Damage caused by the use of third party supplies or parts are not covered by the warranty All life indicators are desig...

Page 140: ...eplace cartridge 0 estimated pages remain 88 xy On On If the printer control panel light sequence matches the light sequence in the preceding illustration then press twice quickly to see the supplemen...

Page 141: ...ame with the supply or see the Replacing supplies section of the User s Guide Note If you do not have a replacement toner cartridge then see the Ordering supplies section of the User s Guide Replace c...

Page 142: ...indicates the value of the printer region y indicates the value of the cartridge region x and y can have the following values Printer and toner cartridge regions Region number x Region y 1 United Sta...

Page 143: ...all missing or unresponsive cartridge 31 xy On On If the printer control panel light sequence matches the light sequence in the preceding illustration then press twice quickly to see the supplemental...

Page 144: ...or more information see the instruction sheet that came with the supply Replace unsupported cartridge 32 xy On On On On If the printer control panel light sequence matches the preceding light sequence...

Page 145: ...xy Blinking On If the printer control panel light sequence matches the light sequence in the preceding illustration then you may need to order an imaging unit If necessary press on the printer contro...

Page 146: ...if necessary to continue printing Imaging unit very low 84 xy Blinking Blinking On If the printer control panel light sequence matches the light sequence in the preceding illustration then you may ne...

Page 147: ...ng Potential Damage Use of third party supplies or parts can affect warranty coverage Damage caused by the use of third party supplies or parts is not covered by the warranty All life indicators are d...

Page 148: ...ce matches the light sequence in the preceding illustration then replace the imaging unit For more information see the instruction sheet that came with the supply Note If you do not have a replacement...

Page 149: ...to see the supplemental light sequence On On Blinking If the supplemental light sequence matches the light sequence in the preceding illustration then try one or more of the following Remove the imag...

Page 150: ...equence matches the light sequence in the preceding illustration then remove the imaging unit and then install a supported one For more information see the instruction sheet that came with the supply...

Page 151: ...e are specified in the Paper menu If the printer is on a network then access the Embedded Web Server 1 Open a Web browser and then type the printer IP address in the address field Notes Print a networ...

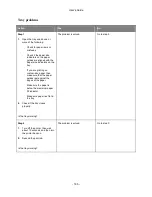
Page 152: ...ed in the Paper menu If the printer is on a network then access the Embedded Web Server 1 Open a Web browser and then type the printer IP address in the address field Notes Print a network setup page...

Page 153: ...in the Paper menu If the printer is on a network then access the Embedded Web Server 1 Open a Web browser and then type the printer IP address in the address field Notes Print a network setup page or...

Page 154: ...cified in the Paper menu If the printer is on a network then access the Embedded Web Server 1 Open a Web browser and then type the printer IP address in the address field Notes Print a network setup p...

Page 155: ...5 Incorrect paper size open paper source 34 On On If the printer control panel light sequence matches the light sequence in the preceding illustration then press twice quickly to see the supplemental...

Page 156: ...menu on the printer control panel If the printer is on a network then access the Embedded Web Server 1 Open a Web browser and then type the printer IP address in the address field Notes Print a netwo...

Page 157: ...of the following Load the tray or feeder with the correct size and type of paper From the printer control panel press to continue printing Note If the printer finds a tray that has the correct size an...

Page 158: ...g Load the tray or feeder with the correct size and type of paper From the printer control panel press to continue printing Note If the printer finds a tray that has the correct size and type of paper...

Page 159: ...e following Load the tray or feeder with the correct size of paper From the printer control panel press to continue printing Note If the printer finds a tray that has the correct size of paper then it...

Page 160: ...ing Load the tray or feeder with the correct size and type of paper From the printer control panel press to continue printing Note If the printer finds a tray that has the correct size and type of pap...

Page 161: ...eceding illustration then try one or more of the following Load the multipurpose feeder with the correct size and type of paper From the printer control panel press to continue printing Note If no pap...

Page 162: ...receding illustration then try one or more of the following Load the multipurpose feeder with the correct size and type of paper From the printer control panel press to continue printing Note If no pa...

Page 163: ...preceding illustration then try one or more of the following Load the feeder with the correct size and type of paper From the printer control panel press to continue printing Note If no paper is load...

Page 164: ...preceding illustration then try one or more of the following Load the multipurpose feeder with the correct size and type of paper From the printer control panel press to continue printing Note If no p...

Page 165: ...rol panel light sequence matches the light sequence in the preceding illustration then do the following 1 Remove the paper stack from the standard output bin 2 From the printer control panel press to...

Page 166: ...the supplemental light sequence matches the light sequence in the preceding illustration then try one or more of the following From the printer control panel press to continue printing Unplug the rou...

Page 167: ...llel port disabled 56 On On If the printer control panel light sequence matches the light sequence in the preceding illustration then press twice quickly to see the supplemental light sequence On Slow...

Page 168: ...b browser and then type the printer IP address in the address field Notes Print a network setup page or menu settings page and then locate the IP address in the TCP IP section If you are using a proxy...

Page 169: ...mental light sequence On On On If the supplemental light sequence matches the light sequence in the preceding illustration then try one or more of the following From the printer control panel press to...

Page 170: ...r more of the following From the printer control panel press to continue printing Note The printer discards any data received through the USB port Set the USB Buffer to Auto If the printer is on a net...

Page 171: ...access the Standard USB menu through the Local Printer Settings Utility for Windows or through Printer Settings for Macintosh Insufficient memory error messages Insufficient memory to collate job 37...

Page 172: ...ing illustration then try one or more of the following From the printer control panel press to print the portion of the job already stored and begin collating the rest of the print job From the printe...

Page 173: ...ing illustration then press twice quickly to see the supplemental light sequence On Blinking On If the supplemental light sequence matches the light sequence in the preceding illustration then press o...

Page 174: ...ser s Guide 174 Memory full 38 On On If the printer control panel light sequence matches the light sequence in the preceding illustration then press twice quickly to see the supplemental light sequenc...

Page 175: ...er control panel press to continue printing A data loss will occur From the printer control panel press to cancel the print job Install additional printer memory Decrease the resolution setting Miscel...

Page 176: ...ex page some data may not have printed 39 On On If the printer control panel light sequence matches the light sequence in the preceding illustration then press twice quickly to see the supplemental li...

Page 177: ...inter control panel press to cancel the print job Install additional printer memory Reduce the number and size of fonts the number and complexity of images and the number of pages in the print job Pri...

Page 178: ...control panel light sequence matches the light sequence in the preceding illustration then turn off the printer and then turn it back on If the lights are still blinking after 10 seconds then the pri...

Page 179: ...179 Too many trays attached 58 On On If the printer control panel light sequence matches the light sequence in the preceding illustration then press twice quickly to see the supplemental light sequenc...

Page 180: ...following 1 Turn off the printer 2 Unplug the power cord from the electrical outlet Note Optional trays lock together when stacked Remove stacked trays one at a time from the top to the bottom 3 Remo...

Page 181: ...p mode or Hibernate mode Go to step 3 Step 3 Check if one end of the power cord is plugged into the printer and the other to a properly grounded electrical outlet Is the power cord plugged into the pr...

Page 182: ...Go to step 7 Step 7 Check if the printer is plugged into any surge protectors uninterruptible power supplies or extension cords Is the printer plugged into any surge protectors uninterruptible power...

Page 183: ...ions and then turn on the printer Step 10 Check if you have selected the correct port settings in the printer driver Are the port settings correct Go to step 11 Use correct printer driver settings Ste...

Page 184: ...t the power cord to the printer then to a properly grounded electrical outlet and then turn on the printer Is the internal option properly installed in the controller board Go to step 3 Connect the in...

Page 185: ...inting on custom size paper then make sure that the paper guides rest against the edges of the paper Make sure the paper is below the maximum paper fill indicator Make sure paper lies flat in the tray...

Page 186: ...tep 4 Check if the tray is available in the printer driver Note If necessary manually add the tray in the printer driver to make it available for print jobs Is the tray available in the printer driver...

Page 187: ...ded paper size and type 2 Insert the tray properly If jam recovery is enabled then the print jobs will reprint automatically Do paper jams still occur frequently Go to step 2 The problem is solved Ste...

Page 188: ...ccess the Print Recovery menu try one or more of the following If the printer is on a network then open a Web browser and type the printer IP address in the address field Then navigate to Settings Gen...

Page 189: ...printer is not the default printer then you must select the printer for each document that you want to print 2 Resend the print job Do the jobs print The problem is solved Go to step 2 Step 2 1 Check...

Page 190: ...rking and if the cables are securely connected to the computer and the printer Note For more information see the setup documentation that came with the printer 2 Resend the print job Do the jobs print...

Page 191: ...of images and the number of pages in the print job and then resend the print job Does the print job still take longer than expected Go to step 2 The problem is solved Step 2 From the Print Recovery me...

Page 192: ...al Settings Eco Mode Note If you do not know the IP address of the printer then print a network setup page and locate the IP address in the TCP IP section If the printer is connected to a computer by...

Page 193: ...the address field Then navigate to Settings Paper Menu Note If you do not know the IP address of the printer then print a network setup page and locate the IP address in the TCP IP section If the pri...

Page 194: ...match Turn off the printer and then turn it back on to deactivate Hex Trace mode Go to step 2 Step 2 1 Open a Web browser and then type the printer IP address in the address field 2 Click Settings Net...

Page 195: ...n a network then open a Web browser and type the printer IP address in the address field Then navigate to Settings Paper Menu Note If you do not know the IP address of the printer then print a network...

Page 196: ...is connected to a computer by a USB cable then open the Local Printer Settings Utility for Windows or Printer Settings for Macintosh 2 Resend the print job Does the job print and collate correctly Th...

Page 197: ...a network setup page and locate the IP address in the TCP IP section b Navigate to Settings General Settings Timeouts adjust the print timeout setting Submit If the printer is connected to a computer...

Page 198: ...rinter still printing blank pages Go to step 2 The problem is solved Step 2 1 Redistribute the toner in the imaging unit a Remove the toner cartridge and then the imaging unit b Firmly shake the imagi...

Page 199: ...of the printer then print a network setup page and locate the IP address in the TCP IP section If the printer is connected to a computer by a USB cable then open the Local Printer Settings Utility fo...

Page 200: ...cause print quality problems c Install the imaging unit and then the cartridge 2 Resend the print job Is the page or image clipped Contact technical support The problem is solved Shadow images appear...

Page 201: ...is connected to a computer by a USB cable then open the Local Printer Settings Utility for Windows or Printer Settings for Macintosh Do the paper type and weight settings match the paper loaded in the...

Page 202: ...ed to a computer by a USB cable then open the Local Printer Settings Utility for Windows or Printer Settings for Macintosh Note 8 is the factory default setting 2 Resend the print job Does the gray ba...

Page 203: ...te If you do not know the IP address of the printer then print a network setup page and locate the IP address in the TCP IP section If the printer is connected to a computer by a USB cable then open t...

Page 204: ...address of the printer then print a network setup page and locate the IP address in the TCP IP section If the printer is connected to a computer by a USB cable then open the Local Printer Settings Ut...

Page 205: ...5 1 Load paper from a fresh package Note Paper absorbs moisture due to high humidity Store paper in its original wrapper until you use it 2 Resend the print job Is the paper still curled Contact tech...

Page 206: ...lowing If the printer is on a network then open a Web browser and type the printer IP address in the address field Then navigate to Settings Paper Menu Note If you do not know the IP address of the pr...

Page 207: ...P address in the address field Then navigate to Settings Paper Menu Paper Texture Note If you do not know the IP address of the printer then print a network setup page and locate the IP address in the...

Page 208: ...m 1 85 in 38 mm 1 5 in Is the distance between defects equal to one of the listed measurements Go to step 2 1 Check if the distance between the defects equal to 80 mm 3 15 in 2 Take note of the distan...

Page 209: ...ld Then navigate to Settings Printer Settings Quality Menu Note If you do not know the IP address of the printer then print a network setup page and locate the IP address in the TCP IP section If the...

Page 210: ...twork setup page and locate the IP address in the TCP IP section If the printer is connected to a computer by a USB cable then open the Local Printer Settings Utility for Windows or Printer Settings f...

Page 211: ...Note If you do not know the IP address of the printer then print a network setup page and locate the IP address in the TCP IP section If the printer is connected to a computer by a USB cable then ope...

Page 212: ...eld Then navigate to Settings Printer Settings Quality Menu Note If you do not know the IP address of the printer then print a network setup page and locate the IP address in the TCP IP section If the...

Page 213: ...work setup page and locate the IP address in the TCP IP section If the printer is connected to a computer by a USB cable then open the Local Printer Settings Utility for Windows or Printer Settings fo...

Page 214: ...address field Then navigate to Settings Paper Menu Paper Texture Note If you do not know the IP address of the printer then print a network setup page and locate the IP address in the TCP IP section I...

Page 215: ...ot expose the imaging unit to direct light for more than 10 minutes Extended exposure to light may cause print quality problems c Reinstall the imaging unit and then the cartridge 2 Resend the print j...

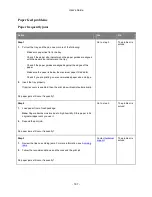
Page 216: ...orrect positions for the size of the paper loaded 2 Resend the print job Is the print still skewed Go to step 2 The problem is solved Step 2 1 Check if you are printing on a paper that is supported by...

Page 217: ...g unit to direct light for more than 10 minutes Extended exposure to light may cause print quality problems b Install the imaging unit and then the cartridge 2 Resend the print job Is the printer prin...

Page 218: ...te If you do not know the IP address of the printer then print a network setup page and locate the IP address in the TCP IP section If the printer is connected to a computer by a USB cable then open t...

Page 219: ...per Menu do either of the following If the printer is on a network then open a Web browser and type the printer IP address in the address field Then navigate to Settings Paper Menu Note If you do not...

Page 220: ...e the toner cartridge and then the imaging unit Warning Potential Damage Do not expose the imaging unit to direct light for more than 10 minutes Extended exposure to light may cause print quality prob...

Page 221: ...ddress in the address field Then navigate to Settings Paper Menu Note If you do not know the IP address of the printer then print a network setup page and locate the IP address in the TCP IP section I...

Page 222: ...more than 10 minutes Extended exposure to light may cause print quality problems b Install the imaging unit and then the cartridge 2 Resend the print job Do streaked vertical lines still appear on pri...

Page 223: ...rint job Do horizontal voids appear on prints Go to step 3 The problem is solved Step 3 1 Redistribute the toner in the imaging unit a Remove the toner cartridge and then the imaging unit b Firmly sha...

Page 224: ...rizontal voids appear on prints Contact technical support The problem is solved Vertical voids appear on prints Action Yes No Step 1 1 Make sure your software program is using a correct fill pattern 2...

Page 225: ...the printer then print a network setup page and locate the IP address in the TCP IP section If the printer is connected to a computer by a USB cable then open the Local Printer Settings Utility for W...

Page 226: ...he print job Do vertical voids still appear on prints Go to step 5 The problem is solved Step 5 1 Redistribute the toner in the imaging unit a Remove the toner cartridge and then the imaging unit b Fi...

Page 227: ...en open a Web browser and type the printer IP address in the address field Then navigate to Settings Paper Menu Note If you do not know the IP address of the printer then print a network setup page an...

Page 228: ...technical support Uneven print density Action Yes No Replace the imaging unit and then resend the print job Is the print density uneven Contact technical support The problem is solved Embedded Web Ser...

Page 229: ...tead of http before the printer IP address to access the Embedded Web Server 3 Press Enter Does the Embedded Web Server open The problem is solved Go to step 3 Step 3 Check if the network is working 1...

Page 230: ...trict you from accessing certain Web sites including the Embedded Web Server Does the Embedded Web Server open The problem is solved Contact your system support person Contacting technical support Whe...

Page 231: ...ility for or liability for errors contained in this guide or for incidental special or consequential damages arising out of the furnishing of this guide or the use of this guide in operating the equip...

Page 232: ...business purposes 3 You may make one backup copy of the Host Software provided your backup copy is not installed or used on any computer Not with standing the above restrictions you may install the Ho...

Page 233: ...VE LIMITATIONS MAY NOT APPLY TO YOU 11 Notice to Government End Users The Software is a commercial item as that term is defined at 48 C F R 2 101 consisting of commercial computer software and commerc...

Page 234: ...by inappropriate waste handling This product complies with RoHS 2002 95 EC directive Product disposal Do not dispose of the printer or supplies in the same manner as normal household waste Consult you...

Page 235: ...tput from electronic inputs 520 W Copy The product is generating hard copy output from hard copy original documents N A Scan The product is scanning hard copy documents N A Ready The product is waitin...

Page 236: ...are powered down safely The Hibernate mode can be entered in any of the following methods Using the Hibernate Timeout Using the Schedule Power modes Using the Sleep Hibernate button Factory default H...

Reviews: