6
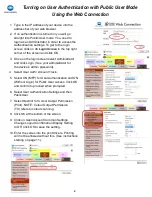
Turning on User Authentication with Public User Mode
from the Device Panel
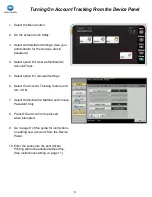
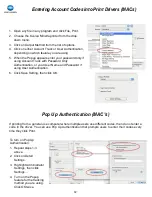
1. Select the Menu button.
2. On the screen select Utility.
3. Select Administrator Settings. (See your
administrator for the device’s admin
password).
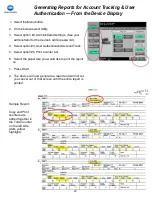
4. Select option #4: User Authentication/
Account Track.
5. Select option #1: General Settings
6. Select User Authentication and select ON
(MFP).
7. Select Public User Access and choose
the 3
rd
option ON (Without Login).
8. Select OK and confirm to proceed when
prompted.
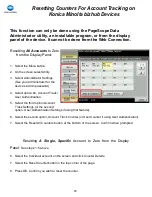
9. From the User Authentication/Account
Track menu select option #2 User
Authentication Settings.
10.
Select User Registration.
11.
Screen 1 of 50 of accounts will be
displayed. Scroll
up
to the last page
to find the Public User account. Select
it and touch Edit.
12.
Select Output Permissions and
choose Restrict for Colour Output.
Press OK. This will require users to
enter a password in order to copy or
print in colour, but allow black & white
copying and printing with no
restrictions.
13.
Go to page 9 of this guide for
instructions on adding new user accounts
from the Device Panel.
14.
Enter the codes into the print
drivers. Printing will not be allowed
without this. (See instructions starting
on page 11).

