5
Applications
5-60
Di5510/Di7210
3
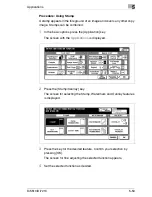
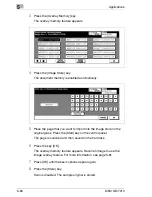
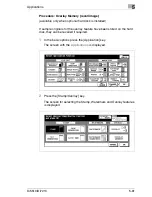
Press the [Overlay Memory] key.
The overlay memory feature appears.
4
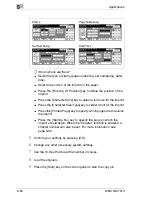
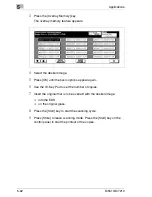
Press the [Image Store] key.
The document memory is enabled automatically.
5
Place the page that you want to import into the image store on the
original glass. Press the [Start] key on the control panel.
The page is scanned and then saved on the hard disk.
6
Press the key [OK].
The overlay memory feature appears. Recall an image to use the
image overlay feature. For more information, see page 5-61.
7
Press [OK] until the basic options appear again.
8
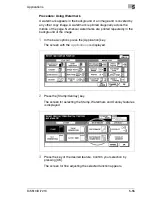
Press the [Store] key.
Scan is disabled. The sample original is stored.
Summary of Contents for Di5510
Page 1: ...Di5510 Di7210 Advanced Information...
Page 2: ......
Page 28: ...1 Introduction 1 16 Di5510 Di7210...
Page 90: ...2 Getting to Know Your System 2 62 Di5510 Di7210 9 Close the finisher door...
Page 96: ...2 Getting to Know Your System 2 68 Di5510 Di7210...
Page 148: ...3 Initial Steps 3 52 Di5510 Di7210...
Page 236: ...4 Basic Functions 4 88 Di5510 Di7210...
Page 352: ...6 Network functions 6 54 Di5510 Di7210 3 Configure settings as required...
Page 455: ...Troubleshooting 8 Di5510 Di7210 8 13 5 Close the finisher door...
Page 457: ...Troubleshooting 8 Di5510 Di7210 8 15 5 Close the finisher door...


