- 12 -
STARTING UP THE SOFTWARE
1. Start up the computer. The computer must be
on before connecting the camera.
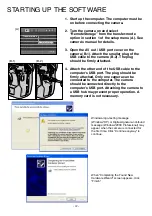
2. Turn the camera on and select
“RemoteStorage” from the transfer-mode
option in section 1 of the setup menu (A). See
camera’s manual for details.
3. Open the AV out / USB port cover on the
camera (B-1). Attach the smaller plug of the
USB cable to the camera (B-2). The plug
should be firmly attached.
4. Attach the other end of the USB cable to the
computer’s USB port. The plug should be
firmly attached. Only one camera can be
connected to the computer. The camera
should be connected directly to the
computer’s USB port. Attaching the camera to
a USB hub may prevent proper operation. A
memory card is not necessary.
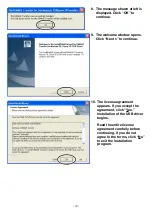
Windows-logo-testing message
(Windows
®
XP) or Digital-signature-not-found
message (Windows
®
2000 Professional) may
appear when the camera is connected for
the first time. Click “Continue anyway” to
continue.
LCDbrightness
Transfer mode
Data storage
Video output
PTP
Audio signals
RemoteStorage
Language
Date/Time set
(A)
(B-1)
(B-2)
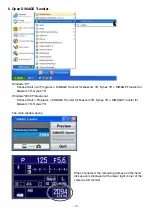
When “Completing the Found New
Hardware Wizard” screen appears, click
“Finish.”


