1-6
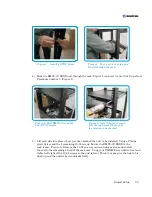
Figure 7. Tighten the nut on the
Figure 8. RMVS-1U.XXXX correctly
rear bracket.
Mounted.
.
6)
7)
Using the adjustable wrench tighten the rear bracket hardware. (Figure 7), from
procedure 2.
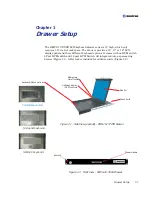
The RMVS-1U.XXXX is now mounted in the rack (Figure 8). To use the unit, unlock
the unit, grasp the handle and pull it out to the fully extended and locked position.
Then lift the handle up to position the display at a comfortable viewing angle.
RMVS-1U LCD/Keyboard Drawer Series User’s Guide
Summary of Contents for RMVS-1U
Page 6: ...This page intentionally left blank Vi RMVS 1U LCD Keyboard Drawer Series User s Guide...
Page 8: ...This page intentionally left blank Viii RMVS 1U LCD Keyboard Drawer Series User s Guide...
Page 12: ...This page intentionally left blank xii RMVS 1U LCD Keyboard Drawer Series User s Guide...
Page 14: ...This page intentionally left blank xiv RMVS 1U LCD Keyboard Drawer Series User s Guide...
Page 18: ...This page intentionally left blank xviii RMVS 1U LCD Keyboard Drawer Series User s Guide...
Page 20: ...This page intentionally left blank xx RMVS 1U LCD Keyboard Drawer Series User s Guide...
Page 24: ...xxiv This page intentionally left blank RMVS 1U LCD Keyboard Drawer Series User s Guide...
Page 37: ...1 10 RMVS 1U LCD Keyboard Drawer Series User s Guide This page intentionally left blank...
Page 38: ...1 11 RMVS 1U LCD Keyboard Drawer Series User s Guide This page intentionally left blank...

