background image

19 


Governor  Store  is  not  able  to  compensate  for 
packs  with  different  cell  counts.  Therefore,  in 
mode  4  with  governor  store  activated,  it  is  not 
possible,  for  example, 

to  program  with  a  10S 

battery  and  expect 

the  same  RPM  with  a  12S 

battery 

afterwards.


When  changing  the  set-up  (battery  cell 
count,  motor, 

gearing,  rotor  blades,  etc.) 

mode  4  must  b

e  reprogrammed  when 

governor store is activated

!


Autorotation 

(bail  out)  is  an  integral  part  of  mode 

4.  It  cannot  be  selectively 

programmed  with  or 

without AR. 
Low  voltage  slow  down 

(deep  discharge 

protection) is active, therefore the motor’s RPM is 
slowed,  when  the  adjusted 

battery  discharge 

voltage is reached 

(see 3.4).  

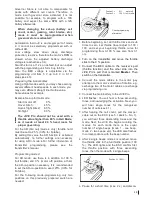
Smooth start is at 12 s on default, 

but can adjust 

with the programming unit form 8 

up to 60 s.


Also,  the  BEC  voltage  is  adjustable  via  the 
programming  unit  from  5  V  up  to  8  V  in  0.1  V 
steps 

(see 4.3).


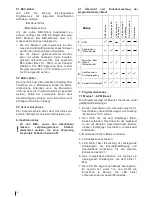
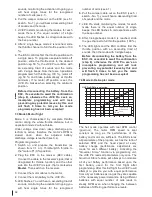
Preparing the transmitter


Using a flight mode switch, you may chose among 
several different head speeds. In each mode, you 
may set a different straight line throttle value. 
Some values for example: 

Example Set-up for Heli 

mode:  

Start / motor off: 

  0 

Hover (

Idle 1): 

45 % 

Scenic flight 

(Idle 2): 

60 

%


3D-flight  

80 

%


The  JIVE  Pro  should  not  be  used  with  a 
throttle value higher than 80 % in Heli Mode, 
as  it  needs  at  least  20  %  head  room  for 
proper governing.


For  the  AR  (bail  out) 

(mode  4  only), throttle  hold 

must be set to 25 % (30% for Futaba).


By  setting  this  value  the  AR  function  is  activated 
automatically,  no  further  settings  are  n

ecessary 

for  using  AR  in mode 4.For further  information  of 
transmitter  programming,  please  see  the 
transmitter’s manual. 
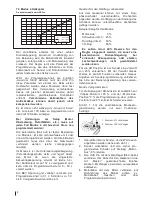
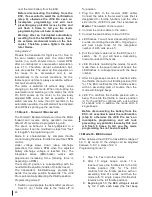
 
Programming mode 4

:


For  AR  mode,  use  there  is  in  addition  to  100 

(full  throttle)  and  0  %  (motor  off)  position  a  third, 
the  AR-on-position necessary.  It is r

ecommended 

to set the AR-on-position 

to exact 25% (30% for 

Futaba).


For  the  following 

mode-programming  only  two 

positions  on  this  previously  prepared  switch  are 
needed:


Position 1 =  

0 %  

motor off 

Position 2 =  

100 %  full throttle


2


1


Check program

ming 

afterwards!


1. 

Before  beginning,  set  all  throttle  trims  and  sub 
trims  to  zero,  set  throttle  travel  adjust  to  100  / 
100,  and  set  your  beginning  throttle  curve  for 
programming  from  0-100  % 

(see  also  from  3.1 

on). 

2. 

Turn  on  the  transmitter  and  move  the  throttle 
stick to the 0 % position. 
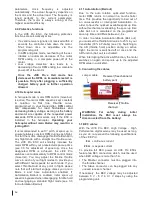
3. 

Connect  the  BEC  cable  to  the  receiver’s  port 
(throttle  function)  and  the  other  side  into  the 
JIVE  Pro's  port  that  is  marked 

Master

.  Then 

switch on the transmitter. 

4. 

Connect  the  motor  cables  to  the 

motor  (pay 

attention to the motor’s direction of r

otation, e.g. 

exchange two of the motor cables 

or exchange 

via programming unit.


5. 

Connect the main battery to the JIVE Pro.


6. 

LED  flashes.  You  will  hear  a  three  ascending 
tones, acknowledging the activation. Next, you 
will  hear  single  tones  for  the  recognized 
nu

mber of cells (see 4.1).
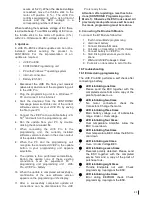
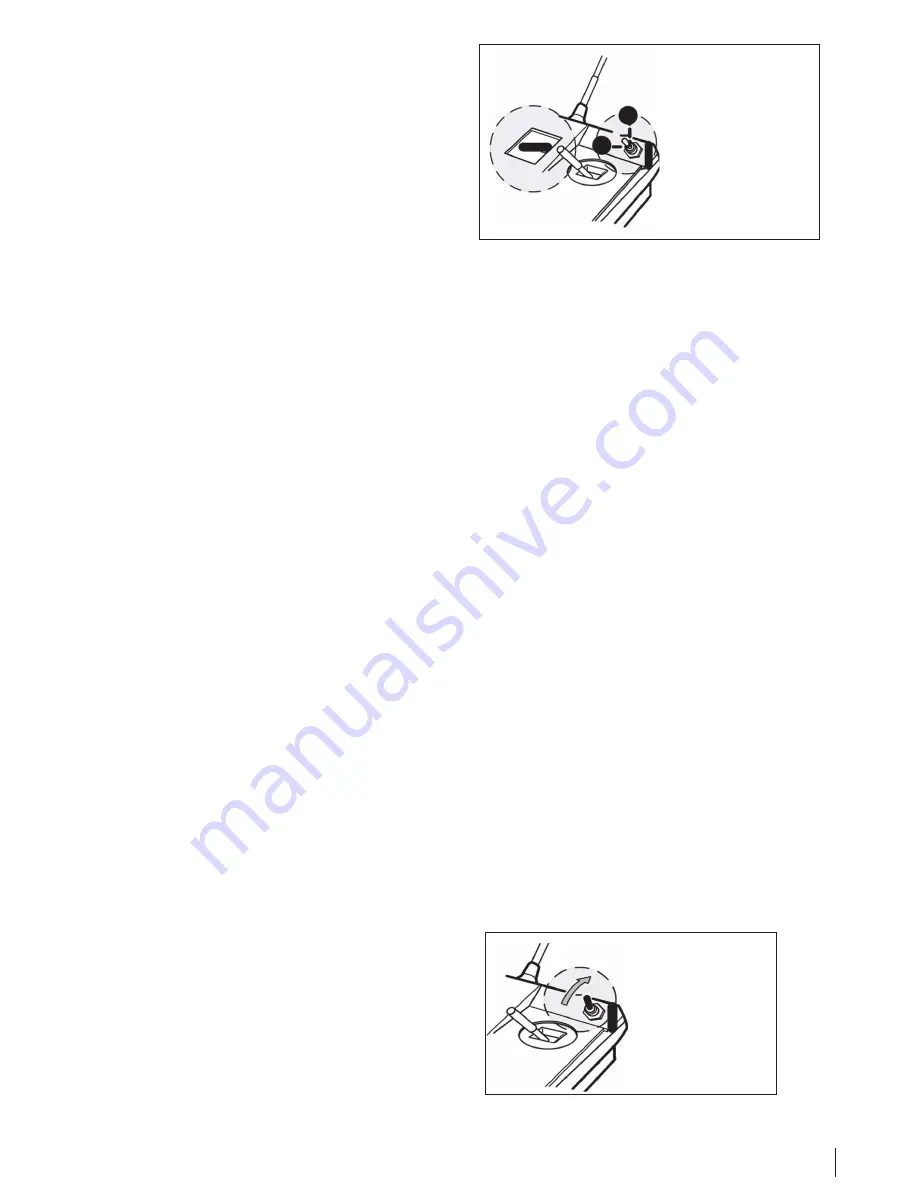
 

7. 

After  hearing  the  cell  count,  pull  the  Jumper 
cable out on 

the ESC (see 5 /  sketch - No. 7), 

you  will  hear  three  descending  tones  and  the 
mode. Next,  the  JIVE  Pro begins  counting  the 
modes,  for  each  mode  there  is  the  equal 
nu

mber  of  single  beeps  (mode  1  -  one  beep, 

mode 2 - two beeps, etc), the LED also 

flashes 

in correspondence with the 

beep number.


8. 

After 4 single beeps mode 4 is 

reached, move 

the throttle stick to the full throttle 

position (100 

%).  The  LED  lights  and  the  ESC  confirm  first 
the  throttle 

position  with  three  ascending 

tones, then 

the mode with 4 single beeps.


Position 2 = 100%!


9. 

Pause  for  a  short time 

(max. 2  s),  and  discon-

!

!

Summary of Contents for JIVE Pro 120+ HV

Page 1: ...eitung Operation Manual Stand Juli 2017 Effective July 2017 KONTRONIK eine Marke der SOBEK Drives GmbH KONTRONIK a brand of SOBEK Drives GmbH Am Oberfeld 9 D 72108 Rottenburg am Neckar Tel 07457 9435 0 Fax 07457 9435 90 E Mail info kontronik com ...

Page 2: ...he Abbildung unter Punkt 5 1 1 Lieferumfang 1 JIVE Pro Regler 2 1 x BEC Kabel JIVE Pro 80 HV 3 Anleitung 4 Satz Aufkleber 5 zus 1x BEC Kabel und 1x Kühlkörper bei JIVE Pro 120 HV 2 Sicherheitshinweise Der JIVE Pro ist ein Produkt das aus schließlich für den Modellbaubetrieb vor gesehen ist Keinesfalls darf der JIVE Pro in bemannten Anwendungen eingesetzt werden Um ein Überhitzen des Reglers zu ver...

Page 3: ...mmiert werden 3 3 Sanftanlauf Mittels Sanftanlauf erhöht der Regler beim Start innerhalb der eingestellten Zeit die Motordrehzahl Die Zeit für das Hochlaufen von 0 auf 100 kann über die Programmiereinheit zwischen 8 s und 60 s eingestellt werden Default ca 12 s Je höher der festgelegte Prozentsatz des Gaskanals am Sender ist desto höher ist die eingeregelte Drehzahl KONTRONIK empfiehlt für optimal...

Page 4: ...pfiehlt zur Fixierung des Kühlkörpers dünnflüssigen Sekundenklebstoff um eine direkte Kühlanbindung zu erreichen 4 3 BEC JIVE Pro Regler verfügen über ein getaktetes BEC Dabei ist die Belastbarkeit des JIVE Pro BECs weitgehend unabhängig von der Eingangsspannung Die Verwendung des BECs ist bei allen Betriebsspannungen möglich Es zeichnet sich durch eine überdurchschnittliche Störunterdrückung aus ...

Page 5: ...er auf 0 Pitch zu stellen damit die Drehzahl bei jedem Flug annähernd gleich ist Zum Starten des Motors den zuvor festgelegten Schalter siehe Punkt 3 1 auf die Idle 1 Position stellen Mittels Sanftanlauf erhöht der Regler innerhalb der eingestellten Hochlaufzeit die Motordrehzahl Einstellung siehe 3 3 Wenn die vorher eingestellte Motordrehzahl erreicht ist schaltet der Regler automatisch auf Regel...

Page 6: ... Inbetriebnahme An den BEC sowie den Akkukabeln müssen verpolungssichere Stecker verwendet werden da eine Verpolung irreparable Schäden hervorruft 6 1 Übersicht und Funktionsumfang der programmierbaren Modi 7 Programmiermodus 7 1 Modus 1 APM Reset Die Programmierung mit Modus 1 löscht alle vorher getätigten Einstellungen 1 Sender einschalten und vorbereiten wie ab 3 1 beschrieben Gas Pitchknüppel ...

Page 7: ...hebel in die gewünschte Position bringen z B 50 der JIVE Pro bestätigt mit einem ansteigenden Dreiklang und den Modus mit 2 Einzeltönen Damit sind im JIVE Pro 3 Stellungen programmiert Vollgas z B 100 Motor Aus z B 50 und Bremse automatisch bei Gashebel Minimum Sollte die optionale Motor Aus Position nicht gesetzt werden bremst der JIVE Pro bei der minimum Position Vor dem Trennen des Reglers vom ...

Page 8: ... die Programmiereinheit von 8 60 s variiert werden Die BEC Spannung ist variabel und kann per Programmiereinheit in 0 1 V Schritten von 5 V bis 8 V eingestellt werden siehe 4 3 Sender für den Heliflug vorbereiten Auf dem Gaskanal können mit einem Flug phasenschalter unterschiedliche Drehzahlen abgerufen werden Abhängig von der Stellung des Schalters können unterschiedliche Drehzahlen geflogen werd...

Page 9: ...tion wird beim erneuten Hoch fahren der Drehzahl wieder der Sanftanlauf aktiviert 7 5 Modus 6 Vorwärts Rückwärts Der Vorwärts Rückwärts Modus verfügt darüber den Motor im Betrieb vorwärts und rückwärts laufen zu lassen Default aus über Programmiereinheit einschaltbar Das Ansprechverhalten ist werkseitig auf einen Mittelwert programmiert Es kann mittels Programmiereinheit von schnell bis träge verä...

Page 10: ...hließend die Updateeinheit mit einem Windows PC und stellen eine Internetverbindung her 3 Laden Sie von der KONTRONIK Homepage www kontronik com die aktuelle Software version für Ihren JIVE Pro herunter und speichern die Datei auf Ihrem PC 4 Verbinden Sie den JIVE Pro mit einem geeigneten Akku 20 50 V und schalten die Updateeinheit ein 5 Führen Sie die Updatedatei auf Ihrem PC durch Doppelklick au...

Page 11: ...st zu dicht an der Knüppelstellung vorne Der Abstand zwischen der Knüppelstellung hinten und Knüppelstellung vorne ist zu groß Den Servoweg für den Gas Knüppel auf 100 ggf auch weniger programmieren Starke Verschiebung der Knüppelstellungen in Richtung lange Impulse eine der Knüppelstellungen muss eine Impulslänge kürzer als 2 ms besitzen Dieser Fehler kann nur bei Computersendern auftreten Am Fer...

Page 12: ...ichen Vorschriften des Landes in dem sie getätigt wurden Alle weitergehenden Ansprüche sind ausge schlossen Dies gilt insbesondere für Schadenersatzansprüche die durch Ausfall oder Fehlfunktion ausgelöst wurden Für Personenschäden Sachschäden und deren Folgen die aus unserer Lieferung oder Arbeit entstehen können wir außer bei Vorsatz oder grober Fahrlässigkeit unsererseits keine Haftung übernehme...

Page 13: ... 3 Manual 4 Sticker 5 add 1x BEC cable and 1x heatsink for JIVE Pro 120 HV 2 Safety instructions The JIVE Pro is a product that is designed exclusively for radio controlled model applications Under no circumstances the JIVE Pro should be used in manned applications Always ensure sufficient cooling in order to prevent overheating of the ESC If necessary a heatsink should be mounted to the JIVE Pro ...

Page 14: ... governed head speed In order to have effective governor range KONTRONIK recommends a maximum throttle setting of 80 Any value higher than 80 limits the ability of the ESC to obtain proper governor operation 3 4 Low voltage protection The JIVE Pro ESCs are equipped with low voltage protection which will automatically set the safe operational parameters for cell count and voltage Depending on the m...

Page 15: ...ro features a high interference rejection BEC capacity of JIVE Pro 8 A continuous 20 A max peak current BEC Voltage default 5 6 V The BEC voltage can be adjusted from 5 V to 8 V in 0 1 V steps by using the programming unit For safety reasons we recommend connecting either a 2 cell LiFePo battery adjusted BEC voltage 6 6 V 7 V or a 2 cell LiPo battery adjusted BEC voltage 8 V or a 4 cell NiCd batte...

Page 16: ...vernor You may adjust the flat line throttle curve in each of your flight modes to provide you with different head speeds for each mode If you select Throttle Hold at any point in flight please note that soft start will engage unless you are in Mode 4 and have Autorotation enabled If Autorotation Bailout is enabled initial spool up speed is bypassed when disengaging throttle hold and reengaging a ...

Page 17: ... will then hear three descending tones and the mode 6 JIVE Pro starts counting the modes for each mode there is the equal number of single beeps mode 1 one beep mode 2 two beeps etc the LED flashes in corres pondence with the beep number 7 After the first single tone mode 1 is reached move the throttle channel to full throttle position 100 The LED lights and the ESC confirms first the throttle pos...

Page 18: ...hen switch on the receiver 3 Connect the motor cables to the motor 4 Connect the main battery to the JIVE Pro 5 LED flashes You will hear a ascending triad of sounds monitoring the activation Ongoing you will hear single tones for the recognized number of cells see 4 1 6 Pull the Jumper cable out on the ESC see 5 sketch No 7 you will hear a descending triad of sounds and the mode 7 JIVE Pro starts...

Page 19: ...4 For AR mode use there is in addition to 100 full throttle and 0 motor off position a third the AR on position necessary It is recommended to set the AR on position to exact 25 30 for Futaba For the following mode programming only two positions on this previously prepared switch are needed Position 1 0 motor off Position 2 100 full throttle 2 2 1 1 Check programming afterwards 1 Before beginning ...

Page 20: ...avel The transmitter s full throttle way prompts for wards the reverse position backwards The JIVE Pro is automatically detecting the throttle position Programming mode 6 1 Switch on and prepare the transmitter as shown from 3 1 on Throttle stick to the motor off 0 position 1 Plug the ESC to the receiver BEC cable Connect the cable to the receiver s jack that is designated for throttle function an...

Page 21: ...gramming unit JIVE Pro JIVE Pro battery 10 When the update is completed successfully a confirmation of the new software version appears on the programming unit s display 11 After a successfully completed update all connections can be disconnected the JIVE Pro is ready for use Attention after updating a reset has to be done KONTRONIK Programming unit or Mode 1 Otherwise the ESC looks dead All previ...

Page 22: ...49 0 7457 9435 0 Fax 49 0 7457 9435 90 Email info kontronik com Internet www kontronik com 11 1 Recycling Electronic components should not be disposed with household waste they have to be disposed according to legal and environmental regulations National and local disposal regulation has to be respected 11 2 Warranty SOBEK Drives GmbH guarantees this product to be free from factory defects in mate...

Reviews: