background image

For detailed information consult the Warranty

section of the "USE and CARE" guide!

If your

WineKoolR™

cooling unit or cabinet fails to perform as designed within one year of the date of purchase, 

KoolR Products

warrants that, upon your request, it will be repaired or replaced, at our option, during the one year warranty period.

WineKoolR™

cooling 

unit that is purchased and used in the con-

tinental United States or Canada (excludes Alaska and Hawaii). It is not valid for subsequent purchasers, nor for units in use outside 
North America. The warranty period for your cooling unit commences on the date you purchased it and expires one year thereafter.

PROOF OF PURCHASE

Within 10 days of purchase, complete and mail, fax or e-mail the registration sheet to 

KoolR Products

™. Alternately, you may register

your warranty on our Internet website,

www.koolr.com

. When you make a warranty claim, you must forward a copy of your original 

dated bill of sale to establish your date of purchase.

IF YOU HAVE A PROBLEM WITH YOUR UNIT

Customer service and warranty problems are handled online at

www.koolr.com

.

You will find a comprehensive well documented 

and easy-to-use solution to almost any question or problem you may have. The inquiry forms are filled in on-line and co

nnect you to our

representatives who will process your requests for warranty service. This is the quickest way to solve your problems.

REPLACEMENT ?

At our option we may choose to offer you a replacement part or product rather than a repair. Upon your authorization to accept a
replacement unit and with appropriate security (credit card authorization), we will promptly ship a replacement unit. The replace-
ment may be a unit that has been reconditioned by

KoolR Products

™. The unit that needs service must be packed and

returned to us, shipping prepaid. Upon its receipt, we will release your credit card security. Go online to the SUPPORT section on our 
website at

www.koolr.com

to request warranty service.

Your unit is designed to perform with a minimum amount of user maintenance when

installed and operated precisely as directed in 

the manual

.

of the condensor coil. Also, you must take steps to protect the unit from sudden power surges. As with any sensitive electronic device, 
your

WineKoolR™

cooling unit

may be damaged by power surges or spikes, including lightning strikes, acts of God, sudden

interruptions or prolonged low-voltage conditions, which are not covered by this Warranty. You must monitor your unit’s 
performance on a daily basis. If there is an apparent problem or “Alarm” condition, you must disconnect the power supply to avoid 
potential damage to your wine collection.It is your responsibility to insure your wine, and to take all reasonable and necessary
precautions to safeguard its condition.

WHAT THE WARRANTY DOES NOT COVER

This warranty covers only defects in materials and workmanship provided by

KoolR Products

™ and does not cover equipment damage 

or malfunction from misuse, abuse, accident, acts of God, or any unauthorized alteration or modification. The product must have
been installed and operated precisely as directed in the manual which accompanies each product. Improper return shipping, inadequate
packaging or shipping damage is not covered unless the unit is packaged and shipped in accordance with 

KoolR Products

replacement procedures. Third party servicing of this product during the warranty period will also void the warranty, as will any 
evidence of tampering or alteration to the serial number and or the original dated bill of sale.

YOUR ONLY REMEDY UNDER THIS WARRANTY IS THE REPLACEMENT OR REPAIR OF YOUR ELIGIBLE PRODUCT AS DESCRIBED ABOVE. NEI-
THER THIS WARRANTY NOR ANY OTHER WARRANTY, EXPRESS OR IMPLIED, INCLUDING, BUT NOT LIMITED TO, THE IMPLIED WARRANTIES 
OF MERCHANTABILITY AND FITNESS FOR A PARTICULAR PURPOSE, SHALL EXTEND BEYOND THE ONE-YEAR WARRANTY PERIOD. UNDER NO 
CIRCUMSTANCES SHALL 

KoolR Products

™ BE LIABLE FOR ANY SPECIAL INCIDENTAL, INDIRECT OR PUNITIVE DAMAGES OR FOR ANY 

CONSEQUENTIAL DAMAGES, INCLUDING SPOILAGE OF WINE, EVEN IF

KoolR Products

™ KNOWS OR IS INFORMED THAT SUCH DAMAGES ARE

POSSIBLE. IT IS YOUR RESPONSIBILITY TO INSURE YOUR WINE, AND TAKE ALL REASONABLE, NECESSARY PRECAUTIONS TO SAFEGUARD ITS
CONDITION. SOME STATES DO NOT ALLOW THE EXCLUSION OR LIMITATION OF INCIDENTAL OR CONSEQUENTIAL DAMAGES, SO THE ABOVE
EXCLUSION OR LIMITATION MAY NOT APPLY TO YOU. NO RESELLER IS AUTHORIZED TO MODIFY THE TERMS OF THIS WARRANTY. ANY
ADDITIONAL WARRANTY OFFERED BY A RESELLER IS THE SOLE RESPONSIBILITY OF THAT RESELLER.

-

cian, or you may purchase a

new

unit at a

special discount

under our Extended Warranty Program. Please be ready to provide model, 

serial number, and your credit card. Let us assure you that local servicing will always be a

more

expensive and less satisfactory solu-

tion. More often than not repairs are not properly done and almost always take longer and cost more than purchasing a

discounted 

new

unit. Go online at

www.koolr.com

to request Replacement or see our Extended Warranty Program.

~ 23 ~

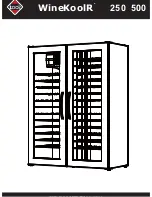
Summary of Contents for WineKoolR 250

Page 1: ...250 500 WineKoolR TM ...

Page 2: ... for periodic vacuuming of the condenser coil See troubleshooting for details Clean using a damp cloth and no detergents or polishes under any circumstances Always remove all bottles before relocating your wine cellar AREA FOR ASSEMBLING YOUR WINE CELLAR TOOLS Rubber mallet hex wrench included phillips screwdriver Helper is needed TEST THE COOLING UNIT Plug it in on a table top to verify that cont...

Page 3: ...x 1 x 1 x 2 SPACER Spacer x 2 CONNECTOR PLATES x 2 x 2 HINGES VENT HARDWARE Brace x 4 x 2 C Cooling Unit Bolts in cooling unit box D Allen in cooling unit box x 1 E Hooks x 2 Wrench x 1 Handle and Lock x 2 F G x 1 Power supply Wall Ties x 2 J Anchors x 2 Model 250 only G Screws x 2 H I ...

Page 4: ...INSERT CORNER LEFT ONLY 1 B A C K PLACE AGAINST WALL FLOOR W ALL BACK B A C K PLACE AGAINST WALL BACK P O S T 1 FLOOR W ALL F L O O R W ALL T IP ...

Page 5: ...2 I N S E R T FLOOR B A C K P L A C E A G A IN S T W A L L B A C K R I G H T BACK RIGHT W ALL BACK P O S T 1 R I G H T C O R N E R FLOOR B A C K R I G H T W ALL BACK RIGHT ...

Page 6: ...BACK PLACE AGAINST WALL LEFT BACK RIGHT LEFT R IG H T W ALL SPACER SPACER L E V E L PUSH OR TAP AT BOTTOM TO TAB SPACER LIFT 3 ...

Page 7: ... BACK 4 INSTALL BOTTOM 2 REST BOTTOM ON SPACERS O K N O SPACER SPACER BOTTOM OUTSIDE BACK BAC P L A C E A G A IN S T W A L 4 PULL OUT SPACERS BOTTOM BOTTOM BA P L A C E A G A IN BOTTOM OUTSID E BACK BOTTOM P R E S S P R E S S P R P R E S S ...

Page 8: ...LEGS 1 4 SPACING ON 4 CORNERS Easy access in upright position for final leveling LEAVE 1 2 SPACING ON CENTER LEGS 1 2 SPACING ON CENTERS Limited access in upright position WARNING Connector plates can be removed ONLY as described on page 19 BOTTOM OUTSIDE BACK BOTTOM A BOTTOM LEFT REAR TAP GENTLY BOTTOM RIGHT REAR HINGE 1 HINGE 2 CENTER REAR BOTTOM CENTER FRONT B LEGS W ASHER A W ASHER NO GAP ...

Page 9: ...T O P INSTALL TOP A INSERT TOP VENT CHECK ORIENTATION VENT OUTSIDE PRESS FOR FIRM LOCK OPPOSITE SIDE 6 ...

Page 10: ...PAGE 7 FOR TOP 4 6 DO NOT INSTALL HINGES YET INSTALL TOP CONNECTOR PLATES TOP OUTSIDE BACK TOP RIGHT REAR TAP GENTLY TOP LEFT REAR CENTER REAR TOP P R E S S P R E S S NO HINGE NO HINGE P R E S S P R E S S B WARNING HINGES can be removed ONLY as described on page 19 ...

Page 11: ...7 INSTALL CENTER POSTS 2 4 3 TO P S LO TS ...

Page 12: ...NGES ONLY HINGE 1 TAP GENTLY WASHER A PLACE WASHERS FIRST INSTALL TOP HINGES Door is made of very tough PLEXIGLAS but it can be scratched Handle and clean with care NOTE DOOR GASKET WILL RELAX IN A FEW DAYS ASSURING A GOOD SEAL ...

Page 13: ...9 CELLAR BOTTOM INSTALL BRACES 5 AND 6 HELPER NEEDED TO HOLD CABINET STEADY TABS ALIGN TO TABS PUSH DOWN BRACES 5 2 AND 6 RU 2 ...

Page 14: ...PRESS CELLAR BOTTOM 10 INSTALL SHELVES TAB REFERENCE START AT MIDDLE PRESS IN SIDES CLICK SHELF OVER TABS LONGER SHORTER FRONT SHELF TAB PRESS ...

Page 15: ...T IN CABINET C IN COOLING UNIT BOX CLEAR OPENING STRAIGHTEN AND PUSH THROUGH GET HELPER TO PULL FROM INSIDE AND LIFT UNIT LEVEL DURING FASTENING LEVEL TO OPENING UP TIGHT CHECK AFTER TIGHTENING VENT COOLING UNIT MUST SEAL ...

Page 16: ...1 12 13 W in e L ist 2 3 1 Connect the power to the power supply F 2 Stick the power supply to the top panel 3 Connect the low voltage plug to the voltage DOWN Hinge on Left UP Hinge on Right Door latch ...

Page 17: ...14 LEVEL CELLAR LEVEL DOORS ADJUST OUTER LEGS TO LEVEL DOORS D UP G HINGES ARE PRE SET ADJUSTMENTS SHOULD NOT BE REQUIRED ...

Page 18: ...TES AND SCREW IN SCREWS H I BRACE TO WALL for 250 models ONLY WALL MATERIALS VARY USE APPROPRIATE ANCHORS FOR YOUR APPLICATION 15 TO AVOID INJURY OR DAMAGE ALWAYS BRACE TO WALL RISK OF INJURY IF CABINET IS NOT FULLY LOADED IN THE BOTTOM IT CAN BE TOP HEAVY DO NOT PRESS IN FULLY NEVER MOVE LOADED CABINET EMPTY FIRST ...

Page 19: ...TIGHTEN LEGS FULLY PRY OFF CONNECTOR PLATE REUSE LEG FOR TOP HINGE REMOVE COOLING UNIT AND SHELVES LAY CELLAR DOWN FULLY TIGHTEN LEGS PRY OFF ALL CONNECTOR PLATES WITH FLAT SCREWDRIVER AND CENTER REAR ...

Page 20: ...nit after 10 minutes 57 56 70 57 57 57 57 58 57 56 57 14 57 57 57 F0 F0 F1 F0 1 Actual temperature PRESS SET temperature PRESS PRESS and RELEASE To increase PRESS once per degree To decrease PRESS once per degree The new value will be memorized and the controller will reset automatically The new value will be memorized and the controller will reset automatically Wait 5 seconds USE for each degree ...

Page 21: ...factors including the type of bottle loading proximity to the door corners exposure to outside temperature door usage etc Just as in air conditioned rooms and refrigerators not all locations measure the same temperature For example if you measure the air temperature exiting the coil it will always be substantially colder than the set air back into the cooling unit causing short cycles Remember the...

Page 22: ...bient temperatures and compensate for additional heat gain if any cabinet walls receive direct sunlight Take steps to improve circulation of air to and from the unit Adjust the legs to level the door for proper mag netic gasket seal Increase your SET TEMPERATURE Clean the grill areas If the problem persists go to our website at Although each WineKoolR cooling unit has been carefully tested at ever...

Page 23: ...t covered by this Warranty You must monitor your unit s performance on a daily basis If there is an apparent problem or Alarm condition you must disconnect the power supply to avoid potential damage to your wine collection It is your responsibility to insure your wine and to take all reasonable and necessary precautions to safeguard its condition WHAT THE WARRANTY DOES NOT COVER This warranty cove...

Page 24: ...250 500 WineKoolR TM ...

Reviews: