7
6
User Manual
• On the main screen, hold
◙
for 3 seconds to change display units between
°C/°F and LPM/GPM.
• You can exit any menu and return to the main screen by holding
◙
for 2
seconds.
• To reset
ALL
settings to default, hold ▼ + ▲ for 3 seconds.
Main Menu
To enter the main menu, briefly press
◙
. The selected option will begin flashing.
Use ▼ and ▲ to navigate this menu.
TEMP/FAN SET
: Temperature set-point adjustment
ALARM SET
: Alarm settings
RELAY SET
: Relay Trigger settings
PUMP SET
: Pump speed settings
DISPLAY SET
: LED display settings
When in the top menu, press
◙
to enter one of the above categories. To exit from
here, press ◄.
Display Panel
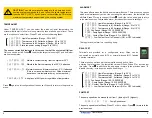
The Koolance display panel allows control and monitoring of various aspects of
the cooling unit. 5 buttons are used, with directional arrows to navigate or change
settings, and a center button to select/exit.
Navigate Up,
Increase Setting
Navigate Down,
Decrease Setting
Navigate
Left
Navigate
Right
Enter/Exit
◙
▲
▼
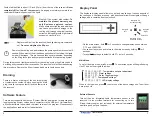
Power on the cooling unit, and increase the pump speed to move coolant if
needed. When most of the air has been pushed out of the tubing, the liquid
noise will decrease. This process can take several minutes, depending
on the filling technique and components attached to the cooling system.
During this process, liquid components (or the cooling system itself) may need to
be tilted gently to assist with air evacuation. The reservoir level will decrease during
this procedure. Remove the fill port cap and add more liquid as needed.
Slowly fill the system with coolant.
To
maintain the product warranty, use
only Koolance approved coolant.
Many alternative liquids and additives
can cause permanent damage to the
cooling unit (through chemical reaction,
corrosion, biological growth, high thermal
expansion, viscosity, etc.).
Replace the fill port on the reservoir (hand tightening is recommend
-
ed).
Do not overtighten the fill port.
Coolant will be filled to about 1/2-inch (13mm) from the top of the reservoir.
Never
completely fill or “top-off” the reservoir.
An air gap must always remain to ac-
commodate thermal expansion of the liquid.
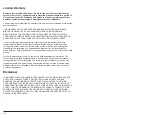
Draining
There is a drain on the rear of the unit for emptying
or replacing the coolant. Before opening the drain
plug, remove the top coolant fill port to allow air into
the reservoir.
Software Feature
This product supports Koolance’s “System Monitor” application for adjusting and
logging cooling system values from a computer via the USB port. Visit www.kool-
ance.com/software to download the latest version of the program. Please consult
the application’s readme.txt for further details.
External Sensors
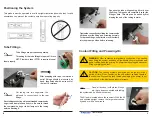
This unit has an integrated liquid temperature sensor in the
reservoir. It also provides terminals for connecting up to two
K-type thermocouples (not included) for external temperature
monitoring and set point options.


