background image

Superior Liquid Cooling Systems

®

English  v1.01

RP-1250

User’s Manual

RP-1250

User’s Manual

www.koolance.com

ISO 

9001

Printed in Korea

Summary of Contents for RP-1250

Page 1: ...Superior Liquid Cooling Systems English v1 01 RP 1250 User s Manual RP 1250 User s Manual www koolance com ISO 9001 Printed in Korea ...

Page 2: ...onal use and household use but is not designed developed and manufactured as contemplated for use accompanying fatal risks or dangers that unless extremely high safety is secured could lead directly to death personal injury severe physical damage or other loss including without limitation nuclear power core control airplane control air traffic control mass transport operation control life support ...

Page 3: ...ergic skin reaction with the solution although generally mild Avoid contact as much as possible and wash exposed area with soap and water for at least 15 minutes If irritation persists or if contact has been prolonged get medical help For further information please visit our website at www koolance com CAUTION Installation of third party cooling products is done at the user s own risk Koolance Inc...

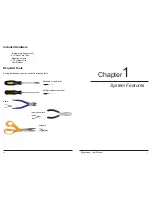
Page 4: ...s Thru Wire Mounting screws ATX Jumper Wire User Manual Included Hardware flat head screw driver phillips head screw driver pliers scissors Required Tools During installation you may need the following tools long nose pliers Chapter1 System Features ...

Page 5: ...3 seconds to change display units between ºC ºF and LPM GPM You can exit any menu and return to the main screen by holding for 2 seconds To reset ALL settings to default hold for 5 seconds Main Menu To enter the main menu briefly press The selected option will begin flashing Use and to navigate this menu TEMP SET Temperature alarm and shutdown settings FAN SET Fan settings PUMP SET Pump settings F...

Page 6: ...NS 50 All Fans Master Speed Setting FAN1 SET 84 Fan Channel 1 Speed Setting FAN2 SET 47 Fan Channel 2 Speed Setting FAN3 SET 30 Fan Channel 3 Speed Setting The selected fan channel will flash Press and to navigate press to return to the previous menu or press to configure this fan channel ALL FANS 50 The speed value will flash Press or to adjust this value Press to confirm the setting Higher fan s...

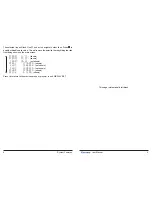
Page 7: ...on The first line will flash Press or to change what this line will display TEMP1 21 7C Show temperature sensor 1 TEMP2 21 2C Show temperature sensor 2 TEMP3 20 8C Show temperature sensor 3 FAN1 1770RPM Show fan channel 1 FAN2 1640RPM Show fan channel 2 FAN3 1820RPM Show fan channel 3 PUMP 5730RPM Show pump speed FLOW 4 1LPM Show flow rate Press to confirm The second line will flash Press or to ad...

Page 8: ...enable or disable each value This will remove the asterisk thereby hiding that line from being shown on the main screen TEMP1 21 7C shown TEMP2 21 2C shown TEMP3 20 8C not shown FAN1 1770RPM shown FAN2 1640RPM not shown FAN3 1820RPM not shown PUMP 5730RPM shown FLOW 4 1LPM shown Press to return to the previous menu or press to exit DISPLAY SET ...

Page 9: ...erature sensors shown on the front display IN OUT Liquid fitting sockets The rear of the unit accepts various connections to integrate with your cooling system PUMP Internal pump INS FM17 INS FM16 Connect an optional flow meter to display flow rate ON SYNC OFF Adjusts LED lighting of INS FM16 flow meter ATX Wire lead for safety shutdown relay For computer use leave the 2 pin wire connected to NO N...

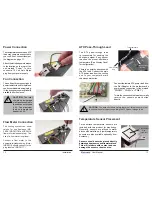
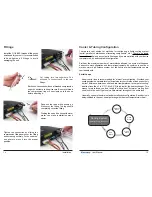
Page 10: ...s to the location on the rear of the unit marked Power To this connect a 12 Volt 4 pin Molex plug from your power supply The cooling system can show values for one Koolance INS FM16 INS FM17 N orINS FM18 flow meter sold separately The use of a flow meter is optional Connect a flow meter to the appropriately labeled plug Note INS FM18 should connect to the plug labeled INS FM17 Fan Connection This ...

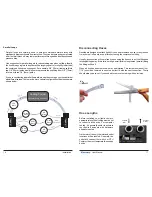
Page 11: ...ost loops you don t need to worry about hot water moving from one block to the next It gets only a little warmer throughout the entire loop Generally series is the simplest and most effective configuration Each device is daisy chained to the next usually starting with the most temperature critical CPU Block Chipset Block Cooling System Radiator Pump Reservoir Video Block Video Block Fittings Cut t...

Page 12: ...t Block RAM Block HD Block Splitter 10mm 6mm 6mm 6mm 6mm 6mm 6mm Installation Nozzles are designed to attach tightly If you need to remove a hose for any reason it may not pull off easily even after unscrewing the compression fitting Usually a connection will come free by squeezing the hose on top of the fitting and twisting pulling away If this fails cutting a small incision lengthwise parallel a...

Page 13: ... Please refer to your cooler kit s individual installation instructions then continue on to the next section WARNING The cooling system s pump can not be run dry for any period of time Never power on the computer or cooling system without sufficient liquid in the reservoir Dry running and thereby damaging the pump is not covered under the Koolance product warranty Continue connecting all of your c...

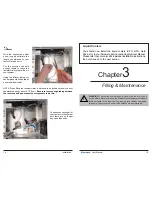
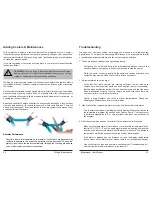
Page 14: ...During this process cooling systems often need to be tilted gently to allow air to escape from the pump and radiator Until the pump is burped in this manner it can cavitate and there will be no circulation This does NOT indicate a problem with the pump The reservoir level will decrease during this procedure Remove the fill port cap and add more liquid when needed If you frequently hear this rushin...

Page 15: ...g performance To help avoid unnecessary RMA issues we have prepared this list of possible operational problems and their most common solutions 1 The pump does not appear to be operating properly Pumps need to be burped during the initial bleeding process to avoid this situation Reduce pump speed but not low enough to stop the pump While the pump is running gently tilt the system in various directi...

Page 16: ...t for further assistance 7 My computer s BIOS gives me errors that there is no cooling fan attached Some motherboards will not boot or may generate an error or alarm if no cooling fan is attached to the CPU or motherboard chipset power connectors There is typically an option to disable this warning in BIOS but you may need to boot with a fan attached initially to disable this setting If the system...

Page 17: ...mage resulting from warranty service performed by a non authorized repair service No responsibility is assumed for any special incidental or consequential damages due to a defective Koolance product In order to obtain warranty service contact our RMA department for information The product must be shipped postage prepaid to an authorized Koolance service location It is suggested that for your prote...

Reviews: