


TouchView user interface
En-
14
i: Check-box (and radio buttons)
Check
‐
boxes
turn
functions
or
options
on
and
off,
and
radio
buttons
select
between
a
small
set
of
options.
Tip
:
You
can
select
check
‐
boxes
and
radio
buttons
by
touching
their
text
labels;
you
don’t
need
to
touch
directly
on
the
graphic
boxes
and
buttons.
j: Page menu button
When
this
button
is
pressed,
a
list
of
menu
commands
will
appear.
The
available
commands
will
vary
depending
on
the
current
page.
To
select
a
command,
just
touch
it.
The
page
menu
will
close
when
you
press
the
LCD
screen
at
a
location
other
than
the
page
menu,
or
when
you
press
the
EXIT
button.
Although
each
page
may
have
its
own
unique
menu
commands,
the
menus
are
standardized
as
much
as
possible.
For
instance,
WRITE
is
usually
the
first
menu
item
in
Program,
Combination,
and
Global
modes.
Menu shortcut: ENTER + numeric keypad
You
can
use
a
shortcut
to
access
any
of
the
first
ten
menu
items:
1. Hold
down
the
ENTER
key.
2. Press
a
number
(0
‐
9)
on
the
numeric
keypad
to
select
the
desired
menu
command,
starting
with
0.
For
instance,
press
0
for
the
first
menu
command,
1
for
the
second,
and
so
on.
If
the
menu
command
just
toggles
an
option
on
and
off
(such
as
Exclusive
Solo),
then
you’re
done.
If
the
command
calls
up
a
dialog
box,
the
dialog
will
appear
on
the
LCD,
and
you
can
proceed
just
as
if
you’d
selected
the
command
from
the
touch
‐
screen.
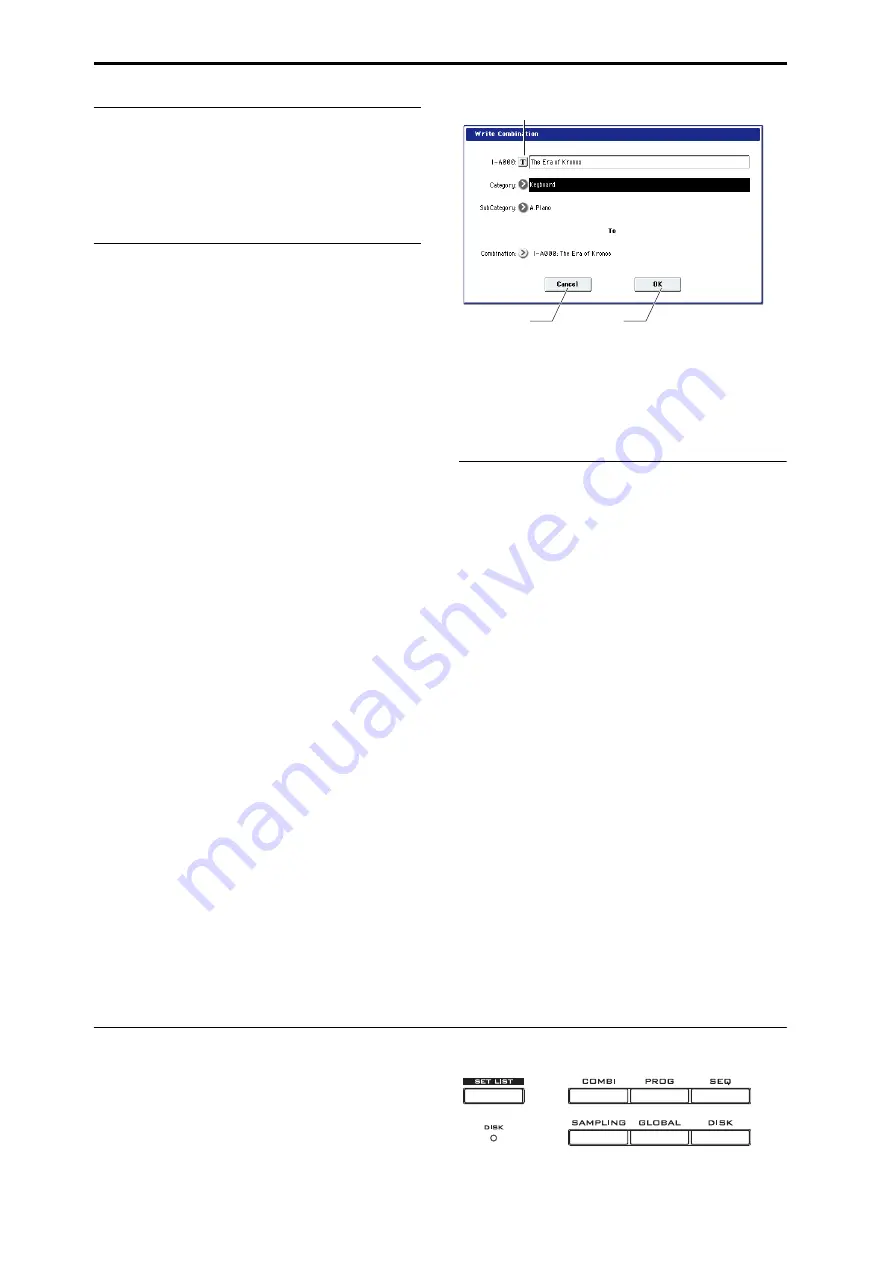
Dialog box
Many
menu
commands
use
dialog
boxes
to
make
additional
settings.
The
dialog
box
that
appears
will
depend
on
the
currently
selected
menu
command.
To
confirm
settings
in
a
dialog
box,
press
the
OK
button.
To
exit
without
making
changes,
press
the
Cancel
button.
After
pressing
either
OK
or
Cancel,
the
dialog
box
will
close.
Text edit button
Pressing
this
button
brings
up
an
on
‐
screen
keyboard,
for
changing
the
name
of
Programs,
Combis,
Songs,
Wave
Sequences,
Drum
Kits,
etc.
For
more
information,
see
under
in
the
OG.
Other objects
Patch panels
The
MS
‐
20EX
and
MOD
‐
7
use
on
‐
screen
patch
panels
to
route
audio
and
control
signals.
To
make
a
connection
between
two
patch
points:
1. Touch
one
of
the
two
jacks
(either
input
or
output).
A
yellow
square
will
appear
around
the
selected
jack.
2. Touch
the
same
jack
again.
The
yellow
square
will
blink,
showing
that
you’re
about
to
make
a
connection.
To
cancel
and
return
to
the
normal
selected
state,
touch
the
same
jack
a
third
time.
3. Touch
the
other
jack.
The
two
jacks
will
now
be
connected
by
a
patch
cable.
To
delete
a
connection
between
two
patch
points:
1. Touch
the
input
jack.
Note:
you
can
also
select
the
output
jack.
However,
if
the
output
is
connected
to
more
than
one
input,
all
of
the
connections
from
that
output
will
be
affected.
2. Press
the
Disconnect
button.
The
selected
connection
will
be
deleted.
Program Play page Overview/Jump graphics
The
main
Program
P0:Play
page
(see
features
an
interactive
overview
of
the
most
important
parameters,
such
as
oscillators,
filters,
envelopes,
LFOs,
and
so
on.
Just
touch
any
of
these
overview
areas,
and
you’ll
jump
to
the
corresponding
edit
page.
Selecting modes
The
KRONOS
is
organized
into
seven
different
“modes,”
each
optimized
for
a
different
purpose.
Each
mode
has
a
corresponding
button
on
the
front
panel,
with
an
LED
to
show
which
one
is
selected.
We’ll
introduce
each
of
the
modes
below.
Cancel button
OK button
Text edit button


