184
Sequencer operating mode
Record mode: Step Backing Sequence page
The locator value is shown in the “measure.beat.tick” format.
Measure
Measure or bar number.
Beat
Divider in the Time Signature ratio (e.g., a quar-
ter in a 3/4 time).
Tick
Smallest position value. Both Pa588 internal
sequencers feature a resolution of 384 ticks per
quarter.
Style
This is the latest selected Style. To insert a Style change at the
current position, touch the Style name to open the Style Select
window, or follow the standard selecting procedure using the
buttons of the STYLE SELECT section.
Note:
Any Style Change inserted after the beginning of the measure
(i.e., to a position other than Mxxx.01.000) will be effective at the
following measure. For example, if a Style Change event has been
inserted at M004.03.000, the selected Style will be effectively
selected at M005.01.000. (This works exactly as in Style Play
mode).
Note:
When inserting a Style Change, you may also insert a Tempo
Change at the same position. A Style Change will not automati-
cally insert the Style’s Tempo.
Performance
This is the latest selected Performance. Select a Performance to
recall the Style it links to. To insert a Performance change at the
current position, touch the Performance name to open the Per-
formance Select window, or follow the standard selecting proce-
dure using the PERFORMANCE/SOUND SELECT section.
Note:
The STYLE CHANGE LED is automatically turned on when
entering the Chord/Acc Step Mode. This means that selecting a Per-
formance automatically selects the Style memorized in the Perfor-
mance.
The SINGLE TOUCH and STS buttons are automatically dis-
abled, meaning that you can’t change Keyboard tracks while in
Chord/Acc Step Mode.
Tempo
This is the Tempo Change parameter. To insert a Tempo Change
event at the current position, select this parameter and use the
TEMPO/VALUE dial to change its value.
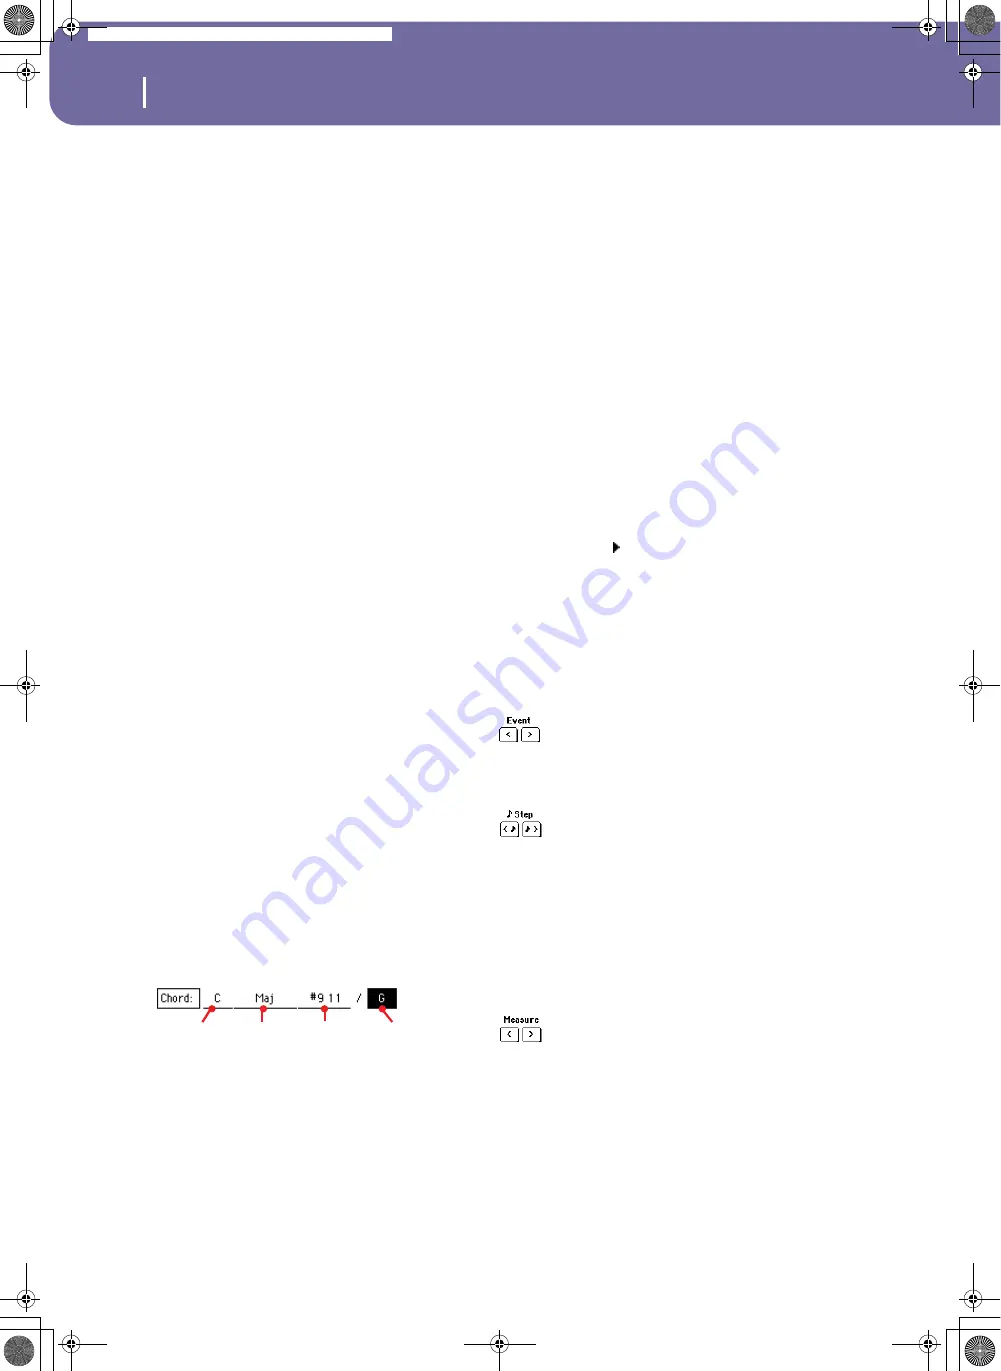
Chord
The chord parameter is divided in four separate parts:
Select one of the parts, then use the TEMPO/VALUE dial to
modify it. As an alternative, you can play a chord, and it will be
automatically recognized.
The lack of a chord (--) means that the accompaniment will not
play at the current position (apart for the Drum and Percussion
tracks). To select the “--” option, select the Name part of the
Chord parameter, then use the TEMPO/VALUE dial to select the
very last value (C…B, Off).
Note:
If you replace a chord with a different one, please remember
that the Lower track (if recorded) will not be automatically
changed, and may cause a dissonance against the accompaniment.
Style Element
This is the Style Element (i.e., a Variation, Fill, Intro, or Ending).
The length of the selected Style Element is always shown by the
“Length” parameter (see below).
“Off ” means that the accompaniment will not play at the
selected position – only Keyboard and Pad tracks will play.
Hint:
Insert a Style Element Off event exactly where the automatic
accompaniment must stop (at the end of the Song).
Length
This parameter will let you know where to place the following
Style Element Change. For example, if you inserted an Intro
event lasting for 4 measures, you can insert 4 empty measure
after this event, and a Variation event at the end of the Intro,
beginning at the 4th empty measure.
Del (Delete) button
When a side arrow ( ) is shown next to a parameter, there is an
event at the current position. You can press the Del button next
to it, to delete the event at the current position.
Hint:
To delete all events starting from the current position, select
the “Delete All from Selected” command from the page menu (see
below).
“Soft” transport buttons
Previous or Next Event
Use these buttons to move to the previous or next recorded
event.
Previous or Next Step
Use these buttons to go to the previous or next step (1/8, or 192
ticks). If an event is located before the previous or next step, the
locator stops on that event. For example, if you are positioned
on M001.01.000, and no event exists before M001.01.192, the >
button moves to the M001.01.192 location. If an event exists on
M001.01.010, the > button stops to the M001.01.010 location.
These commands are effective even if the Measure parameter is
not selected.
Previous or Next Measure
Use these buttons to move to the previous or following measure.
These commands are effective even if the Measure parameter is
not selected.
Done button
Done
Press this button to exit the Step Backing Sequence mode. All
changes will be saved to memory.
Name
Type
Tension
Extension
Pa588-100UM-ENG.book Page 184 Monday, May 26, 2008 4:34 PM
Summary of Contents for Pa588
Page 1: ...User s Manual ENGLISH OS Ver 1 0 1 E ...
Page 8: ...4 Table of Contents Pa588 100UM ENG book Page 4 Monday May 26 2008 4 34 PM ...
Page 9: ...Introduction Pa588 100UM ENG book Page 5 Monday May 26 2008 4 34 PM ...
Page 34: ...30 Interface basics Shortcuts Pa588 100UM ENG book Page 30 Monday May 26 2008 4 34 PM ...
Page 35: ...Quick Guide Pa588 100UM ENG book Page 31 Monday May 26 2008 4 34 PM ...
Page 79: ...Reference Pa588 100UM ENG book Page 75 Monday May 26 2008 4 34 PM ...
Page 239: ...Appendix Pa588 100UM ENG book Page 235 Monday May 26 2008 4 34 PM ...
Page 251: ...Pa588 100UM ENG book Page 247 Monday May 26 2008 4 34 PM ...


