2
Start up
Controlling the Volume
ABOUT THE AUTO POWER-OFF FUNCTION
With the factory settings, this instrument will automatically
power-off when four hours have passed since you last played
the keyboard or used the buttons. If desired, you can turn off
(disable) this function.
The power will also turn off automatically after four hours
pass with only songs or demo songs being played.
To adjust power on/off settings, press the [GLOBAL] button
to enter the GLOBAL page, and adjust the settings on the
Page1-Gen.Controls page.
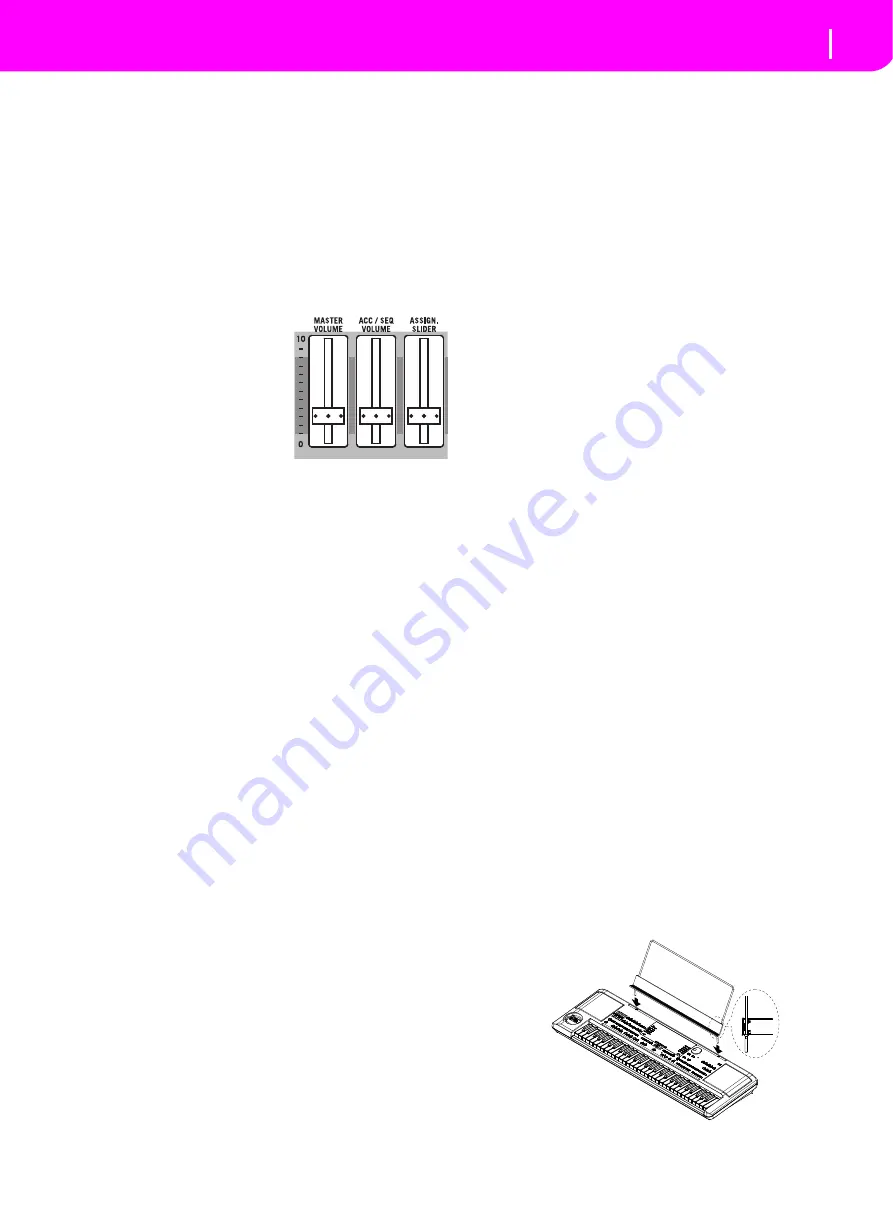
CONTROLLING THE VOLUME
•
Use the MASTER VOLUME
slider to control the overall
volume of the instrument.
This slider controls the vol-
ume of the sound going to
the internal speakers, the L/
MONO & RIGHT OUT-
PUTS, and the HEAD-
PHONES connector.
Note:
Start at a moderate
level, then raise the MASTER VOLUME up. Don’t keep the
volume at an uncomfortable level for too long.
•
Use the ACC/SEQ VOLUME slider to control the Style
tracks (drums, percussion, bass…) volume. This slider
also controls both of the Sequencers tracks, excluding
the Realtime (Keyboard) tracks.
•
By default, you can use the ASSIGN.SLIDER to control the
keyboard tracks volume. This slider is user-assignable, but
is set to the Keyboard Expression parameter by default.
THE BALANCE SLIDER
The BALANCE slider sets the relative volume of the two
onboard sequencers (Sequencer1 and Sequencer 2).
•
Move it fully left to set Sequencer 1 to the maximum level
and Sequencer 2 to zero.
•
Move it fully right to set Sequencer 1 to zero and Sequencer 2
to the maximum level.
•
Move it to the center to set both Sequencers at the same level.
Note:
When turning the instrument on, move this slider to the cen-
ter, to avoid starting a Song at the minimum level.
HEADPHONES
You can connect a pair of headphones to the rear panel head-
phone jack (PHONES: stereo mini-jack). You can use head-
phones with an impedance of 16–200
Ω
(50
Ω
recommended).
AUDIO OUTPUTS
You can send the sound to an external amplification system,
instead of the internal speakers. This is useful when record-
ing, or when playing live.
AUDIO INPUTS
You can connect the output of another electronic musical
instrument, an unpowered mixer, or any audio device to the
rear panel input jack (INPUT: stereo mini-jack). Since this is a
line-level input, you'll need to use a separately sold mic pre-
amp or mixer if you're connecting a mic.
Use the connected device’s volume control to adjust the input
level. Be careful not to make it distort (or “clip”). Here is how
to set the volume of the connected device:
•
if the sound heard on Liverpool’s outputs is too low, you
should increase the output level of the connected device.
•
if it sounds fine, it’s ok.
•
if it distorts, you should lower the level a little, until the
sounds is fine again.
MIDI CONNECTIONS
You can play the internal sounds of your Liverpool with an
external controller, i.e. a master keyboard, a MIDI guitar, a
wind controller, a MIDI accordion, or a digital piano.
1.
Connect a standard MIDI cable from the MIDI OUT of
your controller to the MIDI IN connector on the Liver-
pool.
2.
Select a transmission MIDI channel on your controller.
Some controllers, like the MIDI accordions, usually
transmit on more than one channel.
3.
On the Liverpool, select the MIDI Setup that best fits
your controller’s type.
DAMPER PEDAL
Connect a Damper (Sustain) pedal to the DAMPER connector
on the back panel. Use a KORG PS-1, PS-3 or DS1H foot-
switch pedal, or a compatible one.
DEMO
Listen to the built-in Demo Songs to appreciate the power of the
Liverpool.
1.
Press the STYLE PLAY and SONG PLAY buttons
together. Their LEDs start blinking.
At this point, if you don’t press any other button, all the
Demo Songs will be played back.
2.
Choose a page using the PAGE buttons.
3.
Select a Demo Song by pressing the corresponding VOL-
UME/VALUE button around the display. The Demo will
automatically start.
4.
Stop the Demo by pressing START/STOP.
5.
Exit the Demo mode by pressing one of the MODE buttons.
THE MUSIC STAND
A music stand comes standard with your Liverpool. Fit it into
the two dedicated holes in the front panel.
Summary of Contents for Professional Arranger Liverpool
Page 1: ......


