background image

Multisample Edit

Reference

102

OASYS PCI

English

This parameter serves as an offset to any tuning set in the Patch containing the 
Multisample. Some Patches may not support this offset.

Volume

-100 to +100.  

This is the volume offset for the selected Key Range.

This parameter serves as an offset to any volume set in the Patch containing the 
Multisample. Some Patches may not support this offset.

Pan

0 to 127.  

This is the pan offset for the selected Key Range.

This parameter serves as an offset to any pan set in the Patch containing the 
Multisample. Some Patches may not support this offset.

Cutoff

-100 to +100.  

This is the 

fi

lter cutoff offset for the selected Key Range.

This parameter serves as an offset to any 

fi

lter cutoff set in the Patch containing the 

Multisample. Some Patches may not support this offset (for instance, if they do not 
have a 

fi

lter).

Decay

-100 to +100.  

This is the envelope decay time offset for the selected Key Range.

This parameter serves as an offset to the envelope decay time set in the Patch 
containing the Multisample. Some Patches may not support this offset.

Exclusive Group

Exclusive Groups allow you to create a monophonic set of keys, so that only one 
note in the Exclusive Group will sound at a time. If another key within the group is 
played, the previously played note will be cut off. For instance, you can use this so 
that a closed hi-hat Sample cuts off the sound of an open hi-hat.
Multiple Key Ranges may be assigned to the same Exclusive Group.

Off. 

The Key Range will act normally.

1-63. 

The Key Range will be assigned to the selected Exclusive Group. 

Silent. 

The Key Range will be silent. When you play a key within the range, no 

voices will be allocated.

NOTE: 

This is different from deleting a Sample so that it appears as (none). If the 

Sample is set to (none), the Patch will play a special “silent” Sample, which takes 
up one voice of polyphony.

Exclusive Group settings are controlled by the top Multisample

Many PCM Patches have more than one Multisample. For instance, many have 
High and Low Multisamples, for creating velocity splits. In this case, the Exclusive 

Summary of Contents for Soundlink DRS OASYS PCI

Page 1: ...Users Guide This is a hypertext enabled document All references to page numbers are live links Just click on the page number and the document will go there automatically ...

Page 2: ...B est conforme a la norme NMB 003 du Canada CE mark for European Harmonized Standards CE mark which is attached to our company s products of AC mains operated apparatus until December 31 1996 means it conforms to EMC Directive 89 336 EEC and CE mark Directive 93 68 EEC And CE mark which is attached after January 1 1997 means it conforms to EMC Directive 89 336 EEC CE mark Directive 93 68 EEC and L...

Page 3: ...Using Audio Programs 42 Using Sound Manager MacOS 50 Working With Files 55 Managing Resources 60 Reference 65 Mixer 66 Send Busses 74 Output Busses 78 Channel Parameters 83 Program Edit 86 Control Panel 92 Modulation Palette 97 Multisample Edit 99 Resource Monitor 105 Catalog 108 File Menu 111 Edit Menu 113 Windows Menu 114 Preferences 115 ASIO Control Panel Audio Settings 123 Wave Device Settings...

Page 4: ...iv OASYS PCI English ...

Page 5: ...Introduction OASYS PCI 1 Introduction ...

Page 6: ...o process the onboard synthesizer tracks from digital audio programs and live audio inputs and can be used on channel inserts as sends and on output busses As with synthesis algorithms all effects are plug ins loaded from disk allowing for easy expansion in the future Professional multi format analog and digital I O The OASYS PCI features a total of 12 inputs and outputs stereo analog stereo S PDI...

Page 7: ...Pentium based effects plug ins such as VST MAS and DirectX plug ins simultaneously with OASYS PCI effects and synthesizers Complete automation via MIDI Every parameter in the OASYS PCI can be modulated via standard MIDI controllers allowing easy automation of mixing synthesis and effects from any MIDI sequencer ...

Page 8: ...nstallation instructions and problem solving resources It is provided in both hard copy and Adobe Acrobat pdf format Patches and Effects Guide The Patches and Effects Guide includes complete descriptions of the Control Panel parameters for each Patch and Effect It is provided in Adobe Acrobat pdf format which you may read online or print out as you wish OASYS PCI FAQ FAQ stands for Frequently Aske...

Page 9: ...Using the OASYS PCI OASYS PCI 5 Using the OASYS PCI ...

Page 10: ...eeMIDI follow the instructions under Using the OASYS PCI Editor as a stand alone FreeMIDI program in the Installation Guide After this go on to step 3 or If you have set up the OASYS PCI to use the standard serial MIDI interface go on to step 3 The installer program will have opened two folders on the desktop One of these is named OASYS PCI Demo Multis This folder contains a number of demo sounds ...

Page 11: ...tton Windows 7 In the desktop double click on the icon of another Multi or Select Open from the File Menu and select a new Multi As the shampoo bottles say repeat as desired After you re done listening to a few sounds make sure to read at least the chapter Using the OASYS PCI There s a lot to the OASYS PCI and we wouldn t want to you miss anything Specifically for more information on loading sound...

Page 12: ...which can be layered or split by key and velocity ranges They also have up to four Insert Effects which appear in the Mixer Channel Programs store all Control Panel settings for their Patches and Effects For more information please see Using Programs Patches on page 19 Effects Only Programs Effects Only Programs store all of the Insert Effects for a Mixer Channel including all Effects Control Pane...

Page 13: ...rmat For more information see Using Samples Multisamples on page 35 Multisamples Multisamples are collections of one or more Samples assigned to ranges across the keyboard Each key range has offsets for common parameters such as volume pan filter cutoff decay and so on which can be used to adjust Patch parameters individually for each Sample For more information see Using Samples Multisamples on p...

Page 14: ...hat are Using the OASYS PCI 10 OASYS PCI English You don t interact directly with the OASYS PCI Engine itself instead you control it via the OASYS PCI Editor and any audio and or MIDI software being used ...

Page 15: ...f 0 001 Double clicking on a knob will set it to its 12 o clock position For example double clicking on the Mixer s Pan knobs sets them to 64 center Send knobs are the one exception to this As with volume faders double clicking a send knob sets it to 0dB unity gain a value of 111 Value boxes A value box displays a numerical value such as a volume level or a filter cutoff You can edit value boxes i...

Page 16: ...m from the Catalog window into the desired slot MacOS only Alternatively you can select a slot and then double click on the name of the item in the Catalog window You can also use drag and drop to copy items between slots Just click on the name of the Program Patch Effect Multisample or Sample that you d like to copy and drag it to the new location Delete key Pressing the Delete key will remove th...

Page 17: ...e Input slot MacOS Only Alternatively you can select the Input slot and then double click the name of the Program in the Catalog The Program appears in the Input slot If Auto Load FX is turned on for the Mixer Channel then the Program s Effects will be loaded into the Insert Effect slots See Auto Load FX controls how Effects are loaded below for more details 4 Set the MIDI Channel and Output as de...

Page 18: ...ot be loaded and any previously loaded Insert Effects will stay as they were This is useful if you have created a complex Effects setup and wish to audition different Programs using the same Effects Loading an Effects Only Program into a Multi Effects Only Programs store all of the Insert Effects for a Mixer Channel including all Effects Control Panel parameters You can use them to load chains of ...

Page 19: ...e 23 for more details Removing a Program or Effect from a Multi To remove a Program or Effect from a Multi 1 Select the Program clicking on its name in the Mixer or Channel Parameters window Or select the Effect by clicking on its name in the Mixer Send Busses or Output Busses window 2 Press the Delete key The Program or Effect will be removed from the Multi When deleting several Programs or Effec...

Page 20: ... that each Program is active for only a specific keyboard range For instance setting the Low Key to C4 and the High Key to C8 will make the Program play only in the upper part of the keyboard When the High Low Key and Velocity parameters are selected you can press and hold the Shift key to edit the values by playing notes on your MIDI controller You can create splits using as many different Progra...

Page 21: ... is opened Note that this will also edit any custom Multis that you ve made yourself Reset Master Output Bus can change DSP requirements If a Multi uses multiple Output Buses changing the Master Output Bus may sometimes require the Programs and Effects to be re arranged within the DSPs This may either increase or decrease the effective amount of DSP processing power available In extreme cases if t...

Page 22: ... audio program and several others are assigned to Audio Inputs for adding effects to other external synthesizers In the course of creating the Multi you ve edited a few Programs and edited the Control Panels for a handful of Patches and Effects All of this from the Mixer Channel assignments down to the Control Panel edits is stored in the Multi This means that in general the Multi is all that you ...

Page 23: ...es and so on Synthesis parameters such as envelopes lfos modulation routings and so on are edited in the Patch Control Panel as explained under Editing a Patch below Adding a Patch to a Program To add a Patch to a Program 1 Open the Catalog by selecting it from the Windows menu 2 In the Catalog select the Patch tab 3 Drag a Patch from the Catalog onto a Patch slot in the Program Edit window MacOs ...

Page 24: ...ll appear If you command double click on the Program name of a Program with two Patches both Control Panels will appear The Control Panel contains all of the parameters for the Patch such as envelopes lfos oscillators filters drawbars and so on The parameters will be different depending on which Patch is being used For a complete description of the Control Panel parameters of a particular Patch pl...

Page 25: ...create a keyboard split between two Patches 1 In the Program Edit window set the Low Velocity for each Patch to the minimum 1 and the High Velocity to the maximum 127 This will make sure that the Patches both respond to the full velocity range 2 Set the High Low Key parameters for each Patch so that each is active for only a specific keyboard range For instance setting the Low Key to C4 and the Hi...

Page 26: ... Program s Mixer Channel and all Control Panel settings for the Program s Patches and Effects To save a Program and its Insert Effects 1 Make sure that the Program Edit window is in the foreground 2 Select the Save Program and Insert Effects As command from the File menu 3 Name the Program 4 Select a location to save the Program The OASYS PCI installer creates a folder named User Files with sub di...

Page 27: ...grams are just normal Programs without any Patches loaded into the Patch slots Unlike normal Programs Effects Only Programs can be used on any type of input including Audio Inputs Streams or even other Programs In the Korg factory voicing they will be placed in the Programs section of the folder named Korg Effects To load an Effects Only Program 1 Make sure that FX Auto Load is enabled on the desi...

Page 28: ...r effects such as EQ distortion compression in which only the processed signal is heard or use the Effect s wet dry parameter for effects such as reverb for creating a blend of both the processed and the original sounds FX Auto Load Programs can include a set of insert Effects and the FX Auto Load button determines whether or not these Effects will be loaded into the Mixer For more information ple...

Page 29: ...els are using a similar Insert Effect such as a hall reverb it may make sense for the Channels to share a common reverb via a Send Bus instead This will free up DSP resources which can then be used in other ways To set up several Channels to share a reverb 1 Choose the Insert Effect reverb you like best and use the Edit menu Cut command to remove if from the channel 2 Remove the other Insert Effec...

Page 30: ...sizers or live inputs You can process other synthesizers or in fact any other audio source guitars vocals etc through OASYS PCI effects In fact you can process up to 12 live inputs simultaneously To do this 1 Connect the synthesizer or other audio source to any input s on OASYS PCI You can use any combination of inputs ADAT S PDIF or analog 2 Set an OASYS PCI mixer channel to Audio Input and selec...

Page 31: ...bypass Effects by using the Bypass button in the Effect Control Panel To bypass all Effects in a Channel Send or Output Bus 1 Option click MacOS or CTRL click Windows on any of the Effects slot numbers in the Channel Send or Output Bus Editing Effects To edit an Effect 1 Double click on the Effect name in the Mixer Send Busses or Output Busses window The Effect s Control Panel window will appear T...

Page 32: ...usses window 2 Press the Delete key The Effect will be removed from the Multi When deleting several Effects in a row you may wish to use the Connect and Disconnect commands as described on page 17 No restrictions on connecting stereo and mono Effects All effects in OASYS PCI are designed so that they can be connected to one another You can connect stereo and mono effects together as you wish witho...

Page 33: ...is directory User Files Programs You can also create other main folders inside the OASYS PCI folder at the same level as User Files You may wish to distinguish Effects Only Programs by storing them in a separate main folder separate from standard Programs It s important to store Programs inside a sub directory named Programs If a Program is not stored in a Program folder inside the OASYS PCI folde...

Page 34: ...ngs To create a new modulation routing 1 Click on the name of the Control Panel parameter you d like to modulate For on off buttons option click MacOS or CTRL click Windows on the name The Modulation Palette will appear Initially it will contain two empty modulation paths each with a source and an amount 2 Select a modulation source from the menu For descriptions of the available modulation source...

Page 35: ...ol Panel parameter For on off buttons option click MacOS or CTRL click Windows on the name The Modulation Palette will appear showing the current modulation settings 2 Edit the modulation sources and or amounts as desired For descriptions of the available modulation sources see Modulation Sources on page 94 You don t need to do anything to save the edited modulation routing the changes will take a...

Page 36: ...s will not move in response to modulation via the Modulation Palette 4 Set the Update Control Panel from MIDI checkbox as desired 5 Press the Save button to store the edited preferences 6 In your MIDI sequencing program do whatever is necessary to enable recording and playback of System Exclusive data The OASYS PCI FAQ contains information for some sequencing programs see the program s manual for ...

Page 37: ...7 If you move a Program Patch or Effect to a new slot or Channel Send Bus or Output Bus previously recorded System Exclusive messages will no longer work properly Changing the MIDI Channel used by the Mixer Channel Send Bus or Output Bus will not affect the System Exclusive messages they will continue to work as they did before SysEx format For low level details on the OASYS PCI System Exclusive f...

Page 38: ... is below 127 channel volume is reduced Mute 89 0 is off not muted 1 127 is on muted Solo 90 0 is off not soloed 1 127 is on soloed Send Level A 12 Send Level B 13 Send Mute A 91 0 is off not muted 1 127 is on muted Send Mute B 93 0 is off not muted 1 127 is on muted Send Pre Post A 92 0 is Post 1 127 is Pre Send Pre Post B 94 0 is Post 1 127 is Pre Mixer parameter MIDI Controller Notes ...

Page 39: ...add and delete samples and change Patch offset values such as tuning decay volume pan and filter cutoff Multisample edits are stored within the Multi All edits to a Multisample are stored within the Multi If you are editing a Multisample to use in a specific Multi there s no need to save the Multisample as a separate file to disk just save the Multi and you re done This also means that you don t h...

Page 40: ... adjusted downwards to fill the gap Changing the High Low and Base keys You can change a Key Range s High Low and Base keys in three ways edit the numeric fields at the top of the window drag the edges of the box above the keyboard graphic or use your MIDI controller Numeric editing To change the High Low or Base Key numerically simply edit the desired parameter at the top of the Multisample Edit ...

Page 41: ... your MIDI controller MIDI must be on the correct channel within all key and velocity windows When the Multisample Edit window is in the foreground incoming MIDI selects the current Key Range and can also edit various parameters as described below The Mixer channel s MIDI channel assignment and all Multi and Program key and velocity windows all apply to MIDI received in this window If incoming MID...

Page 42: ...le slot and then double click the name of the Sample in the Catalog For more information on using the Catalog please see the section titled Catalog on page 108 The new Sample will now be assigned to the Key Range All other parameters in the Key Range will remain unchanged Importing AIFF WAV and Sound Designer II Samples OASYS PCI can use 16 bit and 24 bit samples in a number of different formats i...

Page 43: ...e Spark Alchemy etc Selecting a sample editing program First you need to select a sample editing program 1 Select Preferences from the File menu The Preferences window will open 2 Select the PCM Playback tab 3 Under Sample Editor press the Choose button A standard file select dialog will appear 4 Select your preferred sample editing program When the file select dialog is closed the sample editor s...

Page 44: ...how Parameter menu to temporarily hide the sliders Multisample parameters are offsets to Patch values All of the parameters are offsets from a default value in the Patch with a range of 100 The default of 00 is shown as a thin lightly colored line across the center of the graphic Note that the Multisample does not actually contain filtering panning and so on these offsets depend on the Patch to su...

Page 45: ... Multisample is not stored in a Multisample folder inside the OASYS PCI folder it will not appear in the Multisample Catalog For more information on saving files see Working With Files on page 55 Don t save into the Korg and Korg FX Programs folders The Korg and Korg FX Programs folders are reserved for Korg s own use so don t save your own sounds in these folders If you do the sounds may be delet...

Page 46: ...ternal rack mount synth with 32 MIDI inputs two 16 channel MIDI devices and a dedicated MIDI interface So instead of needing to send MIDI data to a port on an external interface you just assign it to OASYS PCI A or B Due to its integration with audio I O hardware you can also record OASYS PCI directly via ASIO or MME without any external connections As an effects processor OASYS PCI appears to aud...

Page 47: ...IO program from using Sound Manager which is usually the default to using OASYS PCI s ASIO driver The error may be due to an overlap between sign on and sign off so that the application is still signed on to OASYS PCI via Sound Manager as it is attempting to sign on to OASYS PCI via ASIO This can be solved very easily by temporarily de selecting OASYS PCI as the Sound Manager hardware To do this 1...

Page 48: ... OASYS PCI s stereo pairs of inputs and outputs appear to Windows MME audio programs as an independent wave device When the Auto Sync button is turned on in the OASYS PCI Wave Device Settings program all of the wave devices will be grouped together so that they operate as a single synchronized multichannel I O device Auto Sync is an easy to use fool proof mode optimized for working with multichann...

Page 49: ...nd discrete mono signals to separate OASYS PCI mixer channels 2 In the OASYS PCI Editor set the mixer channel s Input Type to Stream 3 Set the mixer channel s input to the Stream you selected in Step 1 The audio will now be routed to the OASYS PCI mixer channel 4 Use Insert Send and Output Bus effects on the channels as desired just as you would for internal OASYS PCI synths or audio inputs You ca...

Page 50: ...ard disk track directly to an OASYS PCI mixer channel for individual insert processing Or you can create an output bus in the digital audio program and route several tracks at once through an OASYS PCI mixer channel for group insert processing like an output bus Finally you can create a send bus in the digital audio program and route that send bus to an OASYS PCI mixer channel or to an OASYS PCI s...

Page 51: ...rogram open the OASYS PCI ASIO control panel Audio Settings window For information on how to open the ASIO control panel Audio Settings window please see ASIO Control Panel Audio Settings on page 123 2 Under Record Source select Mixer Outputs 3 Press OK to close the window The mixer outputs will now be routed to the audio program s inputs 4 In the digital audio program select the desired inputs an...

Page 52: ...l audio programs 6 In the digital audio program disable software based record monitoring Most digital audio programs also have software based record monitoring If you are using the OASYS PCI s monitor mixer you should disable the program s software based monitoring Consult the program s manual for details Record monitoring with effects Using the OASYS PCI s main mixer you can record from the audio...

Page 53: ...Using the OASYS PCI Using Audio Programs OASYS PCI 49 the effects as described under Recording OASYS PCI synthesizers and effects on page 47 ...

Page 54: ...IO and Sound Manager cannot use OASYS PCI at the same time If OASYS PCI is selected in the Sound control panel you can still use it with ASIO programs However Sound Manager programs and ASIO programs cannot use use OASYS PCI simultaneously To free OASYS PCI for use by Sound Manager you must either quit the ASIO program or switch the ASIO hardware to something other than OASYS PCI If you wish to us...

Page 55: ...nt ways In some versions of the control panel you will see an OASYS PCI icon In other versions you will simply see a text entry as shown below 3 Select OASYS PCI When you click on the OASYS PCI selection it will become hilighted The OASYS PCI will now be used for input to Sound Manager compatible programs Sound control panel Input page ...

Page 56: ... navigation When you select Sound Out or Output the Output page appears An on screen instruction reads Choose a device As with the input section different versions of the Sound control panel display the output choices in different ways In some versions of the control panel you will see an OASYS PCI icon In other versions you will simply see a text entry as shown below Sound control panel output pa...

Page 57: ...ut including alert sounds the alert sound is the beep or other sound which plays when software displays a warning message To keep extraneous MacOS beeps and chirps out of your digital audio system you may wish to turn the alert volume off entirely 8 Optional select Alert Sounds from the menu or press the Alert tab and turn the Alert Sound volume all the way down The Sound Manager supports only two...

Page 58: ...red OASYS PCI channels in the Input Selection and Output Selection menus You can also change these as necessary whenever you like 12 Set the Clock Source Sample Rate and Analog Input and Output Trims as desired That s it You re now ready to use the OASYS PCI with Sound Manager programs ...

Page 59: ...hes Audio Inputs or Streams They can be used as insert effects in the Mixer Channels and Output Busses or as send effects via the Send Busses Each Effect contains its own audio processing algorithm which may be quite different from one Effect to another Effects have the file suffix oae Samples are audio files which can be placed in a Multisample see below and then played back by sample based OASYS...

Page 60: ...ic such as Sarah s Sounds This will save you a little work later on Use folders and sub directories to organize your sounds You can create sub directories within the Programs and Multis folders to further organize your sounds just keep to one level of directories underneath the main Programs or Multis folders You can also create any number of additional main folders of your own at the same level a...

Page 61: ... Autotyper program This program will automatically set the type and creator for Programs Multis and Multisamples based on the three character file extension oap oam and kem or k2m respectively File type and creator are transparent to Windows which uses three letter name extensions instead If you are distributing sounds created on Windows you might consider using a MacOS computer to run the files t...

Page 62: ...ored anywhere on disk including the OASYS PCI folder if desired Within the main OASYS PCI folder are folders for sound libraries such as the Korg factory sounds and optional sound packages from Korg and third parties or user projects such as TV Series Third Season Cues Within each of these project or library folders are five sub folders one each for Programs Patches Effects Samples and Multisample...

Page 63: ...Using the OASYS PCI Working With Files OASYS PCI 59 File and folder organization ...

Page 64: ...ou should try to set the number of voices just as high as necessary and no higher The fewer voices you reserve for one Patch the more that will be available for other Patches or for Effects Use Send and Output Busses to share Effects Each Mixer Channel can have its own Insert Effects which allows for very powerful and flexible sound shaping However if several Channels each use a number of resource...

Page 65: ...ical busses are in use You can turn off Mixer Channels and Send Busses to optimize the use of these physical busses Turn off unused Mixer Channels If a Mixer Channel s Input Type is set to Off or if the Output and Sends are all set to Off the Channel will be turned off and will not use a physical bus Turn off unused Send Busses If the Send Bus Output is set to Off or if no Mixer Channels are assig...

Page 66: ...YS PCI Preferences window will appear 2 Press the MIDI Global tab The MIDI Global parameters will appear 3 Turn off the Update Control Panel from MIDI checkbox 4 Press the Save button to store the edited preferences Disable System Exclusive messages if not in use Sending and receiving MIDI System Exclusive Parameter Change messages takes a small amount of CPU processing power If you don t need thi...

Page 67: ...enu for the AppleTalk module and set it to Inactive Delete unnecessary Modulation Palette routings Each Modulation Palette routing uses a small amount of CPU processing power If you aren t using a particular routing you can delete it to reduce the CPU processing load For more information see Deleting a modulation routing on page 31 Delay effects Samples and resource usage The OASYS PCI system has ...

Page 68: ... ve already loaded effects which use long delays there will be less room for Samples Note that the whether a delay is considered long or short depends upon the particular effects algorithm being used and not on the parameter settings If you are using an Effect which allows delay times over 680ms the delay will always use the DRAM memory even if you set the delay time parameter to a single millisec...

Page 69: ...Reference OASYS PCI 65 Reference ...

Page 70: ...which may contain either a Program an Audio Input or a Stream as selected by the Input Type parameter described on page 68 To select an Audio Input or Stream 1 Set the Input Type parameter as desired Audio Input or Stream There is a small menu button to the right of the Input Slot When the Input Type is set to Audio Input or Stream the button becomes active 2 Click on the menu button The menu cont...

Page 71: ...I 67 Mixer Double clicking on the Program name brings up the Program Edit page as described on page 86 Command double clicking on the Program Name brings up the Control Panels for the Program s Patches as described on page 92 ...

Page 72: ...el A1 A16 B1 B16 Off This is the MIDI channel used to control the mixer channel including the mixer parameters volume pan sends the Program and the Insert Effects There are two sets of MIDI inputs labeled A and B with 16 channels each When using OMS or FreeMIDI these correspond to the OASYS PCI A and OASYS PCI B devices respectively When using the built in serial drivers only the 16 A channels are...

Page 73: ...to controller 10 on the selected MIDI channel A value of 64 is absolute center 0 is hard left and 127 is hard right Double clicking the pan knob will set it to 64 Width 0 127 Width applies only to stereo channels It controls the stereo width of the channel output and interacts with Pan to determine overall stereo placement With width at minimum the channel output is a mono signal heard at the exac...

Page 74: ...ert effects The effects are applied before the channel volume pre fader and are in series from top to bottom effect 1 is first and effect 4 is last Insert Effects Routing To select an Effect 1 Drag an Effect from the Catalog onto the desired insert slot or Select an Effect slot and then double click the name of the Effect in the Catalog For more information on using the Catalog please see the sect...

Page 75: ...his setting selecting a new Program will not change the current Insert Effects Sends A B The OASYS PCI has four Send Busses and each mixer channel can access up to two of these simultaneously Sends are post insert and can be either pre or post fader Send Bus Select A B Send Bus 1 4 This selects the Send Bus used by the send Each Send Bus can use up to four effects just like the insert effects on t...

Page 76: ... send Send Mute buttons A B On Off The Mute button temporarily silences the output of the send setting the volume level to zero Send Mute buttons A and B respond to MIDI controllers 91 and 93 respectively 0 is off not muted and any value between 1 and 127 is on muted Inserts Channel Input Volume Send Volume Output Bus Send Bus Inserts Channel Input Volume Send Volume Output Bus Send Bus ...

Page 77: ...udio Software Outputs Monitor Mixer Stream 1 Stream 8 Analog L ADAT 8 Vol Program 1 Program 12 Out Assign Outputs Analog L ADAT 8 Analog L In ADAT 8 In Analog L ADAT 8 Output Busses Multi Mixer Channels Audio Software Final Output Summation Switch Record from inputs or from mixer outputs Inputs ...

Page 78: ...inline effects such as compressors eqs distortion etc which are more appropriate for use as Mixer Channel insert effects The Send Busses also allow multiple Mixer Channels to share the same effects which helps to optimize the DSP resources of the system Each Mixer Channel can send to up to two of the Send Busses Additionally Streams can be summed directly into Send Busses bypassing the Mixer Chann...

Page 79: ...he Send Bus Effects 1 4 Each Send Bus can have up to four effects The effects are in series from top to bottom effect 1 is first and effect 4 is last Send Effects Routing To select an Effect 1 Drag an Effect from the Catalog onto the desired insert slot or Select an Effect slot and then double click the name of the Effect in the Catalog For more information on using the Catalog please see the sect...

Page 80: ...he Send Bus by selecting Off Level Meter The meter shows the stereo output volume of the bus post effects To monitor the input to the bus set the Volume fader to 127 and bypass all of the effects Clip Indicators The topmost red lights are clip indicators for the left and right Send Bus outputs To clear a Send Bus s clip indicators click on them To clear all clip indicators on the Mixer option clic...

Page 81: ...udio outputs from a digital audio program Solo responds to controller 90 on the selected MIDI channel 0 is off not soloed and any value between 1 and 127 is on soloed Output Master Analog L R S PDIF L R ADAT 1 2 ADAT 3 4 ADAT 5 6 ADAT 7 8 This selects the Output Bus to which the Send Bus will be routed If Master is selected the Send Bus will go to the Output Bus designated as the Master Output if ...

Page 82: ... going from the Mixer to an audio output pair goes through an Output Bus first Output Busses include insert effects a volume fader and mute and solo controls Mixer Channels and Send Busses are routed to Output Busses Direct outputs from digital audio programs bypass the Output Busses and instead go directly to the physical outputs ...

Page 83: ...ct 4 is last Output Bus Effects Routing To select an Effect 1 Drag an Effect from the Catalog onto the desired insert slot or Select an Effect slot and then double click the name of the Effect in the Catalog For more information on using the Catalog please see the section titled Catalog on page 108 Send Bus 1 Output Bus ADAT 1 2 Audio Output ADAT 1 2 Output Bus ADAT 3 4 Audio Output ADAT 3 4 Mixer...

Page 84: ...Effects slot numbers MIDI MIDI Channel A1 A16 B1 B16 Off This is the MIDI channel used to control the Output Bus including the mixer parameters volume pan mute and solo and the Effects There are two sets of MIDI inputs labeled A and B with 16 channels each When using OMS or FreeMIDI these correspond to the OASYS PCI A and OASYS PCI B devices respectively When using the built in serial drivers only...

Page 85: ...ng requirements Activating an Output Bus s To Master function may sometimes require the Programs and Effects to be re arranged within the DSPs This may decrease the effective amount of DSP processing power available In some cases this may mean that there may not be enough DSP processing power to play a Multi which previously played successfully If this happen you can reduce the number of Output Bu...

Page 86: ...rences The Preferences window Master Output Bus parameter allows you to set a default Master Bus which is used whenever you create a new Multi You can also use the Preferences window Reset Master Output Bus When Opening Multis parameter to automatically set all Multis to use the default Master Bus Use this feature if you always want to audition sounds through a specific Output Bus ...

Page 87: ...d Program Audio Input parameters all of the settings on this page apply to Programs only Ch Channel Number This column shows the Mixer Channel number for reference and is not user editable InputType Program Audio In Stream Off This selects whether the channel s input will be a Program an Audio Input or a Stream The Input Type controls the available settings for the Input Select parameter ...

Page 88: ...t or Stream 2 Select the desired Audio Input or Stream from the menu Clicking on the menu shows a list of either Audio Inputs or Streams depending on the selected Input Type Audio Inputs and Streams are shown as both mono and paired stereo To select a Program 1 Drag a Program from the Catalog onto the Input Select parameter or Select the Input slot and then double click the name of the Program in ...

Page 89: ...he union of the two windows produces the final result See the diagram below for an example Cumulative Program and Patch high low key windows LowVel HighVel 1 to 127 These are the high and low MIDI velocities to which the Program will respond When selected you can set them by playing on your MIDI controller As with Low High Key above these act in addition to any velocity windows assigned to Patches...

Page 90: ...r split by key and velocity ranges They also have up to four Insert Effects which appear in the Mixer Channel Programs store all Control Panel settings for their Patches and Effects For step by step instructions on accomplishing common Program related tasks please see Using Programs Patches beginning on page 19 Program Name This is the name of the Program Patch One or two Patches may be used in a ...

Page 91: ...s is the number of voices allocated to the Patch You can allocate different numbers of voices to each Patch within the Program if desired Volume 0 127 This sets the relative volume levels of the Patches in the Program The overall level of the Program is controlled by the Mixer Channel s Volume parameter CoarseTune 48 to 48 This is the coarse tuning in semitones for the selected Patch FineTune 100 ...

Page 92: ... This is the lowest MIDI note to which the Patch will respond All notes below the Low Key will be ignored When this parameter is selected you can set it by playing a note on your MIDI controller High Key C 1 to G9 This is the highest MIDI note to which the Patch will respond All notes above the High Key will be ignored When this parameter is selected you can set it by playing a note on your MIDI c...

Page 93: ...l be re used For some specifically designed physical modelling Patches this will make the re struck note sound different from the previous note For instance in the real world when you strike a cymbal twice in a row the second strike makes a different sound than the first it adds energy to the previous crash and the sound becomes more intense Patches must be specifically designed to take advantage ...

Page 94: ...ter is set to Mono Legato Mono Retrig or Unison the Patch will play only one note at a time The Key Priority parameter determines what happens when more than one note is being held down When Polyphonic Poly Physical or Poly Retrig modes are selected this parameter does not apply Last Key The most recently played note will sound This is the default Highest Key The highest note will sound Lowest Key...

Page 95: ...y 12 cents Effects Programs store settings for the Mixer Channel Insert Effects If the channel s Auto Load FX parameter is enabled then these Effects will be loaded automatically To select edit or delete Insert Effects for a Program use the mixer channel After the Insert Effects have been edited they can be saved with the Program using the File Menu s Save Program and Effects As command This comma...

Page 96: ...ntrol Panel may contain completely different parameters depending on which Patch or Effect is being edited The mixer channel number Program name if a Patch and Patch or Effect name are shown in the Control Panel window s title bar Control Panel Objects Knobs Move knobs by dragging the mouse either vertically up and down or horizontally left and right just like you would move a slider They are not ...

Page 97: ...ard wired meaning that the amount of modulation can be altered but the source of the modulation is fixed For instance a filter envelope might be hard wired to control the filter cutoff Also most parameters on the Mixer screens have preset MIDI modulation routings for more information see Mixer parameters have preset modulation routings on page 33 Assignable Modulation Paths Patches and Effects may...

Page 98: ...ber will be used Exp Note Pitchbend This selection adds the Pitch Bend amount to the exponential MIDI note number for more precise pitch related modulation When modulating Effects the most recent note number will be used Note Gate This is an on off mod source When the key is held down the modulation is at maximum when the key is released the modulation goes to zero Note Gate is intended for use in...

Page 99: ...uencer In general the Patch or Effect must be specifically designed for MIDI Start Stop in order to obtain meaningful results Keytrack Linear Linear keyboard tracking centered on C4 See the graphs below Keytrack Exp Exponential keyboard tracking centered on C4 for more variation at the extremes of the keyboard See the graphs below Keytrack Log Logarithmic keyboard tracking centered on C4 for more ...

Page 100: ...27 A0 C8 C4 MIDI Note Value 0 127 127 A0 C8 C4 MIDI Note Value 0 127 127 A0 C8 C4 MIDI Note Value 0 127 127 A0 C8 C4 MIDI Note Value 0 127 127 A0 C8 C4 MIDI Note Value 0 127 127 A0 C8 C4 MIDI Note Value 0 127 127 A0 C8 C4 MIDI Note Value 0 127 127 A0 C8 Linear Exp Log Left Lin Left Exp Left Log Right Lin Right Exp Right Log ...

Page 101: ...ing is assigned the name of the modulated Control Panel parameter will be underlined and colored red For step by step instructions on accomplishing common modulation related tasks please see Using Modulation beginning on page 30 Source A and B An extensive set of MIDI modulation sources is available For a complete list see Modulation Sources on page 94 Amount A and B 100 to 100 This sets the amoun...

Page 102: ...ence 98 OASYS PCI English Conversely when the Amount is set to 100 a MIDI modulation value of 127 will take the parameter all the way to the minimum value even if the Control Panel knob or slider is at its very highest setting ...

Page 103: ...it and 24 bit samples in a number of different formats including AIFF WAV and Korg s proprietary kes format Additionally Sound Designer II format samples are supported on MacOS only Key Ranges A Multisample divides the keyboard into one or more Key Ranges as shown by the boxes drawn above the keyboard Each Key Range contains a Sample and various parameters which control the way that the Sample is ...

Page 104: ...mple Name This is the name of the Multisample Clicking on the name will change the cursor into a standard text editing bar you can then edit the name just as you would any other text Remember that this only changes the name of the Multisample within the Multi To save the new name to disk use the Save Multisample As command in the File menu Sample This is the Sample assigned to the selected Key Ran...

Page 105: ... can set it by playing a note on your MIDI controller This allows you to quickly select and edit Key Ranges without needing to use the mouse You can also set the High Key graphically To do so just move the cursor over the edge of a Key Range box above the onscreen keyboard graphic When the cursor changes to a double arrow shape click and drag the edges of the Key Range as desired Base Key C 1 to G...

Page 106: ...rameter serves as an offset to the envelope decay time set in the Patch containing the Multisample Some Patches may not support this offset Exclusive Group Exclusive Groups allow you to create a monophonic set of keys so that only one note in the Exclusive Group will sound at a time If another key within the group is played the previously played note will be cut off For instance you can use this s...

Page 107: ... shows the sliders for the Decay offset Exclusive Group This shows the sliders for the Exclusive Group assignments To select the parameter being displayed use the Show Parameter menu The selections include most of the numeric edit fields at the top of the window Volume Pan Cutoff Tune Decay and Exclusive Group A final setting None makes the sliders disappear for easier viewing of the sample names ...

Page 108: ...ry samples cannot be edited Note that Korg s proprietary kes sample files are encrypted and so they cannot be opened in external editors When a kes sample is selected the Open Sample in Editor button will be grayed out Re Load Sample The Re Load Sample button re loads the selected Sample from disk Use this command after editing and saving a Sample using an external sample editor Zoom In and Zoom O...

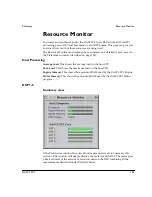
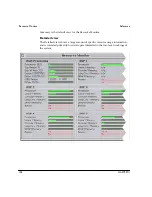
Page 109: ...114 Host Processing Average Load This shows the average load on the host CPU Peak Load This shows the maximum load on the host CPU Engine Memory This shows the amount of RAM used by the OASYS PCI Engine Editor Memory This shows the amount of RAM used by the OASYS PCI Editor program DSP 1 5 Summary view If the Preferences window Resource Monitor parameter is set to Summary this section of the windo...

Page 110: ...nglish Summary is the default view for the Resource Monitor Detailed view The Detailed view shows a large amount of specific resource usage information and is intended primarily for developers interested in the low level workings of the system ...

Page 111: ...imarily used for delay based effects including short delays choruses flangers and so on DRAM Memory This shows the amount of external DRAM memory being used Each chip has 6 megabytes of DRAM used primarily for samples and long delays Busses There are three rows of lights with each row representing one of the three internal bus types Local Left Flowing and Right Flowing Local Busses shown in the to...

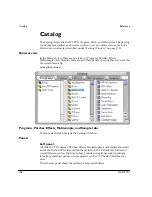
Page 112: ...are also three panels showing three levels of the file system hierarchy Catalog Browser view Programs Patches Effects Multisample and Sample tabs The tabs select which file type the Catalog will show Panels Left panel All OASYS PCI Programs Patches Effects Multisamples and Samples are stored inside the OASYS PCI folder Within the main OASYS PCI folder are folders for sound libraries such as the Ko...

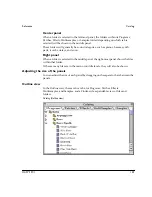
Page 113: ...reverbs delays and so on Right panel When a folder is selected in the middle panel the right most panel shows the files within that folder If there are any files are in the main or middle levels they will also be shown Adjusting the size of the panels You can adjust the size of each panel by dragging on the separator bars between the panels Outline view In the Outline view there are five tabs for ...

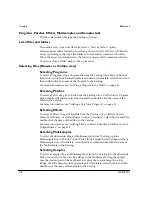
Page 114: ... a Program Edit window Alternately select the slot and then double click the name of the Patch in the Catalog For more information see Adding a Patch to a Program on page 19 Selecting Effects To select an Effect drag an Effect file from the Catalog into an Effects slot in a Mixer Send Busses or Output Busses window Alternately select the slot and then double click the name of the Effect in the Cat...

Page 115: ...has been edited you will be prompted to save the Multi Save Multi This command saves the current Multi It will only appear when a Multi window is in the foreground including the Mixer Send Busses and Output Busses windows Save Multi As Save Multi As allows you to save the current Multi using a new name or to a different location on disk It will only appear when a Multi window is in the foreground ...

Page 116: ...uit freeing system memory for other applications Play This command starts the active Multi if it has previously been stopped Stop This command stops the active Multi It can be used as a Panic or all notes off command Disable Meters Enable Meters This command controls all meters in the system including those in Mixer windows in control panels and in the Resource Monitor It switches between Disable ...

Page 117: ... Just select the item and drag it onto the new slot Paste This command pastes the contents of the clipboard into the current selection Note that you can only paste data which matches the selection for instance a Program can only be pasted into a Program slot Clear The clear command deletes the selected Program Patch Effect or numeric value To clear a Program Patch or Effect you can also just selec...

Page 118: ...s the Send Busses window as described on page 74 If the window is already open it is brought to the foreground On Windows computers you can also use the command ALT W S Output Busses This opens the Output Busses window as described on page 78 If the window is already open it is brought to the foreground On Windows computers you can also use the command ALT W O Channel Parameters This opens the Cha...

Page 119: ...When the OASYS PCI Editor starts up no Multi will be opened you will need to create a new one or open one manually Create New Multi This automatically creates a new Multi when the OASYS PCI Editor is opened Open a Multi When the OASYS PCI Editor starts up an Open dialog will appear allowing you to select a Multi to open Connect to Engine On Off This automatically connects the OASYS PCI Editor to t...

Page 120: ...econds for Host Rate 3 This also sets the update rate for all audio meters The default value is 30 Host Rate 4 This is the update rate in milliseconds for Host Rate 4 The default value is 100 OASYS PCI Folder Location This parameter tells the OASYS PCI Editor the location of the OASYS PCI folder which contains all of the Programs Patches Effects and Scales for the OASYS PCI Pressing the Choose but...

Page 121: ...arameter Miscellaneous Voice Scaling 0 to 30dB This parameter sets the amount of gain scaling for Program voices to provide headroom in the mixer 12dB is the default and in most cases should provide reasonably high output level without clipping At the minimum voice scaling of 0dB voices will not be scaled at all and two or more voices sent to the same channel or output bus may cause clipping Incre...

Page 122: ...well this will cause the OASYS PCI to play two notes for every one that you play one received directly and the other received from the sequencer This can cause various strange results including phasing hung notes and notes cutting off prematurely If the box is not checked the OASYS PCI Editor will not directly respond to OMS or FreeMIDI controllers Instead it will only receive MIDI data patched th...

Page 123: ... commands which must be received before changing the tempo Send MIDI Parameter Change Messages On Off When this parameter is enabled editing any parameter in the Effect and Patch Control Panels will send out a corresponding System Exclusive Parameter Change message You can automate parameter changes by recording these messages into a MIDI sequencer and then playing them back into the OASYS PCI To ...

Page 124: ...hen Bipolar is turned on for a given controller MIDI values from 0 63 will produce negative modulation a value of 64 will produce no modulation and values from 65 127 will produce positive modulation Negative mod amount settings will invert the effect Use this for controllers with a default center position such as ribbons or X Y pads Off MIDI values from 0 127 will produce positive modulation Nega...

Page 125: ... may need to select different clock sources from time to time depending on what you are currently doing with the OASYS PCI see the System Configurations section of the Installation Guide for details ADAT The ADAT optical input will provide the master word clock S PDIF The S PDIF input will provide the master word clock Word Clock The BNC word clock input will provide the master word clock Internal...

Page 126: ...the sample editing program press the Choose button A standard file dialog will appear from which you can select the desired program Factory Settings Pressing this button restores the factory default preferences After recalling the factory defaults you will still need to press the Save button in order for them to take affect Revert Pressing this button reverts all preferences to the last saved sett...

Page 127: ...named Audio Settings when reached from the Audio Settings command and ASIO Control Panel when reached from an ASIO program On Windows it will always be named Audio Settings To open the ASIO Control Panel from within an ASIO program you will generally press a button in the window used to configure the program s audio hardware The location and name of this configuration window will vary depending on...

Page 128: ...must be selected as the software s ASIO device For more information please see the Configuring ASIO Software section in the Installation Guide and the manual for your digital audio software Windows audio programs Before using the OASYS PCI with Windows audio programs various settings should be made in Windows For more information please see the Configuring MME Windows section in the Installation G...

Page 129: ...his selects the output channel to which the input will be routed Any of the twelve inputs Analog left and right S PDIF left and right and ADAT 1 through 8 may be routed to any of the twelve outputs Multiple inputs may be sent to the same output This section is not designed as a full fledged mixer however and so there is an important limitation no additional headroom is provided when mixing multipl...

Page 130: ...essed through OASYS PCI effects without making any external audio connections The mixer outputs are routed to the corresponding inputs in the digital audio program so that mixer output ADAT 3 4 is heard at input ADAT 3 4 and so on You can even simultaneously record audio inputs along with processed audio and synthesizers simply by assigning OASYS PCI mixer channels to the desired audio inputs Audi...

Page 131: ...wo things then you should leave the Audio Buffer Size and ASIO Out Latency Windows only parameters set to their default maximum values ASIO Out Latency Windows 2 3 and 4 buffers This sets the number of audio buffers see Audio Buffer Size above used for ASIO output This affects ASIO output only it does not affect ASIO input or MME input and output 4 buffers is the default setting The total output l...

Page 132: ...T 2 out and so on All volumes are set to full and all phases are set to normal Pressing the button again restores the previous settings of the window Retrieve Preferences Pressing this button re loads the saved settings for the window Save to Preferences Pressing this button saves the current settings to the OASYS PCI Driver Preferences file The saved settings will be automatically loaded on start...

Page 133: ... to the limits of the program itself The OASYS PCI Wave Device Settings program controls the card s sample rate word clock source and play record synchronization Optionally it also lets you set volume and balance for each output device From this program you can also call up the Audio Settings Hardware Meters and Diagnostics windows NOTE This window only affects audio I O with standard Windows audi...

Page 134: ...s parameter has two functions First it sets the clock rate when the Clock Source parameter described above is set to Internal Second it sets the sample rate information embedded in the S PDIF output data which in turn sets the sample rate of any connected S PDIF devices When transferring audio from the ADAT inputs to S PDIF output it is important to set this parameter so that it matches the sample...

Page 135: ...SYS PCI s wave device synchronization For more information see Custom Synchronization on page 134 When Auto Sync is checked the Custom button is disabled and any settings previously made in the Custom Synchronization window will be ignored Volume Balance Control Each stereo I O pair has a Control Enable button which allows you to enable and disable volume and balance control for that stereo pair T...

Page 136: ...e s Vol Bal On box is checked For more information please see Control Enable below Control Enable NOTE This parameter only affects the volume and balance controls in the Wave Device Settings window It has no affect on volume balance or pan controls in audio MIDI software The Control Enable buttons allow you to enable or disable volume balance control for each wave device as desired To enable volum...

Page 137: ... brings up the Hardware Meters window as described on page 136 This window includes meters showing the audio levels at the physical outputs including signals from both the audio DMAs the outputs of audio programs and the OASYS PCI mixer Diagnostics Pressing this button brings up the Diagnostics window This window contains low level information about the OASYS PCI software and hardware and is inten...

Page 138: ...you to manually create one group of stereo pairs which start to play back and or record at the same time for use with a multichannel audio program while all of the other inputs and outputs operate independently Note that if you use multiple independent wave devices with a single multichannel audio program you may sometimes notice delays between the different stereo pairs NOTE When Auto Sync is ena...

Page 139: ... to un synced input or output pairs When one or more stereo pairs are set to Sync Rec or Sync Play the other stereo pairs cannot play or record until all of the synced pairs have been started For instance let s assume that there are two audio programs running at the same time Program A is using ADAT 1 2 and S PDIF and Program B is using ADAT 5 6 The Sync Rec boxes are checked for ADAT 1 2 and S PD...

Page 140: ...e Device Settings window Hardware Outputs This window shows the levels at the hardware outputs of the OASYS PCI after the OASYS PCI Output Busses have been summed with the direct outputs from any audio programs For a complete signal flow diagram of the OASYS PCI please see the graphic titled Overall audio block diagram on page 73 ...

Page 141: ...tries the incoming MIDI note the resulting pitch a note name and fine tuning 100 cents Entries must be separated by either spaces or tabs Anything after the fine tuning is ignored so you can put comments at the ends of the lines For instance below is a valid entry including a comment which causes a MIDI note of D2 to be remapped to F3 E3 plus 100 cents a full half step d2 E3 100 D2 becomes F3 Ther...

Page 142: ...les Reference 138 OASYS PCI English Cent values for fine tuning must be integers in the range of 100 to 100 For positive values the sign is optional C 1 cannot be fine tuned down G9 can be tuned up however ...

Page 143: ...s affect mixer channel 1 regardless of its MIDI channel SysEx Format Due to the plug in nature of OASYS PCI synths and effects there is no fixed System Exclusive format Instead SysEx is generated separately by each individual plug in If you want to control a particular parameter via SysEx the easiest method is to simply enable System Exclusive send and receive in OASYS PCI and then just record kno...

Page 144: ...r value 13 0xf7 EOX end of SysEx message Determining the Parameter ID and value range for a specific parameter To determine the parameter ID and value range for a particular Control Panel knob fader button or menu 1 Enable SysEx transmission in OASYS PCI 2 Start recording in your sequencer 3 Move the Control Panel parameter This will generate SysEx data which will be recorded by the sequencer 4 Ex...

Page 145: ... Sources 94 Cubase VST see the HTML FAQ Custom Synchronization window 134 D Delay Tempo Delay threshold 119 Delay effects and resource usage 63 Digital Performer see the HTML FAQ DSP processing power managing resources 60 E Edit Menu 113 Effects 9 Bypassing Effects 27 Control Panel 92 Copying Effects 28 Editing Effects 27 FX Auto Load 71 Insert Effects 70 Pre Post Effects Sends 71 Removing an Effe...

Page 146: ...39 Tempo Delay threshold 119 Mixer Channel 66 Modulation Assignable Controllers A H 120 Creating a modulation routing 30 List of Modulation Sources 94 Mixer modulation routings 33 Modulation Palette 97 99 Summary of modulation possibilities 93 Monitor Mixer 124 Mono Legato voice allocation 89 Mono Retrig voice allocation 90 Multis 8 Naming Multis 18 New command 111 Revert Multi command 111 Save Mu...

Page 147: ...f Patches within a Program 21 Editing a Program 19 Naming Programs 19 New Program command 111 Program Edit window 85 Saving Programs 22 40 Using Programs 19 R Recording OASYS PCI Synths Effects 47 126 Record Source parameter 126 Recording from audio inputs 46 Resource Monitor Managing resources 60 Preferences 116 S Sample rate 120 130 Effect on processing power 60 Wave Device Settings 130 Samples ...

Page 148: ...ision see the HTML FAQ Voice Allocation 89 Key Priority 90 Voices parameter number of voices 87 Affect on DSP processing power 60 Voice Scaling parameter 117 Volume Analog Trims 125 Expression Controller 34 69 Mixer Channel 69 Monitor Mixer 125 Multisample 102 Output Bus 80 Send Bus 76 VU meters see Level meters W Wave Device Settings 129 Width Mixer Channel 69 Send Bus 76 Windows menu 114 Word cl...

Reviews: