39
Combination
P0
P1
P2
P3
P4
P7
P8
P9
▼
0–1: Page Menu Command
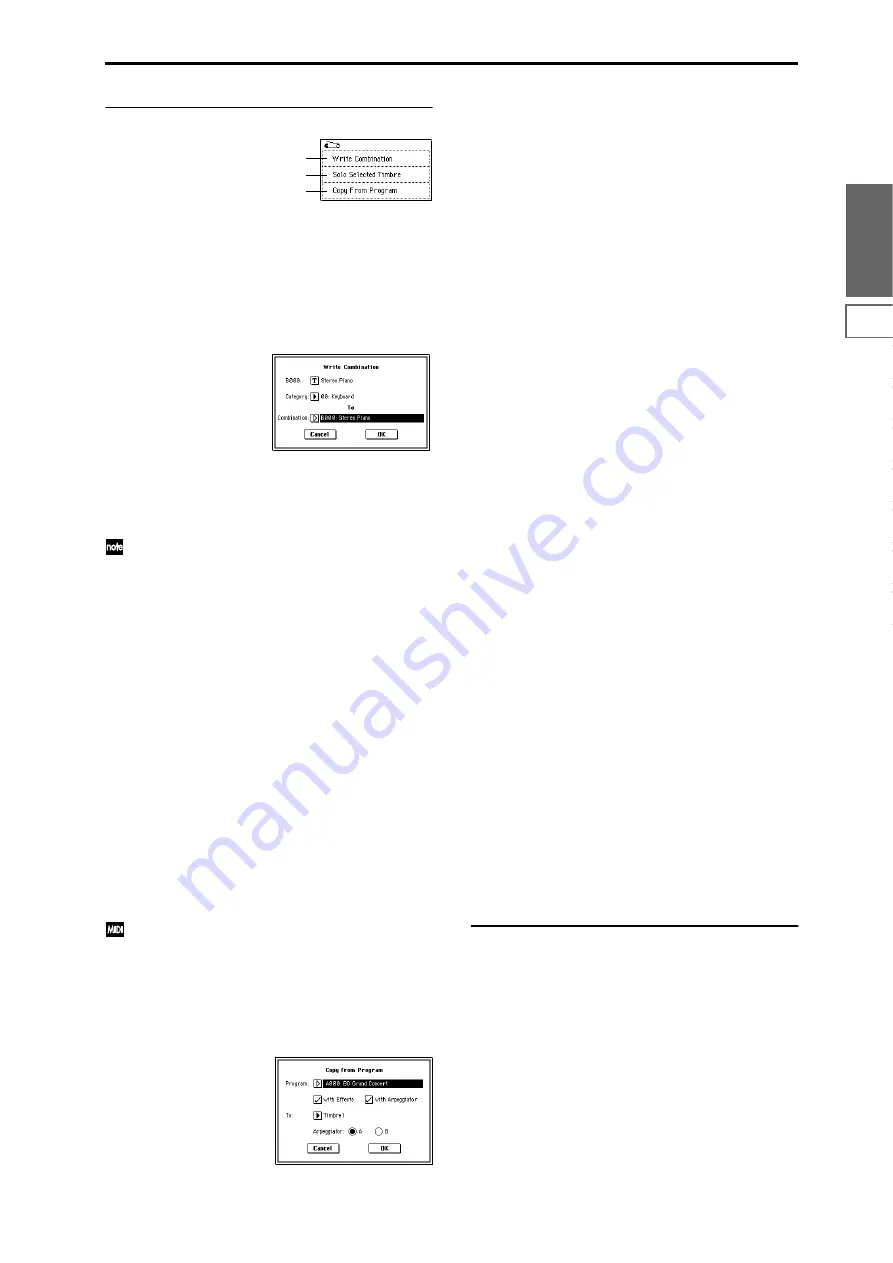
0–1A: Write Combination
This command writes an edited combination into the TRI-
TON Extreme’s internal memory. Be sure to write any com-
bination that you wish to save. If the power is turned off or a
different combination selected before you write an edited
combination, your edits cannot be recovered.
For the procedure, refer to “Write Program” (Program P0: 0–
1A).
If you use “Category” to specify a category for the combina-
tion you are writing, you will be able to select that combina-
tion by its category in Combination P0: Play.
The names of the combination categories can be edited in
“Comb Cat.” (Global P4: 4–2).
You can also use the SEQUENCER [REC/WRITE] key
to write a combination in the same way as “Write Com-
bination.” Press the SEQUENCER [REC/WRITE] key
to access the dialog box, and write the combination. In
this case, the data will be written to the currently
selected combination.
0–1B: Solo Selected Timbre
The Solo function will toggle between on and off each time
you select “Solo Selected Timbre.”
1
Select the page menu command “Solo Selected Timbre.”
When you select this, a check mark will appear at the left
of “Solo Selected Timbre” in the menu, and the Solo func-
tion will be on.
2
In pages that show parameters for an individual timbre,
you can select a particular timbre to Solo (in P0: Play, Pro-
gram Select page “Bank/Program,” etc.) so that only this
timbre will sound and the other timbres will be muted.
The “Selected Timbre Information” (0–1b) in each page
will indicate [Solo.]
To solo a different timbre, select a parameter of the tim-
bre that you wish to solo.
3
To cancel the Solo function, once again select “Solo
Selected Timbre” from the page menu.
If a timbre that is muted by the Solo function has been
set to a “Status” (0–1c, 2–1b) of EXT or EX2, MIDI note-
on/off messages will not be transmitted by that timbre.
0–1C: Copy From Program
This command copies settings from the program you specify
to the currently selected combination.
1
Select “Copy From Program” to open the dialog box.
2
Use “Program” to select the copy-source program.
3
If you check “with Effects,” the insert effect, master
effect, and master EQ settings will also be copied. The
“Control Channel” of each effect will be set to the MIDI
channel of the copy-destination timbre.
About the “BUS Select”
(8–1b/8–2a) setting
• Regardless of the “with Effects” setting, “BUS
Select
” will be set to DKit if the copy-source
program’s “Use DKit Setting” is checked. In
conjunction with this, the “DrumKit IFX Patch”
setting will be reset to the default setting.
• If “with Effects” is checked, the “BUS Select” setting
of the copy-source program will be copied. If the
copy-destination timbre “BUS Select” was set to
IFX1–IFX5
, it will automatically be set to L/R.
• If “with Effects” is unchecked, then the copy-source
“BUS Select” setting will be ignored. or if the “BUS
Select
” of the copy-source program and copy-
destination timbre is set to IFX1–IFX5, it will
automatically be set to L/R.
4
If you check “with Arpeggiator,” the arpeggiator set-
tings of the copy-source program will be copied to the
arpeggiator you specify in step
6
. In conjunction with
this, “Arpeggiator Run” will be set to the “checked”
state for the arpeggiator you specify in step
6
, and the
copy-destination timbre’s “Arpeggiator Assign” will be
set to the arpeggiator you specify in step
6
.
5
Use “To” to specify the copy-destination timbre.
The parameters specific to that timbre will be initialized.
The copy-source program will be specified for “Program
Select” (0–1c).
• The “MIDI Channel” (2–1b) setting will not change if
“with Arpeggiator” is checked. If “with
Arpeggiator
” is unchecked, “MIDI Channel” will be
automatically set to Gch.
• The “Bank Select (When Status=EX2”) (2–1b) setting
will not change.
• The “Status” (2–1b) setting will automatically be set
to INT.
• If the copy-source is a program from the F bank, the
“Voice Allocation Reserve” (
☞
EM p.47) of the copy-
destination track will be set to 6, and the “Voice
Allocation Reserve
” setting of the other timbres will
be set to 0. Also, the “MOSS BUS Select Reference”
(
☞
EM p.47) setting will be automatically set to the
copy-destination timbre.
• The 1–4: Controller settings of the copy-source
program will be copied.
6
Use “Arpeggiator” to specify the copy-destination arpeg-
giator.
7
Press the OK button to execute the copy. If you decide
not to execute, press the Cancel button.
❏
Auto Song Setup
The Auto Song Setup command automatically copies the
current combination settings to a song and makes prepara-
tory settings for recording. Then you can simply press the
SEQUENCER [START/STOP] key to begin recording imme-
diately.
• Hold down the [ENTER] key and press the
SEQUENCER [REC/WRITE] key. In the Setup to
Record” dialog box, press the OK button to execute
Auto Song Setup.
When you execute this, you will automatically move to
Sequencer mode, the settings of the combination will be
applied to the song, and you will automatically be in
record-ready condition.
0–1A
0–1B
0–1C
Summary of Contents for TRITON Extreme
Page 1: ...2 E ...
Page 11: ...xii ...
Page 111: ...100 9 5 Page Menu Command 0 1A 0 1I 0 1J Program 9 5A ...
Page 185: ...174 ...
Page 215: ...204 ...
Page 281: ...270 ...
Page 349: ...338 ...
Page 350: ...339 ...
Page 351: ...340 ...
Page 352: ...341 ...
Page 353: ...342 ...


