background image

12

A

UDIO

/V

IDEO

  C

ONNECTIONS

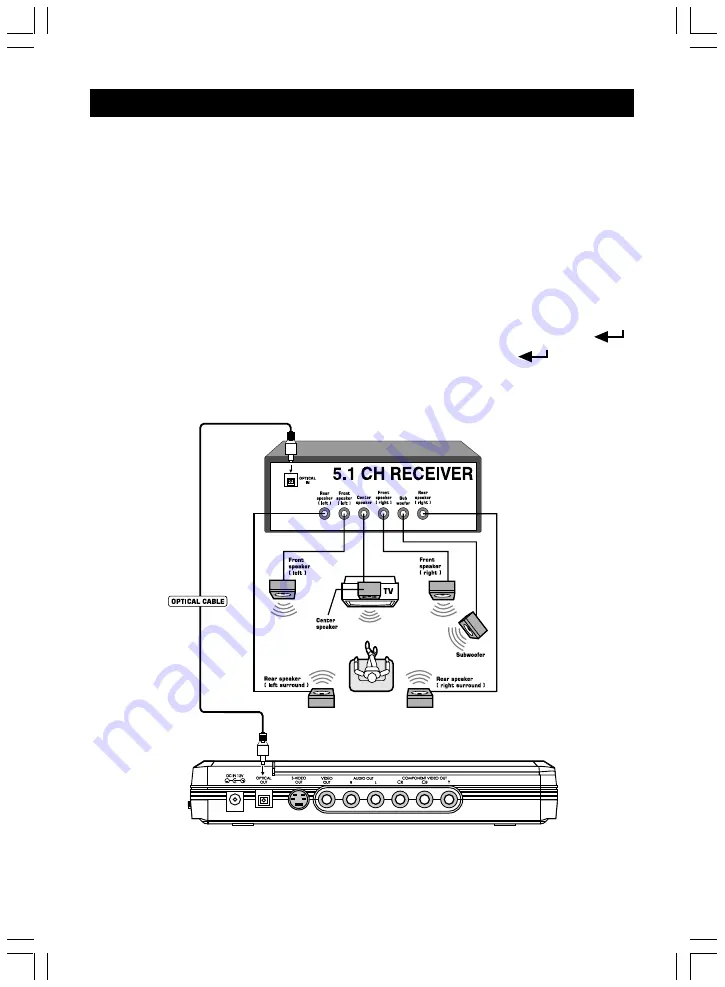
For connection to Dolby Digital 5.1 Receiver

Connect your Component Video or "S" Video or A/V (RCA) video cable as shown

in either P.11 picture for video source.
Use OPTICAL CABLE to connect from the OPTICAL OUTPUT on the back of

your DVD Player and connect into the OPTICAL INPUT on your Dolby Digital 5.1

Receiver.

NOTE:

1. The optical output needed to be turned on via the AUDIO SETUP under SETUP MENU by the

following  procedure:

SETUP  button  -  AUDIO  SETUP  -  DIGITAL ON / PCM

- Press SETUP button on the Remote Control, choose AUDIO SETUP and press ENTER 

and then choose AUDIO OUT to select SPDIF/RAW. Then press ENTER 

 to confirm.

2. Either the optical output or analog audio output can be turned on.
3. During DTS DVD playback, the SPDIF/RAW must be turned on in order to let the receiver to

decode  the  program/music  correctly.

CAUTION  :

The RECEIVER must be Dolby Digital 5.1 to reproduce the required sound quality.

Summary of Contents for DVP2161

Page 1: ......

Page 2: ...the risk of electric shock do not remove cover or back No user serviceable parts inside Refer servicing to qualified service personnel CAUTION The lightning flash with arrowhead symbol with in an equ...

Page 3: ...BLE INCLUDED 10 COMPONENT VIDEO OR S VIDEO CABLE CONNECTION CABLE NOT INCLUDED 11 FOR CONNECTION TO DOLBY DIGITAL 5 1 RECEIVER 12 USING THE EARPHONES 13 USING THE REMOTE CONTROL 14 BASIC OPERATIONS 15...

Page 4: ...layer can connect with a TV compatible with the NTSC or PAL 3 58 PACK When shipping the DVD video player the original shipping carton and packing comes in handy For maximum protection repack the unit...

Page 5: ...3 PACKAGE CONTENTS...

Page 6: ...Front Side 1 Open button 2 Disc compartment cover 3 Clear window 4 LCD unit 5 REPEAT button 6 A B button 7 PAUSE button 8 FAST FORWARD button 9 STOP button 10 FAST BACKWARD button 11 PLAY button 12 R...

Page 7: ...rol wheel 2 Earphone jack 3 Power On Off switch Rear Side 1 DC IN 12V jack 2 Optical digital out jack 3 S Video out jack 4 Video out jack Yellow 5 R channel audio out jack Red 6 L channel audio out ja...

Page 8: ...6 PARTS AND CONTROLS Remote Control...

Page 9: ...ogramming the tracks playing order 10 NUMBER BUTTONS 0 9 10 Number keys VCD mode PBC OFF 10 3 To choose No 13 track CD mode 10 10 7 To choose No 27 track 11 ZOOM Enlarge the picture on screen 12 SETUP...

Page 10: ...8x forward speed 28 STOP Stop the playing function 29 F B Fast backward key It can choose VCD 2x 4x backward speed DVD 2x 4x 8x backward speed 30 S F Play video disc forward in slow motion 31 PAUSE On...

Page 11: ...dicator 4 CD VCD disc indicator there is no display while playing DVD 5 Disc playing time 6 Disc is playing in random order sequence 7 REPEAT 1 Indicate the current track is playing repeatedly 8 REPEA...

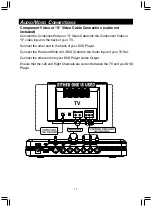
Page 12: ...ncluded Connect the Yellow A V RCA cable to your TV Video Input and your DVD Player Video Output Connect the Red and White A V RCA cable to the Audio Input of your TV Set Connect the other end into yo...

Page 13: ...into the Component Video or S video input on the back of your TV Connect the other end to the back of your DVD Player Connect the Red and White A V RCA Cable to the Audio Input of your TV Set Connect...

Page 14: ...put needed to be turned on via the AUDIO SETUP under SETUP MENU by the following procedure SETUP button AUDIO SETUP DIGITAL ON PCM Press SETUP button on the Remote Control choose AUDIO SETUP and press...

Page 15: ...13 AUDIO VIDEO CONNECTIONS Using the earphones 1 Set the volume control to 0 2 Connect the plug of earphones to the player s PHONES jack 3 Adjust the volume control to the desired sound level...

Page 16: ...14 USING THE REMOTE CONTROL The remote control will operate from a linear distance of approximate 10 meters and within a horizontal and vertical range of 30 degrees 30 30 30 30...

Page 17: ...on the remote control or STOP on the unit When stop is pressed during playback the DVD player remembers the place at which playback stopped To resume play from the point where it stopped just press p...

Page 18: ...press to move the enlarged picture LOCATING A TITLE SUBTITLE OR TRACK Press TITLE button and use number keys or buttons to locate your desired sections This DVD player also allows to use SKIP NEXT or...

Page 19: ...using the Direction navigation keys FOLDER to play a selected folder only SINGLE play a single song only or DISC mode automatically play all the folder in the disc 4 Use Direction navigation keys to...

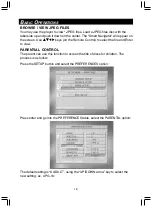
Page 20: ...e keys on the Remote Control to select the file and Enter to view PARENTIAL CONTROL The parent can use this function to screen the title of discs for children The process is as follow Press the SETUP...

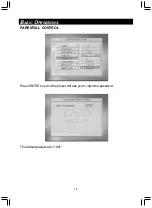
Page 21: ...19 BASIC OPERATIONS PARENTIAL CONTROL Press ENTER key and the player will ask you to input the password The default password is 1001...

Page 22: ...20 BASIC OPERATIONS PARENTIAL CONTROL Press ENTER to continue The PARENTAL option is changed to 4 PG 13 Press SETUP key to leave...

Page 23: ...K OSD LANG CAPTIONS and SCR SAVER 2 SPEAKER SETUP gives you options to change DOWNMIX type 3 AUDIO SETUP allows you to change AUDIO OUT OP MODE DUAL MONO DYNAMIC PROLOGIC and LPCM OUTPUT 4 PREFERENCES...

Page 24: ...f this copyright protection technology must be authorized by Macrovision Corporation and is intented for home and other limited viewing uses only unless otherwise authorized by Macrovision Corporation...

Page 25: ...been tested and found to comply with the limits for a Class B digital device pursuant to part 15 of the FCC Rules These limits are designed to provide reasonable protection against harmful interfer en...

Page 26: ...e Stereo minijack Optical digital out jack S Video out jack Video out jack Yellow Audio out R jack Red Audio out L jack White Compnent Video out jacks Temperature Operation 0 C 45 C Physical Character...

Reviews: