VIA
GO Quick Start (P/N: 2900-301153QS REV 7)
P/N:
2 9 0 0 - 3 0 1 1 5 3 QS
Rev: 7
Scan for full
manual
VIA GO Quick Start Guide
For Installer
This guide helps you install and configure your
VIA GO
for the first time.
Go to
www.kramerav.com/downloads/VIA GO
to download the latest user manual
and check if firmware upgrades are available.
Step 1:
Check what’s in the box
VIA GO
Collaboration Device
1 VESA mounting bracket
1 Quick start guide
1 Power adapter (19V DC)
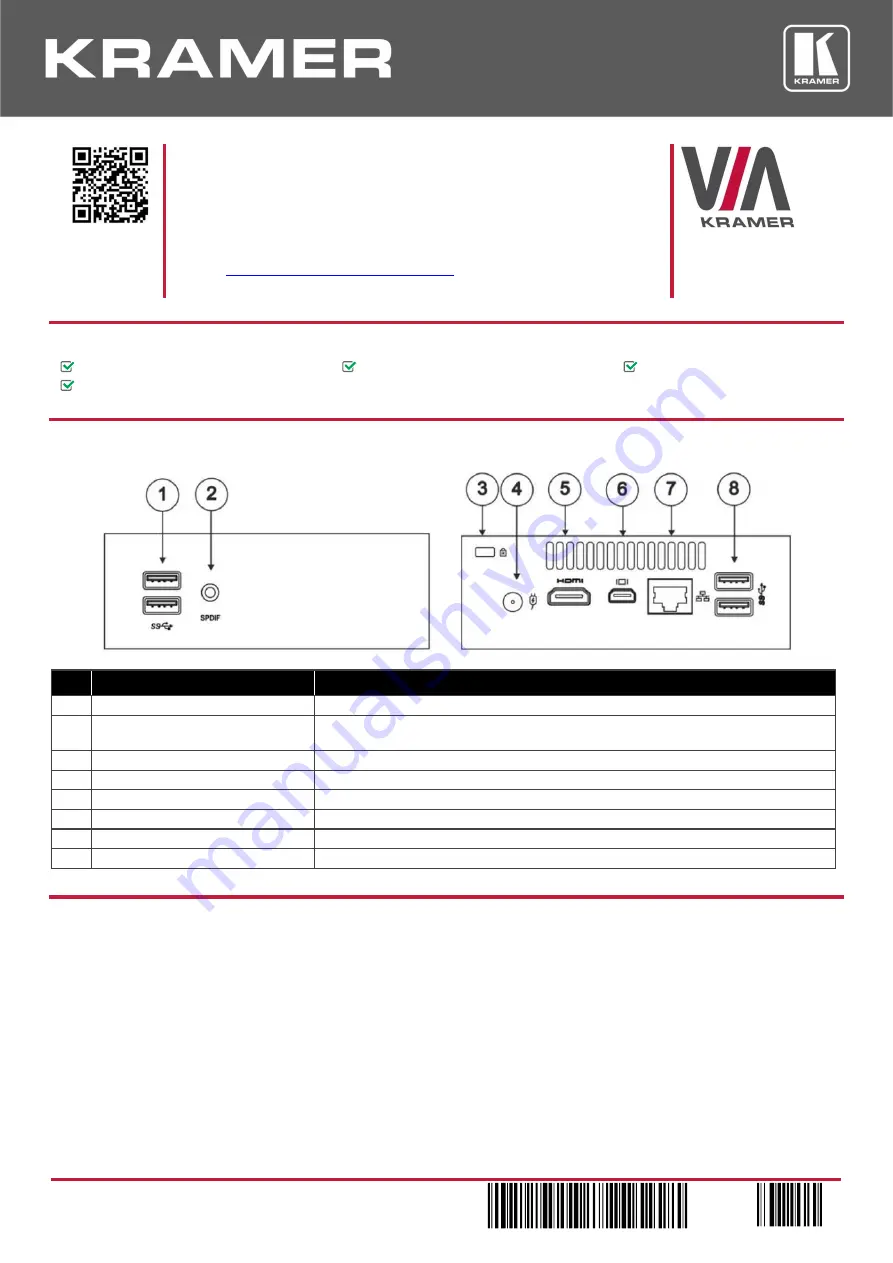
Step 2: Get to know your VIA GO
#
Feature
Function
1
USB 3.0 Connectors
Connect to up to two USB devices.
2
3.5mm Mini Jack Connector
Connect to earphones or a speaker (digital embedded audio from HDMI
TM
and analog
audio supported).
3
Lock Opening
Connect to a security locking cable.
4
Power Connector
Connect to the 19V DC power supply.
5
HDMI Connector
Connect to an HDMI acceptor.
6
Mini DisplayPort Connector
Connect to a mini DisplayPort acceptor.
7
RJ-45 Connector
Connect to a LAN cable and to a network router (optional).
8
USB 3.0 Connectors
Connect to up to two USB devices, for example, a keyboard and mouse.
The terms HDMI, HDMI High-Definition Multimedia Interface, and the HDMI Logo are trademarks or registered trademarks of HDMI Licensing Administrator, Inc.
Step 3: Install VIA GO
Install
VIA GO
using one of the following methods:
•
Mount on a wall or the back of a display using the included VESA mounting bracket.
•
Mount in a rack using the recommended Kramer rack adapter.
•
Place on a flat surface.


