16
9991
KRAUSMANN POWER TOOLS
English |
EN
Installing accessories
Αssembly
WARNING:
A
lways remove the plug from the power source before
installing or removing accessories. Failing to remove
the plug from the power source may result in the tool
accidentally being started and causing serious injury to
the operator.
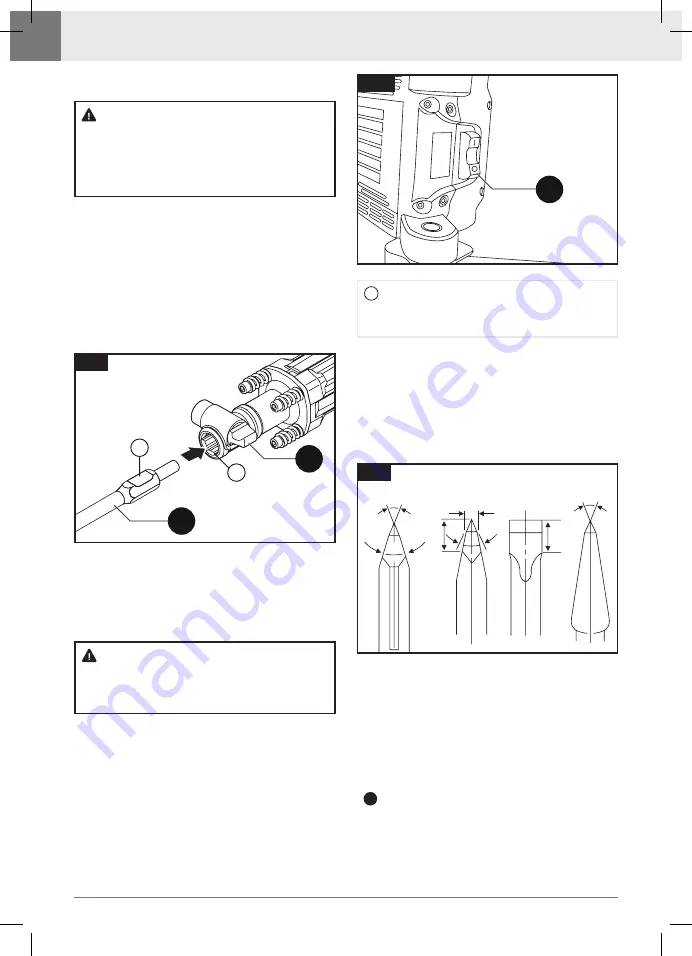
Clean the accessory
6
and apply a light coat of
grease (not included). Pull out the retainer
5
and
turn it 180° anticlockwise. Allow the retainer to
latch again. Insert the accessory into the tool hole
Α
. The groove of the accessory shank
Β
must face
upward (fig 1). Pull out the retainer and turn it 180°
clockwise. Allow the retainer to latch again.
To remove an accessory follow the procedure
above in reverse order.
B
A
6
5
A.
Tool hole
B.
Groove of the accessory shank
fig 1
Operation
Switching ON and OFF
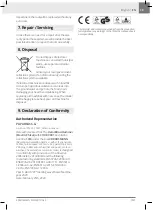
To turn the tool ON, press the ON / OFF switch
1
towards “I” direction. To turn the tool OFF, press
the ON / OFF switch
1
towards “0” direction (fig 2).
WARNING:
Observe correct mains voltage!
The voltage of the
power source must agree with the voltage specified on the
type plate of the power tool.
NOTE:
For low temperatures, the power tool reaches the full
impact rate only after a certain time.
i
1
fig 2
Sharpening
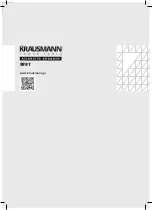
Sharpen chiseling tools using grinding wheels (e. g.
ceramic bonded corundum wheel) with a steady
supply of water (fig 3). Take care that no anneal-
ing coloration appears on the cutting edges this
impairs the hardness of the chiseling tools.
60
60
20
60
60
60
4
fig 3
Grease and oil filling
The tool’s mechanical parts are easy to get worn
and lose impact energy if operated without
enough lubrication, therefore it is advisable to
provide adequate grease and oil filling at regular
intervals. It is recommended to replace grease and
oil in the 50 hours of use.. The steps are as follows:
Loosen the four hex screws and washers
between aluminum head and gear box using
the 6mm hex key
9
(fig 4).
1


