17
KRAUSMANN POWER TOOLS
U78012-00
3
2
English |
EN
The rotation direction can be changed using the
left / right rotation switch
2
(fig 2).
To change the direction of rotation, stop the
machine and turn the left / right rotation
switch
2
in the desired direction (fig 2).
B
efore beginning to work, check that the left
/ right rotation switch
2
is in the desired posi-
tion in order to avoid potential damage to the
tool or to the battery powered drill.
Left / right motion direction
WARNING:
Never change the direction of rotation when the chuck is
rotating. Wait until it has stopped.
5. Maintenance
Correct and regular cleaning will improve the safe-
ty and extend the lifespan of the device.
For safe and proper working, always keep the
tool and ventilation slots clean.
Τhe tool may be cleaned most effectively with
compressed dry air.
Always wear safety goggles
when cleaning tools with compressed air.
Certain cleaning agents and solvents damage
plastic parts.
Some of these are: gasoline, carbon
tetrachloride, chlorinated cleaning solvents,
ammonia and household detergents that contain
ammonia.
T
he brushes and commutator in your tool have
been engineered for many hours of dependable
service. To maintain peak efficiency of the motor,
we recommend every two to six months the
brushes be examined.
Store the tool, operating instructions and where
necessary the accessories in the original packag-
ing. In this way you will always have all the informa-
tion and parts ready to hand.
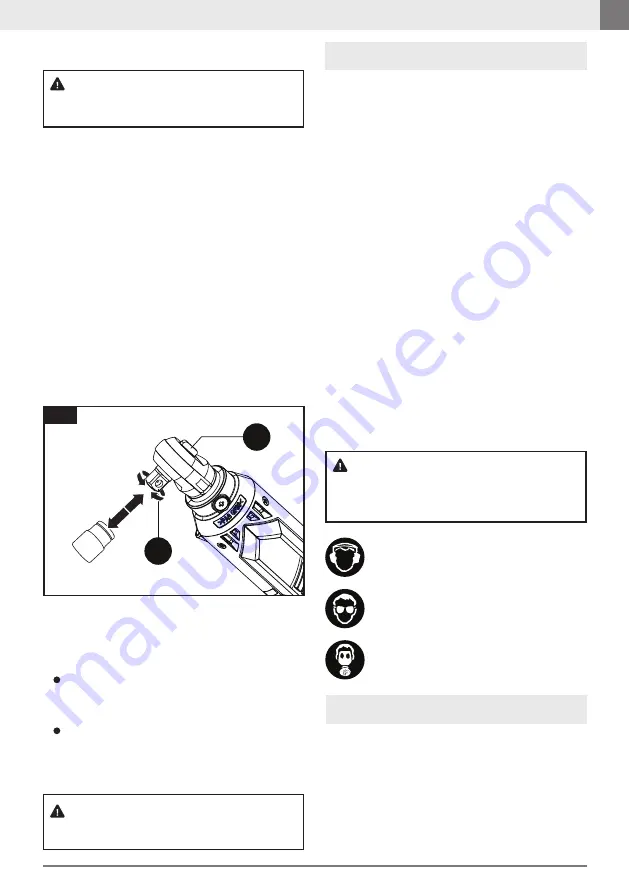
Installing and removing a socket
To install a socket, align the socket holder
3
with
the socket receiver and press on until locked se-
curely in place. To remove a socket, pull the socket
off while twisting back and forth to dislodge (fig2).
When removing a socket or bits from the tool,
avoid contact with skin and use proper protective
gloves when grasping a socket. Accessories may
be hot after prolonged use. Apply the power tool
to the screw/nut only when it is switched off. The
torque depends on the impact duration. The max-
imum achieved torque results from the sum of all
individual torques achieved through impact. The
longer the tool is engaged the higher the accumu-
lated torque value. Maximum torque is achieved
in about 6-10 seconds. The actual achieved
tightening torque should always be checked with a
torque wrench.
WARNING:
Always turn the tool off and remove the battery from
machine before doing any work on the machine.
fig 2
Wear ear defenders
Wear safety goggles
Wear a dust mask
WARNING:
T
urn the device off, disconnect it from the mains and wait
until it cools down before cleaning or maintenance to
avoid electric shock or burn.
This tool has been checked by the manufacturer.
From the date of purchase by the final consumer,
a two year warranty for
amateur use
covers any
faulty material and manufacturing. The receipt or
invoice of purchase needs to be displayed in case
of a repair that is covered by the warranty. For
possible faults during the warranty period, you
6. Warranty
Summary of Contents for U78012-00
Page 2: ...2 U78012 00 KRAUSMANN POWER TOOLS GR ON OFF 3 8 1 2 3 1 LED LED ON OFF 5 6 4 2 3 6 4 5 1...
Page 3: ...3 KRAUSMANN POWER TOOLS U78012 00 GR OFF 2...
Page 4: ...4 U78012 00 KRAUSMANN POWER TOOLS GR ON OFF...
Page 5: ...5 KRAUSMANN POWER TOOLS U78012 00 GR 220 240 volt 50 60 Hz AC 3 KRAUSMANN UN1 POWER 12V 12V 1...
Page 6: ...6 U78012 00 KRAUSMANN POWER TOOLS GR 2 3 4 5 10 11 12 13 14 15 16 17 18 19 20 6 7 8 9 K M 4...
Page 8: ...8 U78012 00 KRAUSMANN POWER TOOLS 3 2 GR 2 2 2 2 2 5 3 2 6 10 2 LED LED 6 LED ON OFF 1...
Page 9: ...9 KRAUSMANN POWER TOOLS U78012 00 X K GR A T T 6 9 1912 4 6 13671 8 7...
Page 11: ...11 KRAUSMANN POWER TOOLS U78012 00 GR Notes...
Page 19: ...19 KRAUSMANN POWER TOOLS U78012 00 English EN Notes...
Page 20: ...20 U78012 00 KRAUSMANN POWER TOOLS U78012 00 www krausmann gr...


